Espoma Organic
  • Products
    • Close
    • Product Line Overview
    • Plant food finder
    • Garden Fertilizers
    • Potting Soils
    • Liquid Fertilizers
    • Lawn Fertilizers
    • Single Ingredients
    • Conventional Plant Foods
    • Animal Care Products
  • Where to Buy
  • Our Story
    • Close
    • Our Story
    • Locations
    • Historical Timeline
    • Our Commitment
    • Directions
    • Solar
    • Join our Team
    • Espoma Brand Partners
  • Learn
    • Close
    • Espoma Blog
    • FAQ’s
    • Pocket Guide
    • Espoma Guides
    • Garden Clubs
    • Safe Paws Lawn
    • PRODUCT FACT SHEETS
    • Fertilizer Fundamentals
      • Close
      • Understanding Plant Nutrition
      • Reading Labels
      • Choosing the Right Type of Fertilizer
      • Terms & Definitions
    • Gardening Projects
    • Resource Links
  • Contact Us
  • Menu Menu

Let Light Delight. Learn about Our Solar Power Initiatives

November 10, 2015/in Landscaping

Five years ago, we at Espoma converted our plant and offices in Millville, NJ into a sunny, solar-power sanctuary. And we’ve never looked back!

Learn how much solar power brightens our world along with simple ways to harness solar power.

Radiant Energy Reductions at Espoma

Vowing to reduce our carbon footprint, we installed 43,000 square feet of solar panels. This reduces as much carbon dioxide as planting 1.7 million trees!
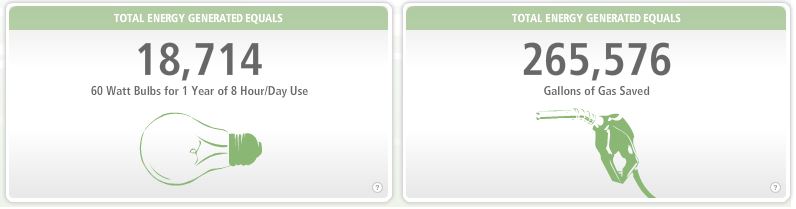
Espoma solar power

Data as of Nov 2015

Every year, Espoma generates enough solar energy to power over 60 homes and save more than 1.4 million pounds of greenhouse gas emissions.

Click here to see how many light bulbs we’ve saved over the last five years!

Easy, Enlightening Ways to Use Solar Power

Solar panels are a big, initial investment. Luckily, you can still give solar power a shot by trying the
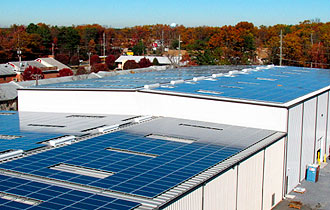
 Espoma Aerial Solar Powerbelow!

  1. Get a Solar Glow. Swap your outdoor garden lights or indoor desk lamps to solar energy.
  2. A Sun Deck for Your Tech. Charge phones, laptops and tablets using solar power! Switching to solar-powered tech chargers instantly reduces your energy use. If plugged in, tech chargers suck up energy – even without a device attached.
  3. Sizzle with Solar. Heat your home’s water with just a few solar panels. A fraction of the cost of a complete solar power system, you can test solar panels without the hefty price tag.
  4. Swim in the Sun. Whether you’re building a new pool or choose to convert a current one, you can heat pools and hot tubs with solar energy.
  5. Bask in Sunny Skylights. Opt for solar tubes instead of regular skylights. Solar tubes are cheaper, more energy efficient and better insulated than skylights.

Be a leading light, and use solar power! Don’t go solar solo, though. Share these easy tips with your friends.  

https://www.espoma.com/wp-content/uploads/2015/11/Capture1.jpg 391 992 espoma https://www.espoma.com/wp-content/uploads/2023/05/espoma-logo340w-1.png espoma2015-11-10 08:27:082019-05-07 10:08:08Let Light Delight. Learn about Our Solar Power Initiatives

Don’t Leave Hanging Baskets Out to Dry…

June 30, 2015/in Container Gardening, Flowers, Landscaping, Spring Gardening, Summer Gardening

Hanging baskets make great visual impacts when they are filled to the brim with bright summer blooms. They add instant color to any spot and are a sign of warm weather.

Though as days get hotter and the summer rolls on, hanging baskets can start to look tired: drooping blooms, minimal flowers and straggly plants.

Your hanging basket isn’t doomed. It just needs a good ol’ fashion pick-me-up.

Refresh your hanging baskets to keep them partying all summer long

Get ready to give your hanging baskets a make-over. With these tips, your hanging basket will be back in its prime in no time.

Photo Courtesy Proven Winners

Photo Courtesy Proven Winners

Take the Heat Off Hanging Baskets

  1. Test the Waters Hanging baskets need more water when temperatures rise. During the peak of summer’s heat, water baskets in the morning until water drips from the drainage holes. Check them again in the afternoon to see if they need more water. On windy days, hanging baskets dry out, so they will need even more water.
  2. Food for Thought. Feed hanging baskets  with an organic flower food, like Flower-tone or the new Bloom! liquid plant food. Because of how much water baskets need, nutrients are frequently flushed from the soil. Regular feedings give your hanging baskets the energy they need to shine and bloom continuously.https://www.espoma.com/liquids/
  3. Drop Dead Gorgeous Blooms. As flowers fade, pinch them off where they meet the stem. Deadheading hanging baskets keeps them producing flowers and prevents them from going to seed.
  4. Which to Switch. Not every flower blooms all summer. If one of your flowers is done blooming for the season, swap it out. Gently remove the flower, replace it with a vibrant plant and fill with an organic potting soil.
  5. What to Cut. When your hanging basket is looking a bit wild or leggy, cut it back by 1-2”.

Look at that! Your hanging baskets already look better. Keep up these tips throughout the summer to keep hanging baskets fresh, beautiful and blooming.

https://www.espoma.com/wp-content/uploads/2015/06/flowers-164815_1280.jpg 722 1144 espoma https://www.espoma.com/wp-content/uploads/2023/05/espoma-logo340w-1.png espoma2015-06-30 08:20:202024-08-16 13:54:28Don’t Leave Hanging Baskets Out to Dry…

Repurpose on Purpose: Trash Transforms into Beautiful Containers

June 23, 2015/in Flowers, Landscaping, Spring Gardening

Container gardening adds a whole new element of style and flair to your outdoor space. Not only do you get to showcase DIY container
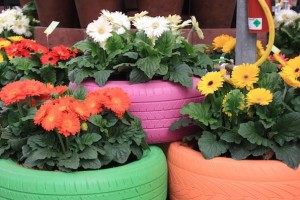
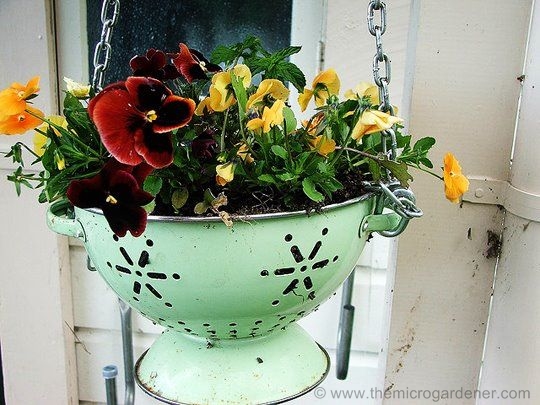
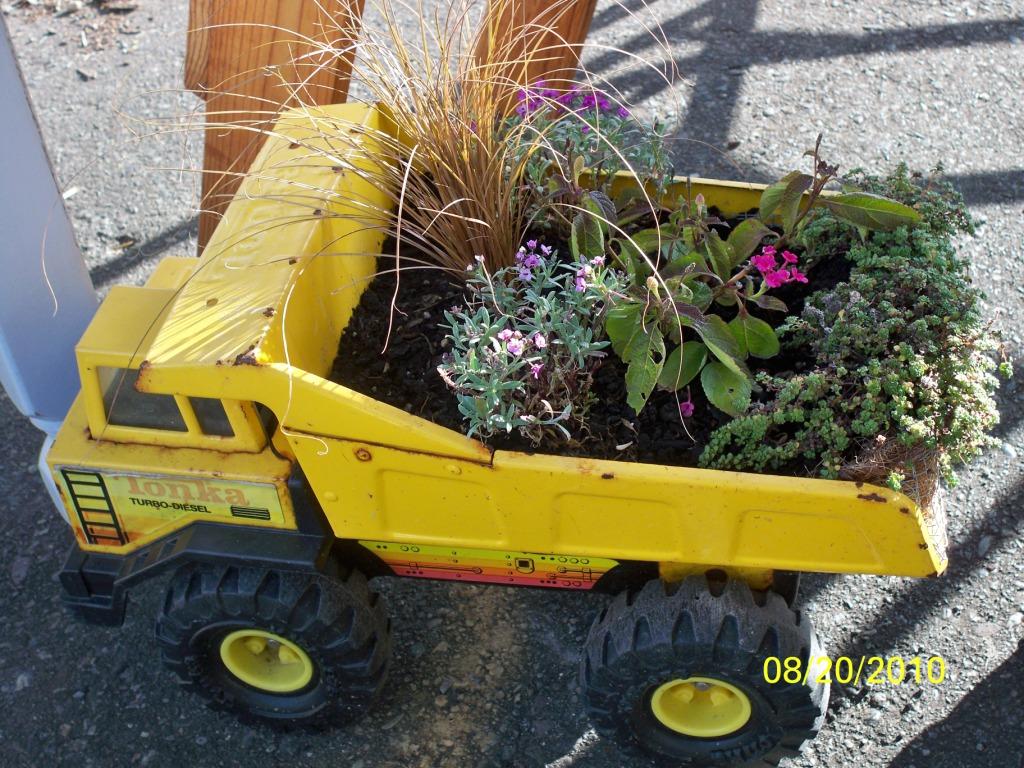
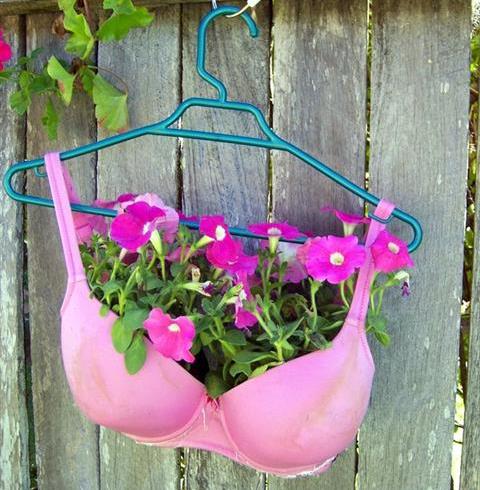
your style through plants, but also in the unique pots you choose. It’s twice the fun!

And you can do it for the planet, too. Growing herbs, veggies and flowers already makes the world a greener place. Now reuse and repurpose a forgotten item into an invigorated planter. Upcycling creates less waste and saves money, too.

Create a repurposed container for a beautiful (and thrifty!) container garden.

Your soon-to-be favorite container may already be in your house. Almost any vessel can be repurposed into a garden container! You’ll be amazed by what you discover (and by what containers you didn’t even know were hiding in your cupboards).

Up for Grabs: Upcycled Containers

  1. Pin Your Style. Create a look that is truly all your own. Decide if you want a rustic, modern, country or bold look. Then browse Pinterest for inspiration.
  2. Start the Search. Browse your kitchen, closet, garage and cupboards for items you no longer use. Any size works! Branch out to yard sales, thrift stores and flea markets for more unique looks.
  3. Add a Special Touch. Personalize your container by painting it, covering it in old wallpaper, or even turning it into a mosaic. Get crafty!
  4. Show Them the Drill. Then Fill. Drill holes in the bottom of your repurposed container to provide drainage. Without drainage holes, soil becomes too wet and causes roots to rot. When ready, fill with the ideal potting soil, Espoma’s Organic Potting Mix, and your favorite plants.
60bc838855263aa8a8875fd58e171bca

These upcycled tires are stacked and painted- as seen by Ellen Wells at Syngenta

Colander-planter_wm

A colorful, retro colander makes a great hanging container

Toy-truck-planter

Think outside of the (toy)box

bra-planter

And, of course, the bigger the better for this container…

Other Types of Repurposed Containers:

Get inspired by some of our favorite items to turn into garden planters below.

  • Teacups and teapots
  • Pitchers
  • Tires
  • Boots and shoes
  • Colanders
  • Desk drawers
  • Buckets
  • Wine crates and whiskey barrels
  • Wheelbarrows and wagons
  • Clothes and lingerie
  • Toolboxes
  • Suitcases
  • Watering cans

Creating repurposed containers is a quick, affordable and fun way to expand container gardens. Once you start, the possibilities are endless!

*thank you MicroGardener for the photos!


https://www.espoma.com/wp-content/uploads/2015/06/Capture2.jpg 261 527 espoma https://www.espoma.com/wp-content/uploads/2023/05/espoma-logo340w-1.png espoma2015-06-23 08:07:142019-05-07 10:08:44Repurpose on Purpose: Trash Transforms into Beautiful Containers

Double your Roses by Feeding and Deadheading

June 17, 2015/in Flowers, Landscaping, Spring Gardening

Is there anything better than walking into your garden, smelling the heavenly scent of a rose and seeing a luscious rose bloom?

Believe it or not, we think there is!

More roses!

Once your roses start blooming, all you want is for more roses to grow, too! Stack the odds in your favor by feeding and deadheading your roses now.

Give Your Roses an Energy Boost!

roses


To create those gorgeous, lovely rose blooms, roses need lots of energy! You don’t think those beautiful blooms just happen, do you?

  1. Ohm. Find the Right Balance. Roses need a balanced, organic fertilizer made specifically for roses. A balanced food with the same amounts of NPK (nitrogen, phosphorus and potassium) keeps the roots, flowers and foliage growing strong and healthy.
  2. Do as the Experts Do. Don’t the experts always know best? That’s what it seems like from those toothpaste commercials at least! The same is true in the garden. Rose-tone by Espoma, an organic plant food, is preferred by professional rose-growers. Follow their lead to grow bigger, better roses! Dare we say, prizewinning?
  3. The 30 Day Phase. Feed your roses once a month during the growing season. When you use a slow-release, organic fertilizer, your roses have enough to eat for 30 days. After that, they’ve consumed all the soil’s nutrients and need their energy source replenished. If the soil is dry, make sure you water roses heavily before feeding them. Find out more here.
  4. Look Dead? Off with their Head. Anyone who grows roses knows the value of deadheading. Roses will bloom all season if you remove spent flowers. Otherwise, the roses focus on seeding – not flowering. Plus, deadheading is easy! With pruners, simply cut dead roses just below the flower to the first set of leaves. Leave the leaves though, since these help plants grow strong. During drought, deadheading also reduces the plants need for water, increasing its chance of surviving this dry spell.
  5. Don’t stop there. Continue to deadhead roses until late August. This will allow the rose to form the important seed bearing hips it needs to produce even more flowers next spring!

Soon, roses will be coming up every which way! Go forth and create big, beautiful blooms with your newfound knowledge.

https://www.espoma.com/wp-content/uploads/2015/06/Capture1.jpg 328 1218 espoma https://www.espoma.com/wp-content/uploads/2023/05/espoma-logo340w-1.png espoma2015-06-17 16:15:242019-05-07 10:08:44Double your Roses by Feeding and Deadheading

Mother’s Day Container Garden Ideas

May 6, 2015/in Flowers, Landscaping, Spring Gardening

Freshly baked chocolate-chip cookies, homemade sandwiches with the crusts cut off and secret passwords— mom did it all for you. She showered you with love in so many ways, big and small.

Now it’s your turn to remind Mom how much you truly appreciate her.

Since Mom has made so many wonderful treasures for you over the years, take the time to make her a gift she’ll enjoy for months!

From a traditional hanging basket to a funky container garden, select a container that’s just her style, fill it with her favorite flowers and present a homemade gift that will bloom and delight for months!

Watch our video on container gardening for each step of the process, or follow the steps below.

First, find the perfect container. There are tons of fun, colorful and patterned containers out there. Or get creative and use an unexpected object. Either way, select the one that screams “Mom!” to you.

Be sure your container has drainage holes at the bottom and be sure it isn’t too big. Once the container is filled with soil, it can get pretty heavy.

Next, look for 3-5 flowers, grasses or greenery. If you already know Mom’s favorite flowers, definitely use those.

Then, choose plants that spill, thrill and fill! You want a plant that cascades, one that mounds and one that stands out among the rest.

You can mix colors, or stick with a monochromatic color scheme. Have fun with it!

Regardless, it’s best to make sure your plants like the same growing conditions. As a final check before checkout, compare plant tags to see if they all need the same amount of sun and water.

While you’re still shopping, grab a bag of the best organic potting mix.

Espoma Organic Potting Mix is not only 100 percent organic, but contains Myco-tone Mycorrhizae, too.

Plants growing in Espoma Organic Potting Mix require up to 30 percent less water than other potting soils. With water restrictions a concern, Mom will use less water for her container.

Plus, Espoma Organic Potting Mix helps your plants adjust to their new home better and grow bigger roots for bigger plants.

Now, get crafty!

  1. Fill the container 3/4 full with Espoma’s Organic Potting Mix.
  2. Mix in 2 tablespoons of Espoma’s Bio-tone® Starter Plus with the soil to give it that extra oomph. This organic plant food encourages bigger and more plentiful blooms!
  3. Remove the plants from their original containers and arrange them in the new planter.
  4. Play around a bit. Move the plants around to see where each plant looks best.
  5. Once the plants look perfect to you, fill in any gaps in the container with organic potting soil.
  6. Water well.
  7. Stick your Mother’s Day card in the soil on a floral pick and tie a bow around the container.

Wait till you see Mom’s face when you arrive on Mother’s Day with a beautiful, homemade container garden!

Share a photo of your Mom with her homemade Mother’s Day container on our Facebook page! And tell her Happy Mother’s Day from Espoma!

https://www.espoma.com/wp-content/uploads/2015/05/container-garden-mom.jpg 1682 1697 espoma https://www.espoma.com/wp-content/uploads/2023/05/espoma-logo340w-1.png espoma2015-05-06 17:03:142019-05-07 10:08:45Mother’s Day Container Garden Ideas

How to Know When to Feed Acid-Loving Plants

April 28, 2015/in Landscaping

Are your plants suffering from a long winter?

Popular plants such as azaleas, rhododendrons, blueberries, strawberries and heathers, are all acid-loving, meaning they need a soil pH of about 5.5.

Knowing whether your soil is acidic or not is the first step to healthier plants season after season.

If your leaves or needles take on a yellow-green hue, your soil is too alkaline is and this condition is called chlorotic. Plants become chlorotic when they cannot access important nutrients due to the soil’s high pH level. Plants that struggle for too long may lose leaves, branches and flowers. Left untreated for seasons, the plant could die.

Another sure sign of a high soil pH is if your hydrangea’s flowers are blooming pink.

However, it’s easy to correct the problem — simply lower the pH level and fertilize.

First, check your soil pH with a quick, DIY kit found at your local garden center. Grab a trowel of soil near your acid-loving plants and follow the kit’s directions.

Don’t worry. No matter what your pH is, fixing it can be easy.

If you have a soil pH higher than 5.5., add Espoma’s Organic Soil Acidifier to amend alkaline soil. If your soil has a number lower than 5.5., remedy with Garden Lime.

Save your coffee grounds, which are rich in nutrients and acidic, and sprinkle them lightly under your shrubs to help keep pH down.

Shredded leaves, sawdust, peat and pine needles also make great additions to your soil before planting. This decaying organic material will decrease the pH of the soil over time.

After you’ve identified and fixed your soil’s pH, it’s time to feed acid loving plants. Feeding them with Holly-tone in spring creates bigger blooms — and more of them. Feeding them again in the fall will ensure year-round health and beauty of your Acid-Loving plants.

Fertilize evergreens, like spruces, firs, hemlock and pines, to encourage a deep, healthy green color. Check out this video to learn more.

Fertilizing acid-loving plants only takes a few minutes, but creates bigger, better flowers and trees than ever before. You’ll be amazed by the results!

There are many plants that survive or thrive in low pH soils. Perhaps the most well-known acid-loving plant is the blueberry, which thrives in about 4.0 – 5.0 pH. However, strawberries and blackberries also favor acidic soil.

Find out if you have acid-loving plants here.

Each spring, begin your gardening with a simple pH test of your soil and plan your soil amendment around the results. Then, be sure to feed with Holly-tone spring and fall. Your rhodos, azaleas and camellias will thank you with bright-green leaves and huge, colorful blooms.

Help us share the knowledge. Tweet “Time to fertilize acid-loving evergreens and plants for bigger, better blooms and greenery.”


Featured in this post:

Espoma Holly-tone


Where to Buy
https://www.espoma.com/wp-content/uploads/2015/04/How-to-Know-When-to-Feed-Acid-Loving-Plants.jpg 960 1280 espoma https://www.espoma.com/wp-content/uploads/2023/05/espoma-logo340w-1.png espoma2015-04-28 07:50:082019-05-07 10:09:23How to Know When to Feed Acid-Loving Plants

How to Turn Pink Hydrangeas Blue

April 13, 2015/in Landscaping

Picture the bluest hydrangea you’ve ever seen. It’s easy, isn’t it? This vibrant flower is as bright and bold as Elvis’ blue suede shoes.

So, how can you get a blue hydrangea? The secret is in the soil, and the power is in your hands.

Create a blue hydrangea simply by amending the soil. Most hydrangeas, except white ones, change color based on the pH or acidity levels of their soil.

And, it doesn’t stop there.

You can continually tweak the soil pH until you get exactly the shade of blue you’ve been dreaming of.

Transforming your hydrangeas to a jaw-dropping blue does take a bit of time. For especially big hydrangeas, the color conversion can take months. But, it is definitely worth the wait.

Creating breathtaking blue hydrangeas is extremely easy. All you need to do is amend your soil with Espoma Organic Soil Acidifier.

Other soil acidifiers contain Aluminum Sulfate, which can be incredibly harsh on plants, and even toxic to some, such as Rhododendrons. To keep your garden organic, all-natural and safe for people, pets and the planet, lower soil pH levels using an organic soil acidifier like Espoma Organic Soil Acidifier.

Before changing your pink hydrangeas to blue, check two things.

First, are there any other plants growing near your hydrangeas? Make sure they like acidic soil, too.

Finally, are your hydrangeas growing near a concrete walking path or patio? Concrete often contains lime, which can make it tough to turn hydrangeas blue.

Now let’s make magic happen!

To turn new hydrangeas blue, use 1¼ cups of Espoma Organic Soil Acidifier. Or to transform established hydrangeas into blue beauties, apply 2½ cups of Organic Soil Acidifier.

Spread evenly around the hydrangea out to its drip line, or the widest reaching branches.

Then, water well.

Repeat every 60 days until you’ve got the perfect color for you.

The intensity of blue hydrangeas is dependent on your soil’s pH levels. For deep blue blooms, aim for a soil pH of 4.5. For a more muted blue, you want your soil pH to be 5. Finally, if you want violet-blue hydrangea blossoms, your soil pH should be 5.5.

Perform a simple, DIY soil test if you want to discover your soil’s exact pH levels.

Craving hydrangeas super-saturated with blue color? Feed hydrangeas regularly with Espoma Holly-tone. Holly-tone fertilizer for acid loving plants also lowers your soil’s pH. Plus, a well-fed hydrangea will have bigger, better blooms.

Let’s get the word out about this gardening magic trick. Tweet if you’re going to magically turn hydrangeas from pink to blue!

Featured in this post:


Where to Buy
https://www.espoma.com/wp-content/uploads/2015/04/hydrangeas-385767_960_720.jpg 390 960 espoma https://www.espoma.com/wp-content/uploads/2023/05/espoma-logo340w-1.png espoma2015-04-13 07:57:092021-01-21 08:54:42How to Turn Pink Hydrangeas Blue

How to Plant Colorful Flowering Shrubs: Azaleas and Rhododendrons

April 7, 2015/in Landscaping, Trees & Shrubs

A yard without shrubs is like a completed puzzle, minus one piece. The look is almost perfect, but something is missing! Shrubs work wonders — especially ones with bold, colorful flowers. These easy to care for plants instantly fill in gaps in your garden landscape and look fabulous every season. Complete your garden by planting a shrub or two today! Azaleas and rhododendrons are some of the most popular flowering shrubs. Blooming from late spring to early summer, these shrubs thrive in almost any garden. Plus, they come in virtually every color of the rainbow — from bold pinks, purples, and reds to soft, muted yellows and whites. As an added bonus, hummingbirds and bees cannot get enough of azaleas and rhododendrons.

For Established Shrubs: Spring feeding helps develop new growth and the production of new flower buds. Sprinkle one cup of Holly-tone per foot of branch spread now. Holly-tone is long-lasting so you’ll only need to fertilize twice in a season. Don’t wait too long, or you risk encouraging green vegetative growth at the expense of flower bud development. Once now, and again in the fall will ensure a perfect Rhody!

For New Shrubs: Spring is the perfect time to plant so pick your favorite color and variety. Before buying, check the plant tag to see if you have enough space for a full-grown shrub. Azaleas and rhododendrons can range from 2 feet to more than 20 feet tall! If planting shrubs in a row, ensure you have enough space to plant 2 feet to 6 feet apart depending on how big your shrubs will get. Now, before you start digging, choose a spot for your shrub and envision the great impact these plants will have on your landscape! Both these flowering shrubs like to hang in the shade and do not grow well in full sunlight. So, make sure you’ve selected a perfectly shaded spot!

Before you start digging, plan for growth. If planting shrubs in a row, ensure you have enough space to plant 2-6’ apart depending on how big your shrubs will get. These flowering shrubs are so easy to care for because most of the work is done before planting. Keep azaleas and rhododendrons bursting with beautiful blooms by picking the right spot and ensuring you’ve got ideal soil for growing. Don’t forget to test the soil! These acid-loving shrubs need a soil pH of 4.5-5.5. If your soil test reveals a higher pH, your soil is alkaline. Solve the problem by amending with Espoma Organic Soil Acidifier.

Pink Flowers on bush

Once your soil is ready, it’s time to plant! Dig a hole as deep as the root ball and twice as wide. Then, remove the shrub from its original container, loosen the roots and dip in a bucket of water. Next, arrange the shrub in the hole, so the top of the root ball is slightly about the ground’s surface. Fill half the hole with compost, peat moss or humus, and mix in 1 cup Holly-tone fertilizer for better blooms. This organic plant food is specially crafted for acid loving plants, like azaleas and rhododendrons. Feeding new shrubs with an organic fertilizer now keeps them well-fed for months, spurs deep evergreen color and dynamic blooms. Fill half the hole with Espoma Organic All Purpose Garden Soil. Now finish planting your shrub by filling the hole with Espoma Organic All Purpose Garden Soil, and add 2-3” of mulch. Water now, and tomorrow, too.

Doesn’t your garden instantly look brighter? For more tips on caring for azaleas, rhododendrons or other acid-loving plants, click here. We’d love to see how a flowering shrub completed your garden. Share a before and after picture on our Facebook page!

*****

Featured Products: 

Where to Buy


https://www.espoma.com/wp-content/uploads/2015/04/blossom-1194065_1920.jpg 1303 1920 espoma https://www.espoma.com/wp-content/uploads/2023/05/espoma-logo340w-1.png espoma2015-04-07 09:56:172024-09-25 07:51:43How to Plant Colorful Flowering Shrubs: Azaleas and Rhododendrons

Feed Your Flower Bulbs Now with an Organic Fertilizer

April 6, 2015/in Flowers, Landscaping

Breathe it in! Spring has arrived and brought the first flowers of the year with it! After the white of winter, sunny daffodils and a rainbow of tulips are a welcome sight.

Flower bulbs are inexpensive, easy to plant, provide stunning cut flowers and can last for years when taken care of properly.

The secret to keep spring flowering bulbs producing year after year is a spring time feeding of Bulb-tone.

Think about it. When planted, bulbs are packed full of nutrients to last all winter. Come spring, they’ve used all the food they have stored.

It’s like they’ve just run a winter-long marathon — and now they need you to greet them at the finish line with snacks and water.

Right now, your spring bulbs — tulips and daffodils included — are exhausted and starving even if they don’t look like it!

So, they need a hefty feeding to keep them robust.

Bulb-tone gives them everything they need to come back strong next year. Fertilizing spring bulbs also helps them fight off diseases and pests.

So, when should you feed spring flowering bulbs?

Fertilize spring bulbs after the plants have bloomed and are about 6” tall. That’s just about as tall as a dollar bill!

Now, what should you look for in bulb food?

Use an organic plant or bulb food that is low in nitrogen and has a higher amount of phosphorous. Nitrogen is the first of three numbers on fertilizer bags, — phosphorus is the second number on the bag. For example, Bulb tone by Espoma has a 3-5-3 Nitrogen- Phosphorous-Potassium ratio, which is exactly what bulbs need.

The advantage of using a plant food made specifically for bulbs is that it provides a complete feeding.

Your bulbs will love Espoma Organic Bulb-tone. This specially formulated bulb food is fortified with microbes to create a healthy soil and environment for bulbs. Plus, of course, it’s pet and kid friendly.

Now to boost spring bulbs, apply Bulb-tone at a rate of 4 lbs. per 60 square feet. Simply sprinkle the organic bulb food around the bulbs to ensure they come back stronger than ever next year.

One thing to remember – leaves on flowering bulbs produce food, and keep bulbs well fed throughout winter. So embrace your bulbs’ leaves! They add a lovely pop of glossy greenery to your landscape.

Only cut bulbs’ leaves when they begin yellowing or showing signs of decay. For tulips and daffodils, this can happen as late as June or July.

Now that your spring blooming bulbs are stocked with food and nutrients, they should come back next year!

What’s your favorite spring blooming bulb? We love white and yellow daffodils with green leaves – since they showcase Espoma colors! Share your favorite on our Facebook Page.

https://www.espoma.com/wp-content/uploads/2015/04/2499490616_d446043e1a_z.jpg 480 640 espoma https://www.espoma.com/wp-content/uploads/2023/05/espoma-logo340w-1.png espoma2015-04-06 10:02:092019-05-07 10:09:24Feed Your Flower Bulbs Now with an Organic Fertilizer

Apply Mulch Now for Benefits all Season

March 12, 2015/in Landscaping

Spring is almost here — only eight more days! We are itching to get our hands dirty in the garden.

Never do we appreciate the richness of the soil or the sunshine more than at the start of spring. Plus, our garden seems just as happy to see us.

During these first few weeks, we set ourselves up for success in the season ahead.

And one of the first items on the to-do list is laying a new bed of mulch. Not only does it look great and make your neighbors envious, but mulch provides a world of benefits!

Organic mulch can reduce water use in the garden by 25-50 percent, which saves money on water bills and conserves water. A thick blanket of mulch reduces evaporation, so you don’t have to water as much. Mulch also controls weeds. Plus, your flower beds look polished and complete with a finishing touch of mulch.

Best of all, organic mulch improves soil health as it decomposes throughout the season.

To reap these benefits, mulch has to be organic.

While non-organic mulches, such as plastic film and rubber, are cheaper, they cause major problems later. Inorganic mulches do not break down over time, so they don’t condition the soil. Even worse, they begin to block air and water from plants’ roots. Nine out of ten times, you’ll need to remove non-organic mulches by hand later.

Natural mulches are composed of plant matter and are very popular. From wood chips and pine needles to shredded bark, pick the organic mulch you like best. These mulches decompose over time which helps improve the soil but it also means they must be replaced once or twice a year.

How do you apply it? It’s easy and can be done this weekend.

First, you’ll want to lightly rake the soil to loosen up the surface. Once loose, pull any weeds or dead plant material.

Then, give your mulch the smell test. Mulch should smell woody or earthy; if mulch smells sour like vinegar, replace it entirely.

This is an ideal time to feed evergreen and acid-loving plants such as rhododendrons, azaleas, dogwoods and hollies with Holly-tone. Apply it in a circle around the drip line of shrubs or trees.

Finally, lay 2 – 3” of mulch around established plants. Mulch that’s too deep can actually smother young plants.

When mulching trees, the mulch should extend away from the plant to a little beyond the drip line covering a bit of the roots. But don’t build volcanoes! Never pile up mulch. Instead, keep 2 – 3” away from the stems of woody plants and 6 – 12” away from buildings to avoid pests.

Keep your garden healthy and your home safe this season by choosing organic mulch. Make it a priority on your spring garden to-do list.

https://www.espoma.com/wp-content/uploads/2015/03/mulch-early.jpg 1183 710 espoma https://www.espoma.com/wp-content/uploads/2023/05/espoma-logo340w-1.png espoma2015-03-12 19:10:402019-05-07 10:09:24Apply Mulch Now for Benefits all Season
Page 2 of 212
Where to Buy

Get News & Updates

Recent Posts

  • VIDEO: How to Plant a Raised Bed Like a Pro with Farmer Nick
  • VIDEO: Transplanting Magnolias 🪴🌺 with Wyse Guide
  • VIDEO: How to Care for Roses 🌹 & Hydrangeas 🌸 with Garden Answer
  • VIDEO: How to Grow a Hummingbird Garden 🕊️🌿🌺 | Growing Joy with Maria
  • VIDEO: Boost Your Blooms: 🌸 Fertilizing Hydrangeas the Organic Way with Skye Hamilton

Tags

All-Purpose Potting Mix bio-tone Bio-tone Starter Bio-tone Starter Plus cactus and succulents Cactus Mix caring for houseplants Container Gardening DIY project Espoma espoma grown espoma organic Espoma Organics Espoma Video fall gardening flower garden flowers garden Garden Answer Gardening gardening tips gardens grow holly-tone houseplants Indoor! indoor gardening indoor plants Kaleb Wyse organic organic fertilizer Organic Gardening organic plant food Organic Potting Mix Outdoor Gardening Planting plants Potting Mix potting soil Spring Gardening succulents summer rayne oakes vegetable garden Vegetable Gardening Wyse Guide

Espoma. A Family Tradition Since 1929.

Espoma Organic logo
  • Espoma Dealer
  • Espoma Pro
  • Garden Club
  • Privacy Policy

Scroll to top