Espoma Organic
  • Products
    • Close
    • Product Line Overview
    • Plant food finder
    • Garden Fertilizers
    • Potting Soils
    • Liquid Fertilizers
    • Lawn Fertilizers
    • Single Ingredients
    • Conventional Plant Foods
    • Animal Care Products
  • Where to Buy
  • Our Story
    • Close
    • Our Story
    • Locations
    • Historical Timeline
    • Our Commitment
    • Directions
    • Solar
    • Join our Team
    • Espoma Brand Partners
  • Learn
    • Close
    • Espoma Blog
    • FAQ’s
    • Pocket Guide
    • Espoma Guides
    • Garden Clubs
    • Safe Paws Lawn
    • PRODUCT FACT SHEETS
    • Fertilizer Fundamentals
      • Close
      • Understanding Plant Nutrition
      • Reading Labels
      • Choosing the Right Type of Fertilizer
      • Terms & Definitions
    • Gardening Projects
    • Resource Links
  • Contact Us
  • Menu Menu

Plant Flower Bulbs in Three Easy Steps

August 11, 2015/in Flowers, Spring Gardening

Tips for planting bulbs from Longfield Gardens, premium online bulb source

Fall is planting time for spring-blooming bulbs such as tulips, daffodils and alliums. There’s nothing difficult about planting bulbs and you can plant dozens of them in just a few minutes.

Spring bulbs are always the first flowers to bloom each spring,” said Hans Langeveld, co-owner of Longfield Gardens. “You plant them in fall and then forget about them until spring rolls around and your garden is filled with flowers that are ready to bloom.”

Langeveld assures gardeners that creating a colorful spring garden requires just 3 easy steps: choosing your bulbs, knowing when to plant, and following some basic planting instructions.
Longfield Gardens


Best Time for Planting Bulbs

“You want to get the bulbs into the ground at the proper planting time for your region,” Langeveld said.

As a general rule, spring-blooming bulbs can be planted anytime before the soil begins to freeze. But bulbs will benefit from having a few weeks to establish roots before the ground is frozen.

Gardeners can reference this map for recommended planting times. Light purple areas should plant bulbs from September to October; medium purple from September to November and dark purple areas should plant between October and December.

Planting is as Easy as 1-2-3

Choosing a good planting location is important. “Bulbs will grow almost anywhere,” said Langeveld. “They will do best in Longfield Gardenssoil that drains well.”

The planting part is easy and the same instructions can be applied to all types of bulbs:

  1. Dig a hole 3-4 times deeper than the height of the bulb.
  2. Set the bulbs into the hole, following spacing guidelines.
  3. Cover bulbs with soil and water only if the soil is very dry.

And of course, we at Espoma recommend a fertilizer made for bulbs such as Bulb-tone.

“Remember when planting bulbs to avoid the temptation to plant them in single rows. For the most natural look, group them in a pyramid, rectangle or circular shape,” Langeveld said.

To see the complete selection of fall-planted, spring-blooming bulbs from Longfield Gardens, click HERE.

https://www.espoma.com/wp-content/uploads/2015/08/Capture.jpg 229 668 espoma https://www.espoma.com/wp-content/uploads/2023/05/espoma-logo340w-1.png espoma2015-08-11 08:16:082024-09-06 11:30:25Plant Flower Bulbs in Three Easy Steps

Don’t Leave Hanging Baskets Out to Dry…

June 30, 2015/in Container Gardening, Flowers, Landscaping, Spring Gardening, Summer Gardening

Hanging baskets make great visual impacts when they are filled to the brim with bright summer blooms. They add instant color to any spot and are a sign of warm weather.

Though as days get hotter and the summer rolls on, hanging baskets can start to look tired: drooping blooms, minimal flowers and straggly plants.

Your hanging basket isn’t doomed. It just needs a good ol’ fashion pick-me-up.

Refresh your hanging baskets to keep them partying all summer long

Get ready to give your hanging baskets a make-over. With these tips, your hanging basket will be back in its prime in no time.

Photo Courtesy Proven Winners

Photo Courtesy Proven Winners

Take the Heat Off Hanging Baskets

  1. Test the Waters Hanging baskets need more water when temperatures rise. During the peak of summer’s heat, water baskets in the morning until water drips from the drainage holes. Check them again in the afternoon to see if they need more water. On windy days, hanging baskets dry out, so they will need even more water.
  2. Food for Thought. Feed hanging baskets  with an organic flower food, like Flower-tone or the new Bloom! liquid plant food. Because of how much water baskets need, nutrients are frequently flushed from the soil. Regular feedings give your hanging baskets the energy they need to shine and bloom continuously.https://www.espoma.com/liquids/
  3. Drop Dead Gorgeous Blooms. As flowers fade, pinch them off where they meet the stem. Deadheading hanging baskets keeps them producing flowers and prevents them from going to seed.
  4. Which to Switch. Not every flower blooms all summer. If one of your flowers is done blooming for the season, swap it out. Gently remove the flower, replace it with a vibrant plant and fill with an organic potting soil.
  5. What to Cut. When your hanging basket is looking a bit wild or leggy, cut it back by 1-2”.

Look at that! Your hanging baskets already look better. Keep up these tips throughout the summer to keep hanging baskets fresh, beautiful and blooming.

https://www.espoma.com/wp-content/uploads/2015/06/flowers-164815_1280.jpg 722 1144 espoma https://www.espoma.com/wp-content/uploads/2023/05/espoma-logo340w-1.png espoma2015-06-30 08:20:202024-08-16 13:54:28Don’t Leave Hanging Baskets Out to Dry…

Out of Town? Don’t Let the Garden Go Brown

June 25, 2015/in Container Gardening, Flowers, Spring Gardening, Summer Gardening

Gardener’s Guide: Hydration while on Vacation

As you pack your bags, finish up at work and plan your vacation adventures, one lingering question remains, “Who will water my plants?

Yes, we’d all like to have a friend or neighbor available to care for our garden while we’re out of town, but that’s not always a possibility.

Luckily, you can prep your garden before you go on vacation. Here are some tricks.

vacation garden tips

While You’re On Vacation, Treat Your Garden to a Stay-cation 

  1. Right on Time. Install a water timer to automate watering. You can opt for a more complex drip irrigation system or simply use a timer with sprinklers. Plan to give plants about 1” of a water a week.
  2. Pack a Snack. Keep your plants well-fed and packed with nutrients while you’re gone. Feeding your veggies, flowers and herbs with the right organic plant food sets them up for success and gives them the strength they need to survive tough situations.
  3. Much Mulch. Mulch helps plants retain 25-50 percent more water, so it’s perfect for vacation use. Make sure all plants have 2-3” of mulch. Water the mulch until it’s wet all the way through.
  4. Cluster Containers. Group containers in a shady spot where they’ll be watered by a sprinkler. Or if going out of town for 1-2 weeks, place containers out of direct sunlight in a kiddie pool filled with a few inches of water.
  5. Take Your Pick. Pick anything and everything from your edible plants. That includes any tomatoes showing color, pint-sized cucumbers and zucchinis and any beans you see. Picking will keep plants producing and provides healthy, organic snacks for your travels, too.
  6. Mow Before You Go. Mow the lawn the day before your trip. Simple!

Now, sit back, relax and get ready for an invigorating vacation! Your plants will surely miss you, but they’ll be just fine while you’re gone.  

https://www.espoma.com/wp-content/uploads/2015/06/pansy-731346_640.jpg 426 640 espoma https://www.espoma.com/wp-content/uploads/2023/05/espoma-logo340w-1.png espoma2015-06-25 08:09:172019-05-07 10:08:44Out of Town? Don’t Let the Garden Go Brown

Repurpose on Purpose: Trash Transforms into Beautiful Containers

June 23, 2015/in Flowers, Landscaping, Spring Gardening

Container gardening adds a whole new element of style and flair to your outdoor space. Not only do you get to showcase DIY containeryour style through plants, but also in the unique pots you choose. It’s twice the fun!

And you can do it for the planet, too. Growing herbs, veggies and flowers already makes the world a greener place. Now reuse and repurpose a forgotten item into an invigorated planter. Upcycling creates less waste and saves money, too.

Create a repurposed container for a beautiful (and thrifty!) container garden.

Your soon-to-be favorite container may already be in your house. Almost any vessel can be repurposed into a garden container! You’ll be amazed by what you discover (and by what containers you didn’t even know were hiding in your cupboards).

Up for Grabs: Upcycled Containers

  1. Pin Your Style. Create a look that is truly all your own. Decide if you want a rustic, modern, country or bold look. Then browse Pinterest for inspiration.
  2. Start the Search. Browse your kitchen, closet, garage and cupboards for items you no longer use. Any size works! Branch out to yard sales, thrift stores and flea markets for more unique looks.
  3. Add a Special Touch. Personalize your container by painting it, covering it in old wallpaper, or even turning it into a mosaic. Get crafty!
  4. Show Them the Drill. Then Fill. Drill holes in the bottom of your repurposed container to provide drainage. Without drainage holes, soil becomes too wet and causes roots to rot. When ready, fill with the ideal potting soil, Espoma’s Organic Potting Mix, and your favorite plants.
60bc838855263aa8a8875fd58e171bca

These upcycled tires are stacked and painted- as seen by Ellen Wells at Syngenta

Colander-planter_wm

A colorful, retro colander makes a great hanging container

Toy-truck-planter

Think outside of the (toy)box

bra-planter

And, of course, the bigger the better for this container…

Other Types of Repurposed Containers:

Get inspired by some of our favorite items to turn into garden planters below.

  • Teacups and teapots
  • Pitchers
  • Tires
  • Boots and shoes
  • Colanders
  • Desk drawers
  • Buckets
  • Wine crates and whiskey barrels
  • Wheelbarrows and wagons
  • Clothes and lingerie
  • Toolboxes
  • Suitcases
  • Watering cans

Creating repurposed containers is a quick, affordable and fun way to expand container gardens. Once you start, the possibilities are endless!

*thank you MicroGardener for the photos!


https://www.espoma.com/wp-content/uploads/2015/06/Capture2.jpg 261 527 espoma https://www.espoma.com/wp-content/uploads/2023/05/espoma-logo340w-1.png espoma2015-06-23 08:07:142019-05-07 10:08:44Repurpose on Purpose: Trash Transforms into Beautiful Containers

Double your Roses by Feeding and Deadheading

June 17, 2015/in Flowers, Landscaping, Spring Gardening

Is there anything better than walking into your garden, smelling the heavenly scent of a rose and seeing a luscious rose bloom?

Believe it or not, we think there is!

More roses!

Once your roses start blooming, all you want is for more roses to grow, too! Stack the odds in your favor by feeding and deadheading your roses now.

Give Your Roses an Energy Boost!

roses


To create those gorgeous, lovely rose blooms, roses need lots of energy! You don’t think those beautiful blooms just happen, do you?

  1. Ohm. Find the Right Balance. Roses need a balanced, organic fertilizer made specifically for roses. A balanced food with the same amounts of NPK (nitrogen, phosphorus and potassium) keeps the roots, flowers and foliage growing strong and healthy.
  2. Do as the Experts Do. Don’t the experts always know best? That’s what it seems like from those toothpaste commercials at least! The same is true in the garden. Rose-tone by Espoma, an organic plant food, is preferred by professional rose-growers. Follow their lead to grow bigger, better roses! Dare we say, prizewinning?
  3. The 30 Day Phase. Feed your roses once a month during the growing season. When you use a slow-release, organic fertilizer, your roses have enough to eat for 30 days. After that, they’ve consumed all the soil’s nutrients and need their energy source replenished. If the soil is dry, make sure you water roses heavily before feeding them. Find out more here.
  4. Look Dead? Off with their Head. Anyone who grows roses knows the value of deadheading. Roses will bloom all season if you remove spent flowers. Otherwise, the roses focus on seeding – not flowering. Plus, deadheading is easy! With pruners, simply cut dead roses just below the flower to the first set of leaves. Leave the leaves though, since these help plants grow strong. During drought, deadheading also reduces the plants need for water, increasing its chance of surviving this dry spell.
  5. Don’t stop there. Continue to deadhead roses until late August. This will allow the rose to form the important seed bearing hips it needs to produce even more flowers next spring!

Soon, roses will be coming up every which way! Go forth and create big, beautiful blooms with your newfound knowledge.

https://www.espoma.com/wp-content/uploads/2015/06/Capture1.jpg 328 1218 espoma https://www.espoma.com/wp-content/uploads/2023/05/espoma-logo340w-1.png espoma2015-06-17 16:15:242019-05-07 10:08:44Double your Roses by Feeding and Deadheading

Hip, Hop, Hurray! Grow Hops for Homemade Beer

June 16, 2015/in Fruits & Vegetables, Spring Gardening, Vegetable Gardening

Homebrewed beer made of homegrown hops takes the craft beer movement to the next level. As you take that first sip, you don’t just taste the beer. You taste the pride, satisfaction and joy of brewing it yourself from scratch. Become a true brewmaster by growing your own hops.

Plus, growing your own hops is cheaper and makes your beer taste incredible.

Let’s plant some hops!homegrown hops

Get Hoppy! Grow Your Own Hops for Homebrews

  1. Which Hop to Crop? Buy hop rhizomes online that match the flavor and type of beer you like. They come in every flavor under the sun. Brewers typically use multiple hop varieties in their beers, so plant several varieties that you can mix and match.
  2. Spot a Spot. Hops need LOTS of sun to thrive — about 6-8 hours daily. Plus, the spot where you plant needs to have vertical space. Hops grow up, not out.

homebrewed beer

 How to Plant Hops for Home Brewing  

  1. Dig a Cozy Home. Dig 4” deep holes and mix in an organic fertilizer like Bio-tone Starter Plus by Espoma. If planting the same hop variety, dig each hole 3’ apart. If planting different hop varieties, plant them 5’ apart.
  2. Get ‘Em Situated. Place the rhizome horizontally in the hole with the root side down, pointy side up. If the rhizome is budding, plant the bud facing up. Fill hole, cover with soil and add mulch to conserve water.
  3. Bursts of Water. When soil is dry, provide a frequent, but short burst of water!
  4. Hungry, Hungry Hops. To grow strong hops, feed them an organic plant food each month. Find out how to apply Espoma’s Plant-tone.
  5. To New Heights. Once your hops are 1’ tall, select the strongest 2-3 vines and wrap them counter-clockwise around an 8-12’ trellis. Prune the remaining vines from the base of the hop. Over the next few days, keep wrapping the vines around the trellis to train them. Hops grow quickly so continue to check your vines regularly and keep wrapping!

Now those tiny hops don’t look like beer. Before long though, you’ll be sipping on their flavors in the most refreshing homebrew yet!

https://www.espoma.com/wp-content/uploads/2015/06/hops2.jpg 1200 1600 espoma https://www.espoma.com/wp-content/uploads/2023/05/espoma-logo340w-1.png espoma2015-06-16 09:56:422019-05-07 10:08:44Hip, Hop, Hurray! Grow Hops for Homemade Beer

Feed Tomato and Pepper Plants Now

June 10, 2015/in Fruits & Vegetables, Spring Gardening, Vegetable Gardening

By now you’ve planted your organic tomatoes and peppers! These homegrown veggies should be starting to flower — which means fruit isn’t far behind.

Now, it’s time to sprinkle a little magic.

The trick is to feed veggies monthly with an organic fertilizer. Tomatoes and peppers have big appetites, so they need plenty of organic food. Since plants get all their nutrients from the soil, their all-you-can-eat buffet runs out quick. Feed them right, and they’ll burst full of fresh produce.

how to grow tomatoes

Create a Balanced Diet:

  1. Go Organic. Since you’re eating this food and feeding it to your friends and family, you’ll want to ensure it’s the cleanest and healthiest possible. Choose an organic fertilizer.
  2. Take it slow. Chose a slow-release organic fertilizer. Artificial, rapid growth results in tall, lanky plants. Slow-release, organic fertilizers actually improve the soil as they break down.
  3. Plants need vitamins, too. Find a balanced food with calcium to help prevent blossom rot. Espoma Tomato-tone has 8% calcium! Be careful that you do not use too much nitrogen which will result in a lush, green plant with very little fruit.
  4. More Magic. Tomato-tone also includes Bio-tone®, a blend containing more than 3 million beneficial microbes. Sounds cool, right?

Don’t take it from us — Veggie Gardener had this to say:

“Bio-tone works magic with this fertilizer. These beneficial microbes do the dirty work of creating big and healthy plants which in turn grow large, plump, and juicy tomatoes. Beneficial microbes support good root growth by helping the roots absorb nutrients from the soil. Well producing tomatoes, or any plant for that matter, starts with a healthy and strong root system. Since I started using Tomato-tone, my tomato plants have grown faster, stronger, and produced more tomatoes.”

Ok, you get it. Fertilizing tomatoes and peppers is like sprinkling them with magic dust that makes them grow bigger, better produce. Now get growing.

how to grow peppers

Tips for Feeding Tomatoes and Peppers:

  1. Measure out the fertilizer according to instructions on bag.
  2. Feed single plants with 3 tablespoons of Tomato-tone. For rows of plants, apply 1 cup on each side per 5 feet. Feed potted plants 1.5 teaspoons per 4” pot diameter. More details here.
  3. Sprinkle Tomato-tone starting approximately 6” from the base of the plant.
  4. After feeding, water well.
  5. Feed tomatoes and peppers every month during the growing season.

Feeding tomatoes and peppers takes just a couple of minutes and drastically increases your harvest.

To feed your family lots of organic, homegrown veggies this summer, you’ll need to first keep your veggies well-fed! Get ready for the biggest, yummiest tomatoes and peppers you’ve ever grown.


Where to Buy

While you’re at it, take a selfie with your Tomato-tone! Tag us in the picture with @Espoma.

https://www.espoma.com/wp-content/uploads/2015/06/tomatoes-19577_640.jpg 360 640 espoma https://www.espoma.com/wp-content/uploads/2023/05/espoma-logo340w-1.png espoma2015-06-10 09:51:582019-05-07 10:08:45Feed Tomato and Pepper Plants Now

Prep the Yard + Garden for Memorial Day!

May 22, 2015/in Lawn, Spring Gardening

The spring season is just flying by and Memorial Day is already here.  Everyone is excited to have the day off, enjoy the outdoors and chow down on BBQ.

Memorial Day may mark the start of the summer vacation season, but let’s remember what the holiday is really about.

This federal holiday, observed the last Monday of May, is to honor and remember the people who died serving in our country’s armed forces. Formerly known as Decoration Day, the holiday originated after the Civil War to commemorate the Union and Confederate soldiers who died in the war.

flowers-258415_640To celebrate “decoration day,” bring out your red, white and blue and get ready for the summer season. You’ll want to make sure your lawn and garden is ready, too, by following our tips to prep your outdoor space.

First, get your yard and garden ready for the summer by evaluating your landscape. Make note of any problem areas that simply look messy, empty or that need color.

If your front door entrance looks dull, add containers full of colorful flowers!

Welcome guests by creating an entry way that really pops. Creating colorful, dramatic flower containers is super easy. And, to make it even more festive, use red, white and blue flowers.

Have an awkward, empty spot in the garden bed? If it’s a smaller space, plant a couple more annual or perennial flowers. To fill a large, gaping hole in the garden bed, plant a flowering shrub for a beautiful fix or fill with a container of flowering plants.

Next, refresh your whole yard with new mulch. All your garden beds will look instantly refined. Plus, mulch reduces water and weeds. Add 2-3” of mulch if you haven’t already.

For any unkempt areas in the garden, pick up any debris on the ground. Then, lightly trim any plants that are overstepping their boundary.

Ok, your yard is almost ready. Time for the wow factors! Add decorative lighting along the pathway, hang your American flags and dazzle with festive garland.

How are you celebrating Memorial Day this year? Share your pictures with us on our Facebook page!

https://www.espoma.com/wp-content/uploads/2015/05/usa-239617_640.jpg 428 640 espoma https://www.espoma.com/wp-content/uploads/2023/05/espoma-logo340w-1.png espoma2015-05-22 07:51:022019-05-24 16:39:00Prep the Yard + Garden for Memorial Day!

Guide to Growing Organic Tomatoes

May 18, 2015/in Fruits & Vegetables, Spring Gardening, Vegetable Gardening

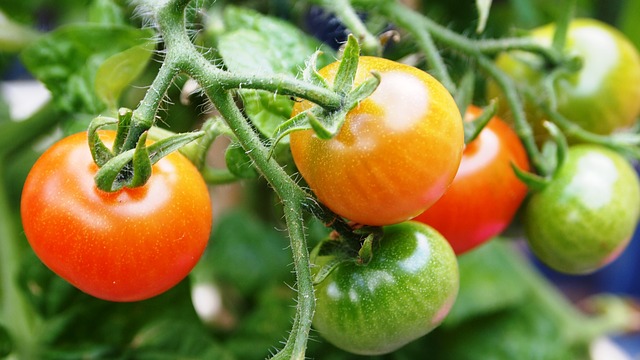
If there’s one vegetable that needs to be in your organic garden, it’s tomatoes! Juicy, red tomatoes are the taste of summer.

In a salad, drizzled with olive oil, sliced with fresh mozzarella or even eaten like an apple, homegrown tomatoes make every summer meal taste better.

Like all homegrown food, they’re picked when they’re the juiciest and most flavorful. And since you care for tomatoes all season, you appreciate theorganic tomato 
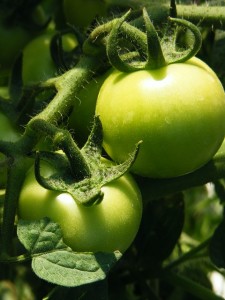
care and work it takes to ethically raise them. You know without an inkling of doubt that these tomatoes are organic, packed with nutrients and 100% free of harmful pesticides.

Plus when growing your own tomatoes, you get to pick exactly the kind you want! There are over 10,000 different types of tomatoes, in nearly every size and color.

To pick the tomatoes best for you, decide if you’d like to snack on tomatoes throughout summer. These are known as Indeterminate. Or if you’d like your crop to ripen at once at the end of summer, select determinate.

Also, think about how you’d like to use your tomatoes. Will you use them in lots of fresh recipes or can and preserve and save them for winter? See our favorite tomatoes below to pick the one right for you!

Best Tomatoes to Eat All Summer (Indeterminate)

  • Best Tomatoes for Sandwiches: Brandywine– The original scrumptious beefsteak, and all other beefsteaks
  • Best Tomatoes for Early Harvest: Early Girl– Bright red in color and flavor
  • Best Tomatoes for Sun-Drying: Any Cherry tomatoes

Best Tomatoes for Canning and Sauces (Determinate)

  • Best Tomatoes for Sauces – Full-flavored Roma
  • Best Tomatoes for Canning –Viva Italia which are virtually seedless
  • Best Overall Tomatoes: Rutgers– Abundant, uniform tomatoes that are perfectly tasty

tomato successPick one (or a couple) tomato varieties and get planting! Follow along below or check out how not to be a couch tomato with these tips.

Since tomatoes love the sun, they need a spot that gets at least 6 hours of sunlight a day.

Then, boost your soil. Mix in 3” of homemade compost or organic Garden Soil into the top 6” of your soil.

While you’re at it, mix in 9 cups of Espoma’s Tomato-tone per 50 square feet. For single plants, use 3 tablespoons of Tomato-tone per plant.

An organic plant food like Tomato-tone provides tomatoes the nutrients they need to grow big and plump. Since this is a slow-release, organic fertilizer, Tomato-tone never forces rapid growth, which reduces tomato yield.

Now dig a hole larger than the tomatoes’ original container. Look at the plant tag to see how far apart each tomato plant should be.

Situate the plant in the hole so its lowest leaves are below the soil level. Go ahead and pinch those lower leaves off.

Then fill the hole with amended soil or Espoma’s Organic Garden Soil.

To set your tomatoes up for success, stake them now to increase air circulation and sunlight exposure.

You can support them with a tomato cage, trellis or container. Or hammer 6-8” stakes 1’ into the ground about 3-6” away from the plant. When tomatoes begin blooming, tie them to the stake.

Right now though, all they need is some water! For the next few days, water tomatoes generously. Then, give tomatoes about 2” of water around their base each week.

In addition to watering, feed your tomatoes an organic tomato food each month. Organically fertilizing tomatoes with Tomato-tone produces larger, plumper tomatoes all season.

In 3-5 weeks, add 2-3” of mulch to reduce water consumption.

It won’t be long now until you’re biting into the first, fresh tomato of the season!

Share this post if you LOVE growing tomatoes!
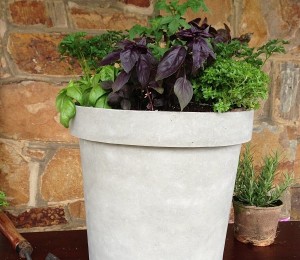
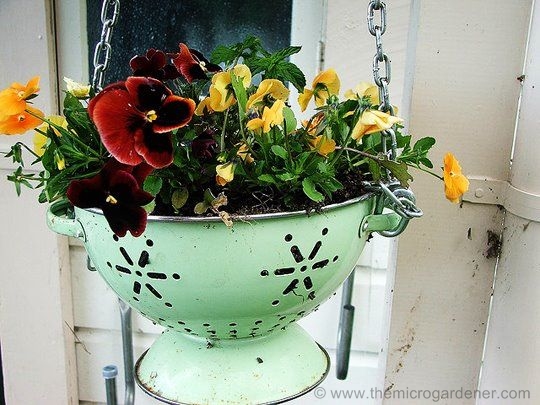
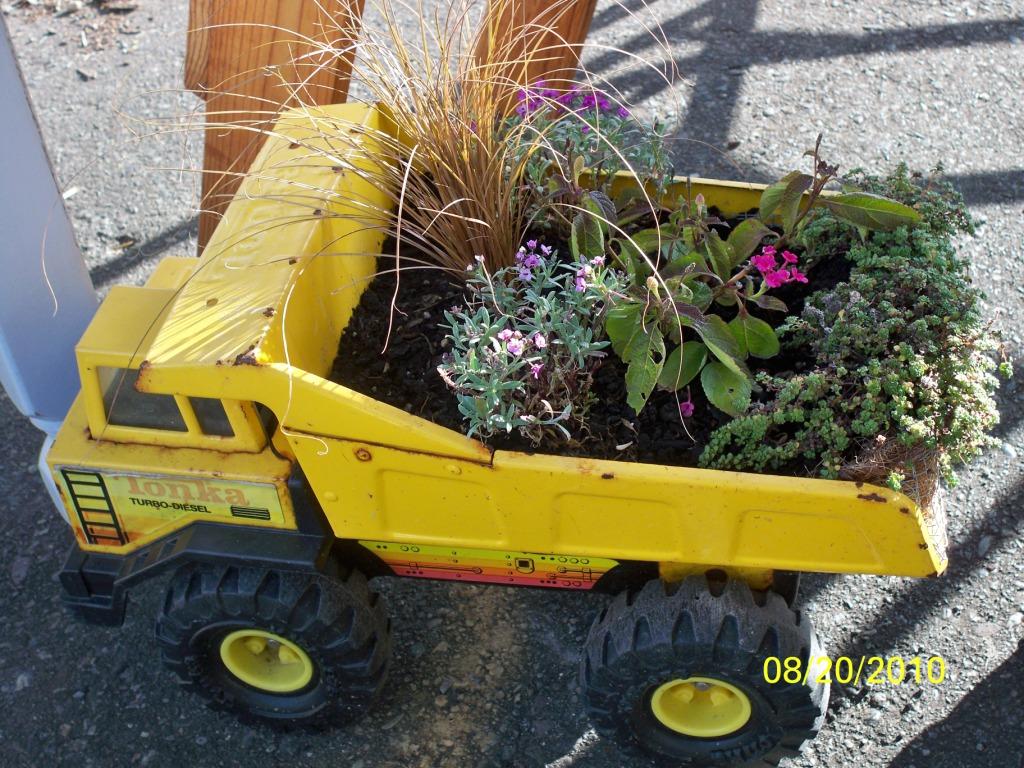
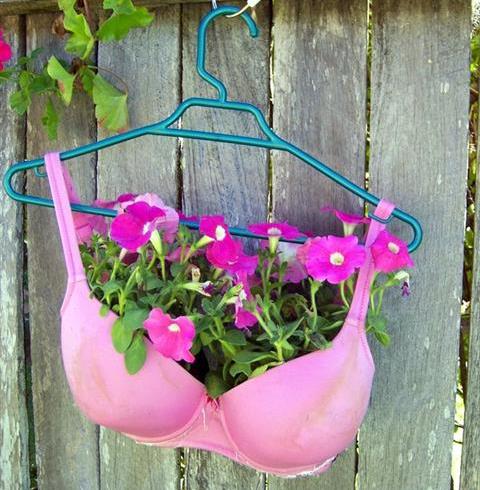
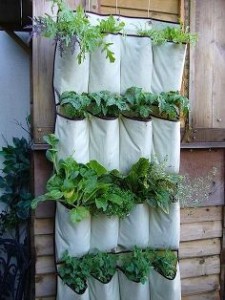
https://www.espoma.com/wp-content/uploads/2015/05/tomato-409404_1280.jpg 853 1280 espoma https://www.espoma.com/wp-content/uploads/2023/05/espoma-logo340w-1.png espoma2015-05-18 13:46:512019-05-07 10:08:45Guide to Growing Organic Tomatoes

Grow Fresh Herbs at Your Fingertips

May 14, 2015/in Fruits & Vegetables, Spring Gardening, Vegetable Gardening

Forget dried, stale or store-bought herbs. There’s a cheaper, closer and fresher alternative.

Plant an herb container garden near your kitchen or next to the grill.

Having fresh, organic herbs right where you cook makes them easier to incorporate into any meal.

With just a few snips, fresh herbs will invigorate your cooking. With just one bite, you’ll instantly taste the difference. Plus, you can use fresh herbs in unexpected ways, like flavoring olive oil, tea or water

Whether you garden in a large space or a small apartment, an herb container garden is convenient and delicious!

All you need to cook up your next great dish is a sunny spot, a roomy container, the best organic potting mix and your favorite herbs.

First decide which (and how many) herbs to grow. Check old grocery lists or recipes to see which herbs you buy the most but especially spend the most money on. Choose those and grow some just for fun like relaxing lavender and lemon balm!

Herb
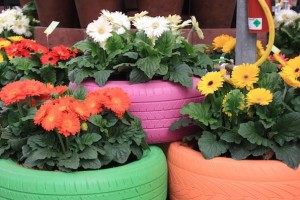
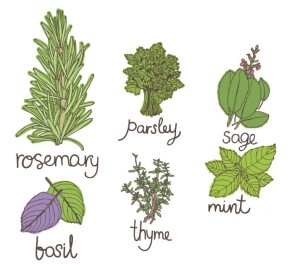
Most herbs will work in a container but the best herbs to plant in containers are: Basil, Mint, Rosemary, Thyme, Oregano, Cilantro, Parsley, Sage, Chives, Lavender, Tarragon, Lemon Verbena

Now pick a container with drainage holes. With container gardens, you can buy a modern or traditional container or get creative and use found objects.

Grouping herbs together that like the same amount of water, light and soil in the same container.

How many herbs you should plant in one container? There’s no hard and fast rule. Use your judgment and read the plant tags.

Go ahead and arrange containers on your deck, patio or any place that’s easy to access when you’re cooking. The area should get between 6-8 hours of sunlight a day.

Once your containers placed, fill half-way with a high-quality, organic potting mix such as Espoma’s Organic Potting Mix. Since you’ll be eating and serving them, organic potting soil is a must!

Now arrange the herbs to your liking! Try 3 or 4 different placements before planting. Read the plant tags to see how big the plants will get, too. And just like those class photos, the tallest go in the back!Container Garden

Once you’re happy with where the herbs are, fill the rest of the container with Espoma’s Organic Potting Mix. For a two gallon container, add 1 cup of Espoma’s Organic Bio-Tone Starter Plus to the top 4-6” of soil. For a five gallon container, add two cups.

Pat the soil to firm and remove air bubbles.

Feeding herbs with an organic fertilizer regularly promotes bigger plants, so you’ll have a bigger harvest. Bio-Tone Starter Plus is a microbe enhanced all natural plant food that will help your herbs to establish quickly.

Give your herb containers 1” of water a week.

Harvest herbs often! The more you pick, the more they’ll grow. Don’t you just love plants like that?

What herbs are you planting this year? Share your favorites by commenting below!

https://www.espoma.com/wp-content/uploads/2015/05/mint-521401_640.jpg 460 640 espoma https://www.espoma.com/wp-content/uploads/2023/05/espoma-logo340w-1.png espoma2015-05-14 08:35:362019-05-07 10:08:45Grow Fresh Herbs at Your Fingertips
Page 4 of 512345
Where to Buy

Get News & Updates

Recent Posts

  • VIDEO: How to Plant a Raised Bed Like a Pro with Farmer Nick
  • VIDEO: Transplanting Magnolias 🪴🌺 with Wyse Guide
  • VIDEO: How to Care for Roses 🌹 & Hydrangeas 🌸 with Garden Answer
  • VIDEO: How to Grow a Hummingbird Garden 🕊️🌿🌺 | Growing Joy with Maria
  • VIDEO: Boost Your Blooms: 🌸 Fertilizing Hydrangeas the Organic Way with Skye Hamilton

Tags

All-Purpose Potting Mix bio-tone Bio-tone Starter Bio-tone Starter Plus cactus and succulents Cactus Mix caring for houseplants Container Gardening DIY project Espoma espoma grown espoma organic Espoma Organics Espoma Video fall gardening flower garden flowers garden Garden Answer Gardening gardening tips gardens grow holly-tone houseplants Indoor! indoor gardening indoor plants Kaleb Wyse organic organic fertilizer Organic Gardening organic plant food Organic Potting Mix Outdoor Gardening Planting plants Potting Mix potting soil Spring Gardening succulents summer rayne oakes vegetable garden Vegetable Gardening Wyse Guide

Espoma. A Family Tradition Since 1929.

Espoma Organic logo
  • Espoma Dealer
  • Espoma Pro
  • Garden Club
  • Privacy Policy

Scroll to top