Espoma Organic
  • Products
    • Close
    • Product Line Overview
    • Plant food finder
    • Garden Fertilizers
    • Potting Soils
    • Liquid Fertilizers
    • Lawn Fertilizers
    • Single Ingredients
    • Conventional Plant Foods
    • Animal Care Products
  • Where to Buy
  • Our Story
    • Close
    • Our Story
    • Locations
    • Historical Timeline
    • Our Commitment
    • Directions
    • Solar
    • Join our Team
    • Espoma Brand Partners
  • Learn
    • Close
    • Espoma Blog
    • FAQ’s
    • Pocket Guide
    • Espoma Guides
    • Garden Clubs
    • Safe Paws Lawn
    • PRODUCT FACT SHEETS
    • Fertilizer Fundamentals
      • Close
      • Understanding Plant Nutrition
      • Reading Labels
      • Choosing the Right Type of Fertilizer
      • Terms & Definitions
    • Gardening Projects
    • Resource Links
  • Contact Us
  • Menu Menu

5 Veggies to Plant in August

August 12, 2020/in Fall Gardening, Fruits & Vegetables, Gardening, Vegetable Gardening

Have you thought ahead to your fall harvest yet? August is prime time to plant delicious and nutritious vegetables that will come to life in the cooler months. And there’s nothing better than being able to spice up your home-cooked dishes using your very own garden — no need to run to the supermarket! Read on to find out which veggies you should be planting right now.
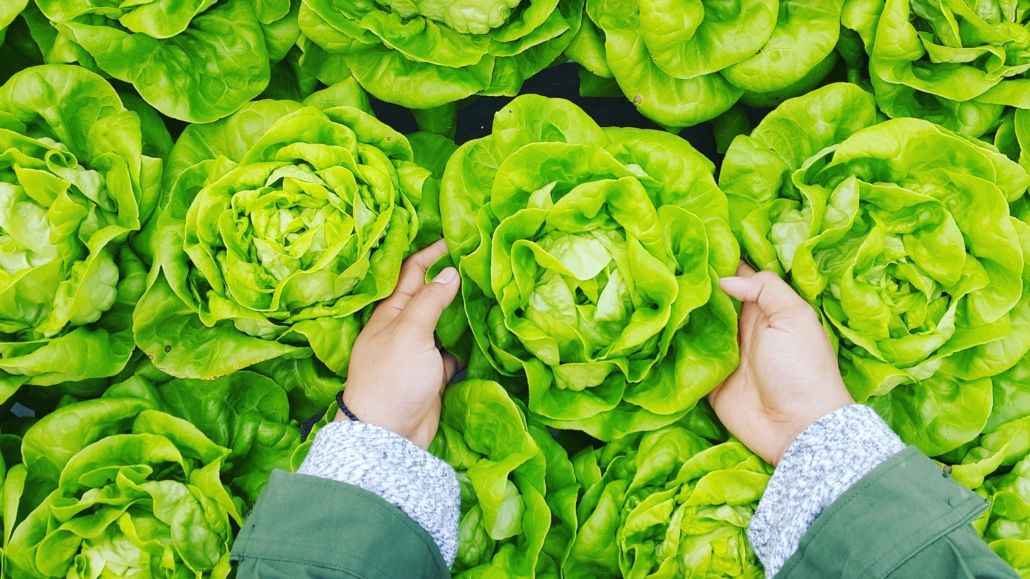
 

Lettuce

Did you know lettuce cannot be frozen, dried, pickled, or canned? That’s why you have to eat it fresh! Luckily, planting it right now means you’ll be able to enjoy it in just a few months. A fall harvest is ideal as lettuce’s sturdiness prevents any frost from destroying it. These leafy greens are a good source of vitamin C, calcium, iron, and copper — making it the perfect base for a healthy salad. Keep an eye out for the dark green leaves when harvesting as they’re even healthier than the light green ones. 

Spinach

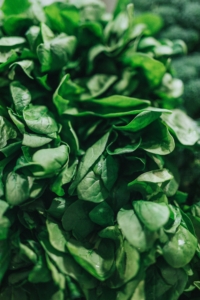
Spinach is well known for its low-calorie count and high levels of vitamin A, C, and iron — making it the perfect addition to that healthy salad. This veggie also gives you the highest turnover out of all the others. If collected in small quantities, you can keep harvesting them late until May! The best time to start planting them is now, at the tail end of summer.
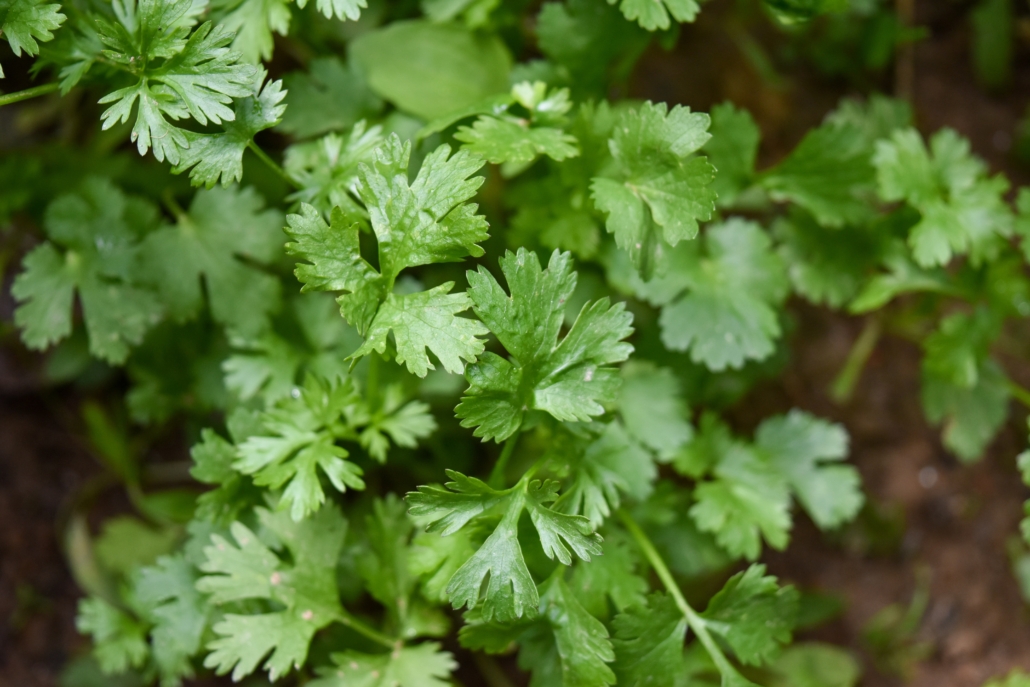
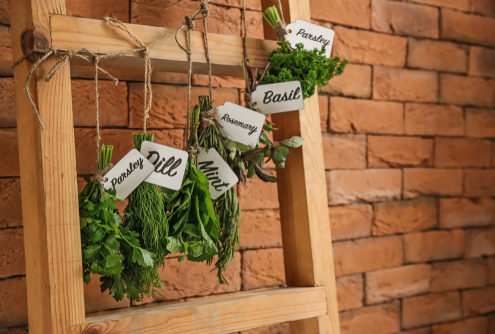
Parsley

Ready for another healthy addition to that salad we’re working on? Parsley is a rich source of Vitamin K, C, and A, and minerals like magnesium, potassium, iron, and calcium. It’s no wonder this veggie has been used in dishes since ancient Rome! It’s also believed to have anti-tumor, anti-bacterial, and antifungal properties. Plant your parsley now to make sure you can reap all these benefits in the fall.
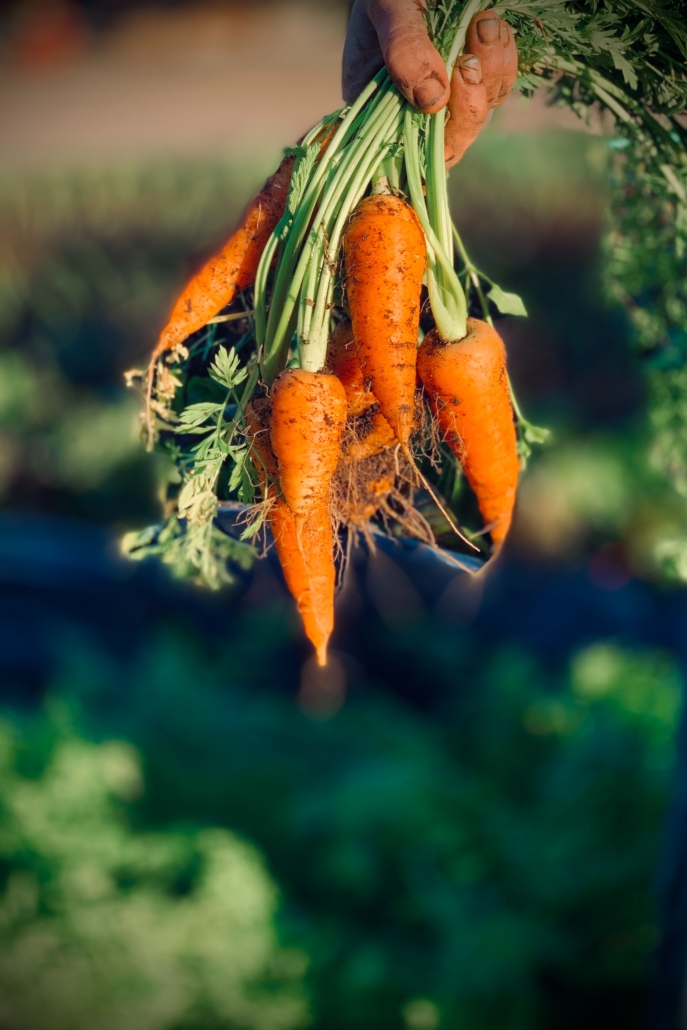
Carrots

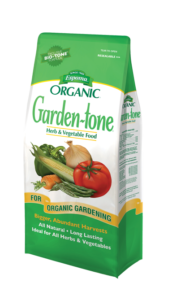
If you’re planning on sowing some veggies that aren’t leafy greens, carrots should definitely be your first choice! As this vegetable grows into the fall season, the cool weather turns the starch to sugar, making them extra delicious. This sweet flavor makes them the perfect side or snack — sauteed, roasted, or even raw! Keep in mind that this plant does need a little extra care compared to some of the others on this list, so be sure to use vegetable food like Garden-tone to provide them with the energy they need to grow.
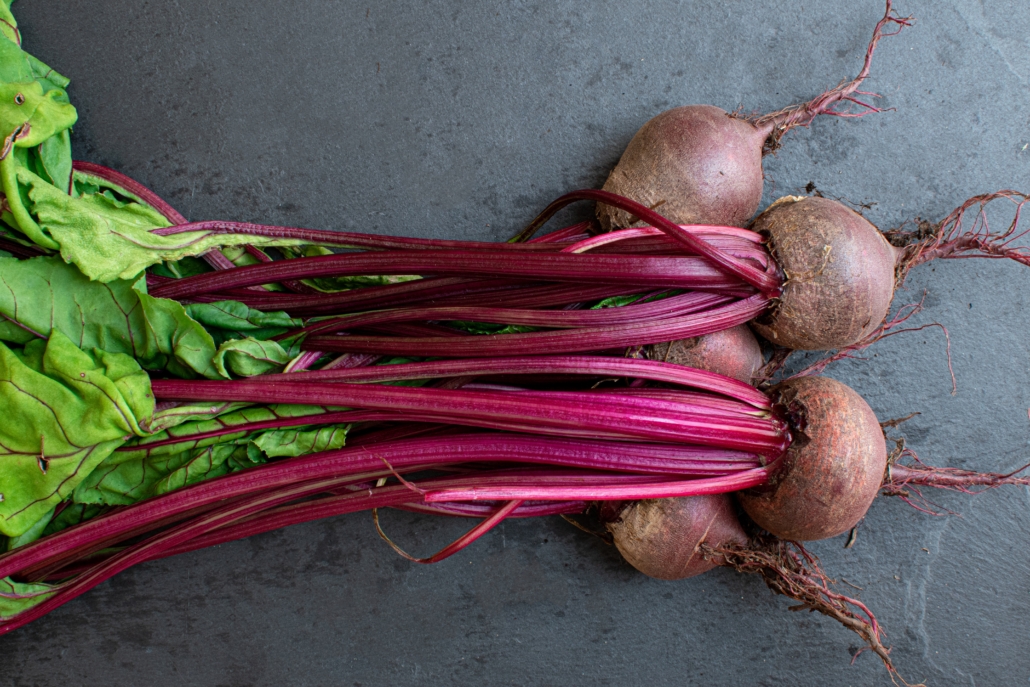
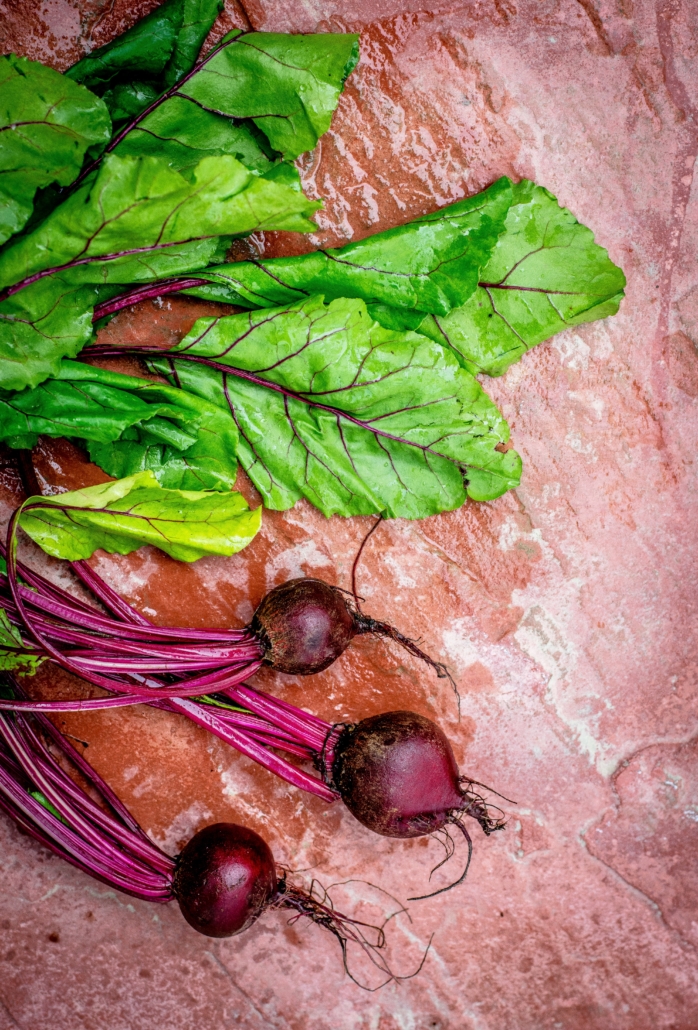
Beets

Last but not least, beets should definitely be on your August to-plant list. Did you know beets are edible from the tip of their green leaves to the bottom of their brown roots? They also help capture some hard-to-catch toxins and flush them out. These same antioxidants provide anti-inflammatory agents that provide a wide array of health benefits. Still not convinced? Since beet juice helps cleanse your liver, it’s thought that it can even help cure hangovers! If you want to make use of the entire plant and enjoy all these delicious benefits, make sure to sow the seeds now — about 8 weeks before the first frost.

*****

Just because summer is winding down, doesn’t mean it’s time to pack up your gardening supplies. August is the perfect time to plant some of your favorite vegetables! Cooking primarily with these veggies straight from your garden will give you some of the freshest and tastiest dishes. So get your family together, head outside, and get planting!
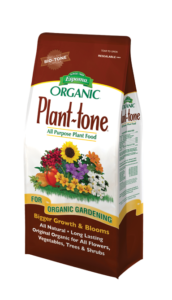
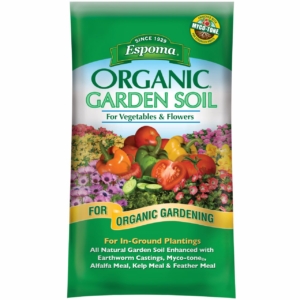
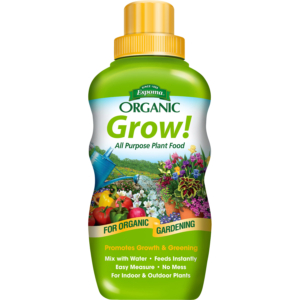
 

Featured Products:


Where to Buy


https://www.espoma.com/wp-content/uploads/2020/08/sophie-mikat-gCU9ucYYcSQ-unsplash-scaled.jpg 1707 2560 Danielle Kirschner https://www.espoma.com/wp-content/uploads/2023/05/espoma-logo340w-1.png Danielle Kirschner2020-08-12 15:50:192023-08-15 11:22:155 Veggies to Plant in August

Video: Tying up & Fertilizing Tomatoes with Bloom and Grow Radio!

August 4, 2020/in Bloom and Grow Radio, Espoma Videos, Fruits & Vegetables, Vegetable Gardening

Are your tomato plants growing out of control? Time to tie them up with Bloom and Grow Radio‘s Tying and Fertilizing Tomatoes video featuring Tomato-tone!

See our guide to growing tomatoes here

Featured Products:

Espoma Organic Tomato-tone
https://www.espoma.com/wp-content/uploads/2020/08/Screen-Shot-2020-08-04-at-2.39.27-PM.png 910 1766 Danielle Kirschner https://www.espoma.com/wp-content/uploads/2023/05/espoma-logo340w-1.png Danielle Kirschner2020-08-04 14:44:422024-09-03 15:26:04Video: Tying up & Fertilizing Tomatoes with Bloom and Grow Radio!

Video: Tomato Planting Tutorial with Bloom and Grow Radio

August 4, 2020/in Bloom and Grow Radio, Espoma Videos, Fruits & Vegetables - None, Vegetable Gardening

A little vitamin boost from Bio-tone Plus before amending your soil is key when planting up a fresh tomato path. More great tips from Bloom and Grow Radio in the full video!

See our guide to growing tomatoes here

Products Featured

This image has an empty alt attribute; its file name is biotone-starter.png
https://www.espoma.com/wp-content/uploads/2020/08/Screen-Shot-2020-08-04-at-2.15.04-PM.png 390 781 Danielle Kirschner https://www.espoma.com/wp-content/uploads/2023/05/espoma-logo340w-1.png Danielle Kirschner2020-08-04 14:33:552022-04-12 08:19:01Video: Tomato Planting Tutorial with Bloom and Grow Radio

How to Dry Herbs

March 13, 2019/in Vegetable Gardening

A simple, inexpensive way to enjoy your herbs beyond the growing season is to dry them!

When talking about herbs, we’re referring to the leaves of certain plants that are usually green in color. Spices, on the other hand, are the flowers, fruit, seeds, bark and roots of tropical plants and  are typically more pungent than herbs.

While the best flavors come from freshly picked herbs, however there is always an abundance that you cannot use in one season. Drying your herbs is the next best thing!

Dried herbs can be used for anything from flavoring recipes to making a fragrant fire starter.

When to Harvest:

We recommend growing organic herbs in Espoma Organic’s Potting Mix. To get the most flavor from herbs you need to harvest them at just the right time. The fullest flavor comes from herbs harvested before they flower. If you use a lot of freshly picked herbs, they may never flower. If that is the case, and you want to savor that flavor during the non-growing months, be sure to harvest them by the end of summer before the weather cools to get the most flavor out of them.

Focus on one type of herb at a time and remember to only cut back what you need. Try to avoid cutting back the entire plant, unless you are ready to replace it.

8 Steps to Harvesting and Drying Herbs:

  • Cut healthy branches from your herb plant.
  • Discard any damaged leaves as they have already lost their flavor. Yellowed leaves aren’t worth saving.
  • Gently shake the cut branches to remove insects and excess soil as you won’t be washing the stems.
  • Remove the bottom inch of the stem and the lower leaves to allow room for tying. Place the leaves aside – you can add them to the bag on their own.
  • Tie 5 or 6 stems together with either string or a rubber band. Make sure to check in on them as they dry as herbs shrink down and may slip out of the band.
  • Place herbs in a paper bag, stem side up. Tie the end of the bag closed, being sure not to squish herbs.
  • Poke a few holes in the bag for ventilation.
  • Hang the bag by the top in a warm, well ventilated room.

Once your herbs are dry enough to crumble, they are ready to be stored. Keep dried herbs in an air tight container, like a small canning jar or a zippered bag.

There you have it: freshly dried herbs to enjoy all year long!

Learn what to plant next with Laura from Garden Answer.

Products for Healthy Herbs


Where to Buy

https://www.espoma.com/wp-content/uploads/2019/03/herbs-snip.jpg 854 1280 Kevin Pyles https://www.espoma.com/wp-content/uploads/2023/05/espoma-logo340w-1.png Kevin Pyles2019-03-13 21:33:052024-09-07 08:16:22How to Dry Herbs

7 Tricks for Starting Tomato and Peppers Seeds Indoors

January 24, 2018/in Vegetable Gardening

Dreaming of juicy, flavorful tomatoes and ripe, spicy peppers? Grow them yourself in only a few months.

If you’re as excited about tomato season as we are, why not get started now?

The best way to get a head start on growing tomatoes is to start seeds indoors 4-6 weeks before the last spring frost date in your region. Whether you’re growing cherry tomatoes or hot peppers, visit your local garden center to pick up supplies and seeds.

Here’s how to start tomato and pepper seeds indoors:

  1. Test Seeds

If you saved tomato seeds from last year and stored the seeds properly, they should last for about four years. Pepper seeds will last about two to three years.

Check seeds for vitality before planting for a successful crop. Need seeds? Find them at your local garden center.

Test your seeds a few weeks before you’re ready to start. Place several seeds on a wet paper towel cover it with plastic and place it in a warm spot. If the seeds are viable, they should sprout within a week.

  1. Soak Seeds

Give your seeds a head-start. Simply soak seeds in warm water for 2-4 hours to soften. Read the instructions on the seed packet to ensure the optimal conditions for your seeds.

  1. Start Seeds

Gather supplies and fill seed trays to within ¼” of the top with Espoma’s Organic Seed Starting Mix. Follow instructions on the seed packets to see how deep and far apart to plant. Cover with soil, press down and lightly water.  Find out more about starting seeds here.

  1. Add Heat

Once the seeds are planted, it’s time to warm them up. Heat loving crops like tomatoes and peppers love the warm weather. While your seedlings are sprouting, store them on top of the fridge or in a warm place. An even better option is use a special heating mat. The warm temperatures help to speed up the growing process. Make sure to check seeds daily for moisture since the soil may dry out more quickly.

  1. Feed

Once the true leaves have developed, seeds will benefit from a nutrient boost. Add Espoma’s Organic Tomato! plant food to feed instantly.

  1. Thin Plants

Thinning is the process of removing weaker seedlings to allow more room for the stronger ones. It creates healthier plants that produce more. As seedlings grow and you see crowding beginning to happen, gradually thin plants to 4” apart by gently pulling out the smallest ones with your hands.

  1. Prepare for Transplant

Start hardening off plants once the last frost date has past. Place seedlings outdoors for seven to 10 days for a few hours each day. Once plants are ready for transplanting, gently remove plants from containers without damaging the roots. Plant in a prepared bed and mix in Espoma’s Bio-tone Starter Plus, to keep roots strong.  Once plants are established in the garden or container feed with Tomato! liquid or  Tomato-tone.

See our guide to growing tomatoes here


Where to Buy


https://www.espoma.com/wp-content/uploads/2017/05/tomato-varieties-heirlooms.jpg 3744 5616 espoma https://www.espoma.com/wp-content/uploads/2023/05/espoma-logo340w-1.png espoma2018-01-24 15:00:222022-04-12 08:53:227 Tricks for Starting Tomato and Peppers Seeds Indoors

Save Seeds for Sustainability

August 24, 2017/in Vegetable Gardening

Savvy gardeners are known for not letting anything go to waste. They are the compost kings and queens. They are smart about how they water. They use every inch of their garden to plant something amazing.

So when it comes to seeds, why would that be any different? Saving seeds for vegetables is simple and wallet-friendly. It allows gardeners to be sustainable within their own garden.

Saving Seeds Basics

Saving seeds is easy to do. Its three simple steps: harvest the seeds from the vegetables, dry the seeds and store the seeds. Of course there’s a little more to know, but it’s truly that straightforward.

Depending on the vegetable you want seeds from, there’s a little bit of washing to do too.  We have outlined three popular vegetables to get you started.

Peppers

Peppers are the easiest vegetables to get seeds from. When they have changed colors and are ready to eat, the seeds are ready as well.

Cut the peppers open, scoop out the seeds onto a ceramic or glass plate and lay them out to dry. Make sure the seeds are lying flat, not stacked on top of each other. Twice a day move the seeds around to ensure they aren’t sticking together. When they break, not bend, in your hand they are ready for storage.

Be sure to use ceramic or glass as the seeds will stick to paper.

Cucumbers

At the end of the season, pick off overly ripe cucumbers and bring them inside. Cut the cucumber open lengthwise and scoop out the seeds. To get the excess goop and coating off, rise and swirl seeds in a sieve gently. Spread them on wax paper to dry. Mix them occasionally to ensure even drying.  Store when the seeds feel rough but not slippery.

Lettuce

Lettuce plants need to flower before you can harvest their seeds. One lettuce plant can produce a lot of seeds, so you don’t need to worry about all of them. When the flower heads are dried out and have puffs of white, the seeds are ready to be harvested.

Pinch off the flower heads and collect them in a bag. Bring them to a table and break them open so the seeds fall out. Some of the flower may stick to the seed, it is fine. It won’t disrupt the germination of the next season. Allow the seeds to dry and store.

Storage

Airtight containers work best for all seeds described. If taken care of, these seeds can last a few years! Keep them at room temperature and they will be ready to go when planting season begins.

When next year rolls around, start your seeds indoors and use Espoma’s Bio-tone Starter Plus to grow bigger and better versions of your favorite plants.

https://www.espoma.com/wp-content/uploads/2017/08/dried-vegetable-seeds.jpg 667 1000 espoma https://www.espoma.com/wp-content/uploads/2023/05/espoma-logo340w-1.png espoma2017-08-24 09:00:562019-05-07 10:01:36Save Seeds for Sustainability

Don’t Stop Believing – Your Garden Reinvented!

July 25, 2017/in Vegetable Gardening

So you just finished harvesting all of your crops, you have tomatoes in every drawer in your kitchen and your garden is cut back. What now?

With enough time left before the first frost, you can still get another crop in the ground.

Whether you are a planner or a fly by the seat of your pants kind of gardener, succession planting is something to try.

What is Succession Planting?

Succession planting is a way of planting that maximizes your harvest. You plant one vegetable right as another finishes. There are a few ways to do this:

  1. Harvest Crop – Using the same plot for another set of vegetables after harvest. When a crop is finished, plant another, with a shorter maturity date, in its place. Leafy greens, followed by potatoes, are a great example of harvesting and replanting.
  2. Companion Crop – Plant two or more crops with varying maturity dates around each other. After the first crop is harvested, your garden will continue flourishing. Radishes next to cucumbers are great companions. Radishes will be harvested before the cucumbers start to produce too much shade.
  3. Staggered Crop – Plant the same crop every few weeks in order to not be bombarded by the entire crop at once. Tomatoes and peas are crops you’d want in small batches through the whole season.
  4. Same Crop – Plant the same crop with different maturity dates. Seed packets will display the days to maturity on the packets. Broccoli is an example crop with various maturity dates.

Now you know what succession planting is, here are a few steps to send you in the right direction.

5 Tips for Succession Planting

  1. Plan Accordingly – Growing based on maturity can be a little tricky if you aren’t planning for your region. Make sure to check the seed packet or plant tag to find out how long the plant will take to mature and what temperature it will grow best in. Make sure you have enough seeds to keep you going through the season.
  2. Plant Transplants – Speed up the growing process by starting seeds This will allow you to harvest and quickly plant to keep your garden at optimum level all the way up to those winter months. Or, purchase plants as seedlings from your local garden center.
  3. Feed Regularly – Add Espoma’s Garden Tone to the soil between plantings to keep the soil rich and crops thriving.
  4. Don’t Hesitate – As you see plants starting to reduce or cease harvest, don’t hesitate to pull them to make room for a new crop.
  5. Rotate Crops – Try not to plant the same vegetable in the same spot year after year. This causes the soil to lose essential nutrients and increases the likelihood for diseases to develop. Rotate crops every three years.

Succession planting can ensure your garden is in working production all season long. Learn what veggies it’s not too late to plant.

https://www.espoma.com/wp-content/uploads/2017/07/root-vegetables.jpg 2337 3500 espoma https://www.espoma.com/wp-content/uploads/2023/05/espoma-logo340w-1.png espoma2017-07-25 12:30:172019-05-07 10:01:37Don’t Stop Believing – Your Garden Reinvented!

5 Summer Edibles it’s not Too Late to Plant

June 27, 2017/in Vegetable Gardening

It’s never too late to start an edible garden. Different fruits and vegetables thrive in all types of conditions, so you’re bound to find the perfect fit for your garden, regardless of the season.

In fact, some summer favorites can be planted now for a delicious late summer or early fall harvest. Make sure to use Espoma’s Organic Garden-tone when growing veggies this summer.

Consider these options for late June – early July planting.

Beets

These little red veggies thrive in conditions with warm days and cooler nights, making them perfect for areas with a mild summer climate. They can also adapt to grow in cool weather, making your harvest last through the fall and winter. Beets prefer full sun when possible, but still produce leafy greens in the shade.

Aside from being delicious, beets also have a ton of nutritional benefits. With loads of vitamins A and C, iron, potassium, and calcium, beets can help protect you from heart cancer.

Cucumbers

Nothing says summer flavor like a delicious, crisp cucumber. Cucumbers serve as a perfect addition to any summer salad or cocktail, or they can stand on their own as a yummy snack. Cucumbers thrive in warm weather and that hot summer heat will give you delicious sprawling cucumbers in as little as 50 days.

Harvest cucumbers before they get too big to encourage continued growth.

Peas

Sweet, crisp and crunchy – what else could you want from a summer vegetable? Sugar snap peas need at least six hours of full sun every day and thrive in sunny spots. As sugar snap peas grow up, support them with a trellis or stake. They will be ready to harvest within 60-90 days of planting, which will give you a delicious late summer – early fall treat.


Zucchini is definitely a fan favorite when it comes to summer squash. This fast-growing vegetable will be ready to harvest within 45-55 days after sowing seeds. Zucchini tastes best when it measures around 4-6 inches. If it grows much bigger, the flavor will become bitter.

Be sure to give your zucchini plants plenty of room to grow as they often produce lots of vegetables very quickly.

Melons

If you live in a climate where the hot summer heat lasts well into the fall, try planting watermelons in your vegetable garden. Watermelons are extremely pest and disease resistant, making them perfect for an organic garden. Watermelons typically need 80-100 days of hot, humid weather to develop their delicious sweet taste, so only plant if you live in the right climate.

For those in climates a bit milder, try planting honeydew or cantaloupe. These melons prefer warm weather but don’t require the same amount of heat as watermelons.

*****

When Planting we recommend using  Espoma Organic Bio-tone Starter Plus to help produce large root systems very quickly. This will help ensure that new plantings get maximum water and nutrients from the soil to minimize transplant loss.


Featured Products:


Where to Buy


https://www.espoma.com/wp-content/uploads/2017/05/Beets.jpg 976 1280 espoma https://www.espoma.com/wp-content/uploads/2023/05/espoma-logo340w-1.png espoma2017-06-27 17:15:412023-06-27 13:22:235 Summer Edibles it’s not Too Late to Plant

Five Vegetables to Plant in the Shade

May 30, 2017/in Vegetable Gardening

Summer gardens filled with fresh fruits and lots of veggies are worth the work. And while gardeners with shady areas may be envious, they can still have plenty of success on their own vegetables.

After, the secret to good crops is really in the soil.

A shady space that gets as little as two hours of direct sunlight a day is still a prime location for a veggie garden filled with root or leafy vegetables. Plus, you’ll have a longer growing period for cool-season crops.

Read on for five vegetables that don’t need to full sun.


5 Vegetables that Grow in Shade:

  1. Beets

Easy to grow in almost any space, beets are a shade gardener’s best friend. Beets can be used for both their roots and their greens. Sow seeds directly in the ground in early spring for the best flavor.

  1. Bok Choy

This cold-weather vegetable can withstand cooler temps and shade. Use in soups, salads and stir-fries. Sow seeds directly in ground in both the fall and spring for two harvests.

  1. Kale

Cold-hardy and resilient, kale will grow for months until the weather gets too hot. This plant can be added to stir-fry, salads, omelets and smoothies for a healthy addition. Plant kale about two months before your first frost.

  1. Turnips

Eat turnips raw or cook and serve in soups, stir-fries or mashes. These plants thrive in cool temperatures and shade. Scatter turnip seeds in your garden two to four weeks before the last frost in spring or from late August to October.

  1. Garlic

Requiring almost no space, garlic is simple to grow. Break off cloves from a whole bulb and plant in the ground. To harvest big and flavorful bulbs next summer, plant garlic in the fall. Allow garlic to cure after harvesting in an airy, shady spot for two weeks.

Want to get kids involved in vegetable gardening? Learn more about kid-friendly gardening.

https://www.espoma.com/wp-content/uploads/2017/05/Beets.jpg 976 1280 espoma https://www.espoma.com/wp-content/uploads/2023/05/espoma-logo340w-1.png espoma2017-05-30 16:31:032019-05-07 10:02:02Five Vegetables to Plant in the Shade

The Best Heirloom Tomatoes to Grow

April 21, 2017/in Vegetable Gardening

Have you wondered why heirloom tomatoes taste so much better than those conventional ones from the store?

Conventional tomatoes have been bred for long shelf life, disease resistance, high yield and even for their looks! Some say all the flavor and taste has been bred out of them, too.

So whether you say to-may-to or to-mah-to, we’re here to help you choose the perfect heirloom tomato variety for you.

tomato-tone, growing tomatoes, organic gardening

 What is an Heirloom Tomato?

Heirloom tomatoes come from seeds that have been handed down from farmer to farmer for generations for their special characteristics and varieties must be 50 years old at least. Because of this, heirloom tomatoes have minimal disease resistance.

Heirloom varieties are open-pollinated–meaning that the seeds you collect will produce plants almost identical plants year after year. That’s key to their survival.

Many heirlooms have been passed down generation to generation. Seeds, once considered valuable property, traveled country to country in pockets or through letters. Varieties come from Central America, Russia, Italy, Japan, France, Germany and Kentucky. Here are a few of our favorites.

Best Heirloom Tomatoes to Grow


Pink Brandywine– This is hands-down the yummiest and most popular heirloom. Dating back to 1885, these tomatoes ripen late in the season, but delight with huge tomatoes with even bigger flavor. Plus, Pink Brandywine tomatoes grow well in containers.

  • Growth Type: Indeterminate
  • Time to Maturity: 85-100 days
  • Taste and Texture: Intense, full flavor with a rich, velvety texture
  • Light: Full sun
  • Plant Size: 4-9’
  • Spacing: 24-36” apart
  • Staking: Yes – Cage or stake

Black Cherry – This black, heirloom cherry tomato is somewhat disease resistant and easy to grow – even in containers. The truly striking color makes these cherry tomatoes an instant conversation (or kabob!) starter.

  • Growth Type: Indeterminate
  • Time to Maturity: 65-75 days
  • Taste and Texture: Sweet meets smoky flavor with a meaty texture
  • Light: Full sun
  • Plant Size: 5-8’
  • Spacing: 24-36”
  • Staking: Yes – Cage or stake

Cherokee Purple – Cherokee purple tomatoes may look eccentric, but boy, do they taste good!  Believed to be passed down from Cherokee Indians, this variety produces significantly more tomatoes than other heirlooms.

  • Growth Type: Indeterminate
  • Time to Maturity: 75-90 days
  • Taste and Texture: Sweet, juicy and savory with a thin skin
  • Light: Full sun
  • Plant Size: 4-9’
  • Spacing: 24-36”
  • Staking: Yes – Cage or stake

Striped German/Old German – This sizzling red and orange tomato looks like a work of art. Slice it open, and you’ll be delighted by its intricate texture and pattern. Also called “Old German,” this sunny tomato produces huge beefsteak tomatoes. It does need constant, proper care to thrive.

  • Growth Type: Indeterminate
  • Time to Maturity: 75-85 days
  • Taste and Texture: Incredibly juicy with a faintly tart flavor and meaty texture
  • Light: Full sun
  • Plant Size: 4-8’
  • Spacing: 24-36”
  • Staking: Yes –  Cage or stake

Wapsipinicon Peach – Bright in color and flavor, these tiny, fuzzy yellow tomatoes make the perfect snack. Named for the Wapsipinicon River in Northeast Iowa around 1890, Wapsipinicon Peach tomatoes are resistant to rot and field blight. Plus, they are quite prolific!

  • Growth Type: Indeterminate
  • Time to Maturity: 75-80 days
  • Taste and Texture: Sweet flavor with little acidity and fuzzy, thin skin
  • Light: Full sun
  • Plant Size: 4’
  • Spacing: 24-36”
  • Staking: Recommended – Cage or stake

Why Should I Grow Heirlooms?

We believe the flavor of heirlooms is so superior that no garden would be complete without them. Try a variety this year, and we’re sure you will agree. You will be tasting a little bit of history all summer long.

When you’re organic gardening, be sure to feed tomatoes lots of Tomato-tone during the growing season.  

And if you’re looking for more info on tomatoes, such as easy tomatoes to grow, hybrid tomatoes or non-red tomatoes, please visit our Organic Tomato Gardening Guide for more tips and tricks.

Download as PDF

Tomato_info

Download as PDF
https://www.espoma.com/wp-content/uploads/2016/02/grow-heirloom-tomatoes.jpg 470 700 Jill Fox https://www.espoma.com/wp-content/uploads/2023/05/espoma-logo340w-1.png Jill Fox2017-04-21 13:02:382024-09-01 21:03:49The Best Heirloom Tomatoes to Grow
Page 2 of 512345
Where to Buy

Get News & Updates

Recent Posts

  • VIDEO: How to Plant a Raised Bed Like a Pro with Farmer Nick
  • VIDEO: Transplanting Magnolias 🪴🌺 with Wyse Guide
  • VIDEO: How to Care for Roses 🌹 & Hydrangeas 🌸 with Garden Answer
  • VIDEO: How to Grow a Hummingbird Garden 🕊️🌿🌺 | Growing Joy with Maria
  • VIDEO: Boost Your Blooms: 🌸 Fertilizing Hydrangeas the Organic Way with Skye Hamilton

Tags

All-Purpose Potting Mix bio-tone Bio-tone Starter Bio-tone Starter Plus cactus and succulents Cactus Mix caring for houseplants Container Gardening DIY project Espoma espoma grown espoma organic Espoma Organics Espoma Video fall gardening flower garden flowers garden Garden Answer Gardening gardening tips gardens grow holly-tone houseplants Indoor! indoor gardening indoor plants Kaleb Wyse organic organic fertilizer Organic Gardening organic plant food Organic Potting Mix Outdoor Gardening Planting plants Potting Mix potting soil Spring Gardening succulents summer rayne oakes vegetable garden Vegetable Gardening Wyse Guide

Espoma. A Family Tradition Since 1929.

Espoma Organic logo
  • Espoma Dealer
  • Espoma Pro
  • Garden Club
  • Privacy Policy

Scroll to top