Espoma Organic
  • Products
    • Close
    • Product Line Overview
    • Plant food finder
    • Garden Fertilizers
    • Potting Soils
    • Liquid Fertilizers
    • Lawn Fertilizers
    • Single Ingredients
    • Conventional Plant Foods
    • Animal Care Products
  • Where to Buy
  • Our Story
    • Close
    • Our Story
    • Locations
    • Historical Timeline
    • Our Commitment
    • Directions
    • Solar
    • Join our Team
    • Espoma Brand Partners
  • Learn
    • Close
    • Espoma Blog
    • FAQ’s
    • Pocket Guide
    • Espoma Guides
    • Garden Clubs
    • Safe Paws Lawn
    • PRODUCT FACT SHEETS
    • Fertilizer Fundamentals
      • Close
      • Understanding Plant Nutrition
      • Reading Labels
      • Choosing the Right Type of Fertilizer
      • Terms & Definitions
    • Gardening Projects
    • Resource Links
  • Contact Us
  • Menu Menu

How to Plant an Organic Vegetable Garden

April 30, 2015/in Vegetable Gardening

Want to always have fresh veggies on hand, taste juicy tomatoes and save $600 annually on grocery bills?

We thought so! Get all that and more by planting an organic vegetable garden.

The veggies will be the best you’ve ever had, hands down. And, you’ll feel incredibly empowered by growing your own food. When you plant and harvest your own vegetables, you know your food.

You can be confident you’re feeding your family the absolute best. No worrying about the freshness of the produce, or any applied pesticides. Your veggie garden will be organic from start to finish.

And you’ll slash your grocery bills. The average family spends $70 to make a vegetable garden and grows an estimated $600 worth of vegetables, according to the National Gardening Association. Think about all you could do this summer with that extra money.

The first step to creating a veggie garden like that is deciding what to grow.

To save the most, grow veggies that are expensive at the store —tomatoes, salad greens, herbs and onions, etc. Plus, plant what you love to eat!

Next, strengthen your soil. Improving soil creates big, healthy roots, which absorb more nutrients and water. Before planting, ensure success by performing a quick soil test.

Then, make sure your soil is jam-packed with the nutrients your veggies need, so they will always have something to eat.

An organic fertilizer like Espoma Organic Garden-tone, provides vegetables with nutrients they need to grow big and strong. When fed with an organic plant food regularly, you’ll have a bigger veggie crop than you ever thought possible.

Created for professionals, Garden-tone also helps improve the soil as it feeds the veggies.

So, when preparing your vegetable bed, use 3.5 pounds of Espoma Garden-tone per 50 square feet. Then, pair with either compost or Espoma Organic Garden Soil. Mix both into the top 4-5” of soil.

Once your soil is ready, plant either cool-season or warm-season crops depending on what your weather is like.

We know this winter and spring have been cold for many regions. If a hard frost is still possible, plant cool-season crops like broccoli, salad greens and herbs. If the threat of frost is gone, feel free to plant warm-season crops too, such as peppers, tomatoes and beans. Get the lowdown on frost dates here.

Now here comes the fun part – planting.

Remove plants from their containers. Dig a hole as deep and an inch wider than the container they were growing in. To see how far apart to plant them, check the plant tag!

Arrange them in the hole and fill with soil. Remove any pesky air pockets by pressing down on the soil.

All that’s left to do now is lightly water them since vegetables need about 1” of water a week.

In 7-10 days, feed your new veggies another helping of Garden-tone.

What’s the best (or most memorable) vegetable you’ve ever grown? Comment below to share your story.

https://www.espoma.com/wp-content/uploads/2015/04/How-to-Plant-an-Organic-Vegetable-Garden.jpg 853 1280 espoma https://www.espoma.com/wp-content/uploads/2023/05/espoma-logo340w-1.png espoma2015-04-30 07:49:032019-05-07 10:09:23How to Plant an Organic Vegetable Garden

The Secret to Growing Bigger Plants, Faster

March 31, 2015/in Vegetable Gardening

Drum roll please! The start of planting season is here!

After long weeks spent pouring over seed catalogs and admiring Pinterest gardens, it’s time to finally create the garden of your dreams.

If you started seeds a few weeks ago, it’s time to gradually move them outside. And if you didn’t, a trip to your local garden center awaits you.

So now that you’re ready, let’s plant your soon-to-be flourishing garden.

How to know if your garden is ready for planting:

To see if the ground is thawed and warm enough for planting, dig 3-4” deep. Grab a handful of soil and roll into a ball. If the soil won’t take shape, it’s too hard and dry for new plants.

If you can make a ball, drop it to the ground. If it breaks, your soil is ready. If the ball stays together, your soil is too wet, so try again in a few days.

Now comes the fun part, deciding what to plant!

Roses, snapdragons and pansies are some of our favorite flowers to plant in early spring. Plus, they add a pop of color when you need it most.

As far as veggies go; plant peas, spinach, kale, lettuce, broccoli, carrots and onions in early spring. Imagine how much you’ll save on groceries in the upcoming months!

Before you buy your new plants, check the plant tags to make sure you have enough space and sun.

Now time to plant:

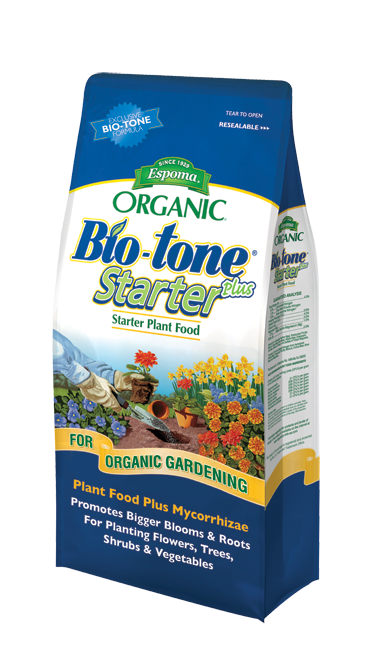
If planting a flower bed, mix 4 lbs. (12 cups) of Bio-tone Starter Plus, an organic plant food, per 100 square feet into the top 4-6” of soil.

Adding all-natural, organic plant food enhanced with bacteria is the secret to bigger, better plants of all kinds.

Bio-tone Starter Plus is like a protein shake for your plants. This organic plant food is jam-packed with microbes and mycorrhizae to provide an instant health boost.

Seriously, the proof is in the plants.

Bio tone Starter Plus gives plants everything they need to grow bigger blooms faster. So, you’ll lose fewer plants along the way. You can also add Bio tone when planting bulbs, container gardens, shrubs and even trees. Using this organic plant food on veggies and fruits is a-ok since it’s all natural.

Now, get digging! You can plant in individual holes or a garden bed. Either way, dig holes as deep as the containers the plants came in, and check the plant tag to see how far apart to plant.

Remove plants from containers; loosen roots and pop ‘em in the hole!

Then, replace the soil around the plants and water.

Finally, add the finishing touch of 2-3” mulch — if you haven’t already.

What are you planting this spring? Comment below or better yet, share a picture on our Facebook page!

https://www.espoma.com/wp-content/uploads/2015/03/3847323170_08bf293f0e_b.jpg 683 1024 espoma https://www.espoma.com/wp-content/uploads/2023/05/espoma-logo340w-1.png espoma2015-03-31 10:21:212019-05-07 10:09:24The Secret to Growing Bigger Plants, Faster

Wait! Before You Plant This Year, Test the Soil!

March 17, 2015/in Vegetable Gardening

Healthy Soil is the Secret to a Great Garden

Want to grow bigger tomatoes, taller sunflowers and all-around healthier plants this season?

The secret is in the soil. Read more

https://www.espoma.com/wp-content/uploads/2015/03/soil-test.jpg 500 800 espoma https://www.espoma.com/wp-content/uploads/2023/05/espoma-logo340w-1.png espoma2015-03-17 19:04:452019-05-07 10:09:24Wait! Before You Plant This Year, Test the Soil!

Make Landscapes Not Landfills with Compost

March 9, 2015/in Vegetable Gardening

Why Compost: Turn Food Scraps Into Garden Gold

Stop! Don’t throw out those leftover vegetables and coffee grinds. Mixing these kitchen food scraps with other ingredients turns ordinary garbage into black gold for the garden.

The secret to creating enriched, organic soil is compost. Compost gives the soil nutrient-rich materials and helps plants resist diseases and grow stronger. Plus composting food scraps keeps organic materials out of landfills and garbage disposals and puts them back into the earth. Best of all, it’s free!

Plus, you’ll make the planet cleaner and greener. The US tossed a whopping 131 billion pounds of food in 2010 alone, according to the U.S. Department of Agriculture.

At Espoma, we are always looking for natural solutions. When we founded our company in 1929, we transformed ordinary ingredients into an extraordinary product for your garden.

So, to make great compost, simply follow the recipe, just like when cooking. The best compost is 50 percent green material made of garden and food scraps and 50 percent brown material, such as paper, straw or dried leaves.

Add Espoma Organic Compost Starter to help speed the composting process, for rich, fertile compost. This 100% bio-organic mix contains microbes cultured for fast, healthy composting.

Toss your compost about every two weeks to help it decompose quicker. Make it even easier by investing in a compost tumbler. Trust us, it’s worth it!

And finally, make sure your compost is getting enough to drink. Squeeze a handful of compost – while wearing garden gloves of course! If water drips, it’s too wet, so add dry brown material. If no water dribbles but the compost crumbles when released, moisten with a bit of water. Or if your area often gets rains, make an indent in the top of the compost to collect rain water.

https://www.espoma.com/wp-content/uploads/2015/03/compost-espoma.jpg 500 800 espoma https://www.espoma.com/wp-content/uploads/2023/05/espoma-logo340w-1.png espoma2015-03-09 19:14:032019-05-07 10:09:25Make Landscapes Not Landfills with Compost

Spruce up to Jumpstart the Gardening Season

March 4, 2015/in Vegetable Gardening

Even though we still need cozy scarves and burly winter coats, we won’t for much longer. Our favorite time of year is almost here! We cannot wait to be outside, gardening, playing and basking in the sun in about two weeks.

Enough dreaming about the warmer days though, it’s time to start the yard and garden prep.

Although we’ve got green lawns on the mind all year long, even when they’re covered by 18” of snow, we’re eager to get outside and start prepping for our best lawn yet. Same for you?

Here are our professional tips for tackling early spring yard prep:

First, remove dead or diseased branches from trees and shrubs by cutting at a 45º angle with pruners.

Armed with your pruners, cut flowering perennials to 4-5” and trim ornamental grasses to 2-3”. Just like haircuts make hair grow faster and healthier, pruning plants does the same!

While walking around the yard, pick up fallen branches, spent annuals, lingering leaves and other natural debris. Doesn’t your yard already look better?

Then if the snow has melted, grab a rake and break up any matted, crunchy or discolored spots in the lawn to renew the area.

Finally, if the ground is thawed, scoop up a small handful of soil to test. Testing soil either with an at-home kit or with help from your extension agency is one of the most beneficial actions you can take.

Soil tests tell you what to add to get the perfect soil. Imagine racking your brain to figure out why your veggies are too small or your flowers look unhealthy. In reality, the problem could be your soil.

Take time to test and amend your soil needs — from soil acidifier or organic fertilizer. Cultivating organic, healthy soil now means your garden will deliver its absolute best later on. Come back to our blog later this month for more specific tips on adjusting your soil for that perfect lawn or plant.

Ah, the garden is gearing up for its comeback. Now, start planning what additions you’ll make to the garden this season.

https://www.espoma.com/wp-content/uploads/2015/03/prune-clean-up-espoma.jpg 500 800 espoma https://www.espoma.com/wp-content/uploads/2023/05/espoma-logo340w-1.png espoma2015-03-04 19:17:242019-05-07 10:09:25Spruce up to Jumpstart the Gardening Season

Start Seeds Indoors in 10 Easy Steps:

February 11, 2015/in Vegetable Gardening

Planting seeds inside is the first step toward Spring! Starting now means you’ll be planting seedlings outside in just 4 to 6 short weeks.

Plus, planting seeds is as easy and fun as can be. Gather your kids, family or friends to plant seeds with you for a “think Spring” get-together.

There’s nothing more refreshing or rewarding than crunching down on produce you’ve grown from seed.

How to Plant Seeds Inside:

1. Dream big

Choose your favorite high-quality seeds from a huge selection. Starting hard-to-find or expensive plants from seed will give you the biggest bang for your buck.

2. Stock up

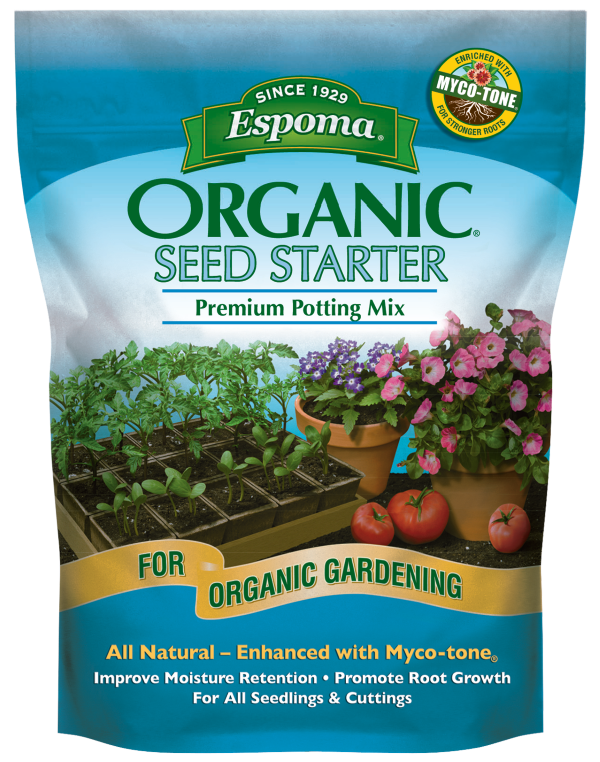
Get plastic trays with holes in the bottom or a seed-starting kit as well as an organic soil starter, such as Espoma’s Organic Seed Starter. An organic soil like this is made specifically to help your seedlings grow strong, sturdy roots in a healthy, safe environment.

3. Get plantin’

Fill seed trays to within ¼” of the top and lightly water. Then, follow seed packet instructions to see how deep and far apart to plant. Cover with soil, press down and label.

4. Water wisely

Water perfectly by placing tray in a larger pan of shallow water for a few seconds or up to a couple of minutes so the water seeps up from the bottom.

5. Find the right spot

Place seeds in a warm, safe place. To warm up a spot, place a space heater nearby or place trays on top of the refrigerator.

6. Take cover and wait

Loosely cover the tray with plastic wrap, or use the cover in your seed-starting kit. Check seeds daily for moisture.

7. Spot a sprout

Once you see sprouts, remove the cover and move seeds to a sunny, south-facing window that is 65-75°F. Then, turn the container a little each day to prevent leaning seeds.

8. Boost plants

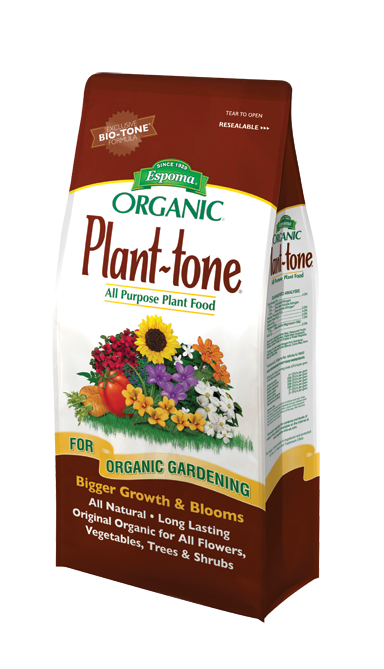
When leaves grow, add a bit of fertilizer such as Espoma’s Plant-tone. Plant-tone is an organic fertilizer, so it’s safe to use on edibles and helps plants grow bigger than ever before.

9. Strengthen seeds

Check seed packets to see when to plant after the last frost. Before planting you’ll want to harden off seedlings. Hardening off is a process that gets seeds used to the outdoors. Simply place your tray outside for a few hours a day for 7-10 days. Each day, increase their time outdoors and reduce watering.

10. Plant permanently

Once the last frost date has passed, you’re ready to plant! Gently remove plants from containers without damaging the roots. Plant in a prepared bed and mix in organic starter plant food to keep them strong, such as Bio-tone Starter Plus.

You did it! Spring is just a step away – and so are your crisp, garden-fresh veggies and fruits!

Tell us, what seeds are you starting this year?

Featured Products:


Where to Buy
https://www.espoma.com/wp-content/uploads/2016/01/arugula-762557_1920.jpg 1280 1920 espoma https://www.espoma.com/wp-content/uploads/2023/05/espoma-logo340w-1.png espoma2015-02-11 22:22:472021-02-16 11:35:31Start Seeds Indoors in 10 Easy Steps:
Page 5 of 512345
Where to Buy

Get News & Updates

Recent Posts

  • VIDEO: How to Plant a Raised Bed Like a Pro with Farmer Nick
  • VIDEO: Transplanting Magnolias 🪴🌺 with Wyse Guide
  • VIDEO: How to Care for Roses 🌹 & Hydrangeas 🌸 with Garden Answer
  • VIDEO: How to Grow a Hummingbird Garden 🕊️🌿🌺 | Growing Joy with Maria
  • VIDEO: Boost Your Blooms: 🌸 Fertilizing Hydrangeas the Organic Way with Skye Hamilton

Tags

All-Purpose Potting Mix bio-tone Bio-tone Starter Bio-tone Starter Plus cactus and succulents Cactus Mix caring for houseplants Container Gardening DIY project Espoma espoma grown espoma organic Espoma Organics Espoma Video fall gardening flower garden flowers garden Garden Answer Gardening gardening tips gardens grow holly-tone houseplants Indoor! indoor gardening indoor plants Kaleb Wyse organic organic fertilizer Organic Gardening organic plant food Organic Potting Mix Outdoor Gardening Planting plants Potting Mix potting soil Spring Gardening succulents summer rayne oakes vegetable garden Vegetable Gardening Wyse Guide

Espoma. A Family Tradition Since 1929.

Espoma Organic logo
  • Espoma Dealer
  • Espoma Pro
  • Garden Club
  • Privacy Policy

Scroll to top