Espoma Organic
  • Products
    • Close
    • Product Line Overview
    • Plant food finder
    • Garden Fertilizers
    • Potting Soils
    • Liquid Fertilizers
    • Lawn Fertilizers
    • Single Ingredients
    • Conventional Plant Foods
    • Animal Care Products
  • Where to Buy
  • Our Story
    • Close
    • Our Story
    • Locations
    • Historical Timeline
    • Our Commitment
    • Directions
    • Solar
    • Join our Team
    • Espoma Brand Partners
  • Learn
    • Close
    • Espoma Blog
    • FAQ’s
    • Pocket Guide
    • Espoma Guides
    • Garden Clubs
    • Safe Paws Lawn
    • PRODUCT FACT SHEETS
    • Fertilizer Fundamentals
      • Close
      • Understanding Plant Nutrition
      • Reading Labels
      • Choosing the Right Type of Fertilizer
      • Terms & Definitions
    • Gardening Projects
    • Resource Links
  • Contact Us
  • Menu Menu

Plant trees in the right place to slash energy bills

August 28, 2019/in Trees & Shrubs

Trees give us a lot of bang for their bark — paying us back in major, quantifiable ways. In fact, planting a tree is one of the best financial investments a homeowner can make. Yes!  Money does grow on trees. A single large tree can save hundreds on energy bills each year and add thousands to the property value of a house. 

Planting trees to reduce heating and cooling costs can pay off quickly. The American Power Association estimates that effective landscaping can reduce a home cooling bill by as much as 50 percent a year. In fact, areas without cooling shade trees can become “heat islands” with temperatures reaching 12 degrees higher than surrounding areas. And with the heat wave we experienced in July, any reduction helps!

Plant trees on the north and northwest sides of your property to create a wall against cold winter winds and shade your house during hot summer days.

Besides saving you dough, trees and forests are vital in cleaning the air. Trees intercept and absorb pollutants such as carbon monoxide, sulfur dioxide and nitrogen dioxide. A mature, leafy tree can produce as much oxygen in a season as 10 people inhale in a year.

Ready to plant? Here’s what to do?

  1. Identify the right tree for your property. Decide if you want an evergreen tree or a deciduous tree. Evergreens keep their leaves year round, while deciduous drop them in autumn and bud out again in the spring. If you want privacy or year-round interest, opt for an evergreen such as Leyland cypress, Douglas fir or white spruce. Be sure the tree is compatible with your cold-hardiness zone. Visit your local garden center to find out more about which trees would be best for your yard.
  2. Find the right spot. Locate all underground utilities before digging and look up to see if there are any potential hazards like wires that could interfere with growth in the future.  Take into consideration how close you are planting to driveways, walkways and other permanent structures as well.
  3. Go Shopping. Choose larger, more mature trees. Small trees take years to grow tall enough to provide adequate shade.
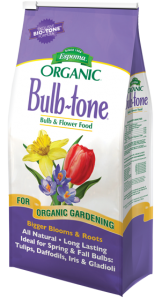
  4. Start digging. Dig a hole 3-4 times as wide, but no deeper than the container. Fill the hole with water and let it drain. Add Espoma’s Bio-tone Starter Plus to the hole to give your new tree the ingredients it needs to develop strong roots.
  5. Ready to plant. Gently loosen roots, being careful not to damage. Set the plant in the hole so the place where the trunk meets the roots is at the soil line-not too high and not too deep. Spread the roots out. Fill halfway with soil and lightly tamp to eliminate air pockets. Replace the remaining soil and tamp again.
  6. Water gently and deeply. Build a shallow saucer of soil with a 3” lip around the perimeter of the hole to contain water.
  7. Add mulch. Keep mulch away from the trunk and do not mound like a volcano, it can kill the tree or shrub.
  8. Water regularly the first year, even during winter warm spells if the soil isn’t frozen. Fertilize with Tree-tone in fall and spring to help the tree develop.

Want to know how much you’ll save with a new tree? Check out this calculator from the Arbor Day Foundation.

Espoma Products for Healthy Trees

Where to Buy
https://www.espoma.com/wp-content/uploads/2018/05/lawn-grass-stripes-home.jpg 666 1000 espoma https://www.espoma.com/wp-content/uploads/2023/05/espoma-logo340w-1.png espoma2019-08-28 15:34:512019-08-28 15:34:52Plant trees in the right place to slash energy bills

Tulip Time

August 22, 2019/in Flowers

It’s still summer — time for picnics, backyard barbeques and going to the beach. Kids get to stay up late to chase fireflies and make s’mores.  While these sunny days conjure images of suntan lotion, lemonade, this is the best time of year to plan for a colorful spring.

Photo courtesy of flowerbulbs.com

Order Early and Save

When the afternoon sun hits its zenith, grab your bulb catalogs or iPad and head for the air conditioning. Choosing now could save you money. You’ll also have the opportunity to get the best and newest varieties before they run out. You’ll thank yourself next spring.

Photo courtesy of flowerbulbs.com

The Easiest Way to Plant

Ask your local garden center when they expect to have the bulbs you’re looking to plant and then mark it on your calendar. Planting bulbs is easy, especially if you have an auger for your cordless drill. When spring hits, the first flowering bulbs will brighten your spirits immeasurably. No plane tickets to Holland required.

Photo courtesy of flowerbulbs.com

Is Your Style Contemporary or Traditional?

Flowerbulbs.com is a great website for all things related to growing bulbs. They don’t sell bulbs, you’ll want to go to your local garden center for those, the site is all about inspiration. They have information about deer resistant bulbs, fun combination recipes and great information on every kind of bulb. When you do plant this fall, don’t forget to grab a bag of Espoma’s organic Bulb-tone to make sure they are off to the best start.

Photo courtesy of flowerbulbs.com

Lasagna Planting

‘Lasagna Planting’ is a special way to plant spring flowering bulbs in large pots, in layers. The bulbs that flower the latest, like tulips are planted near the bottom of the pot. The bulbs that will flower first, like crocus are planted near the top. By planting several varieties, you’ll have flowers blooming for several months. Bulbs need good drainage and a quality potting soil like Espoma’s organic Potting Mix.

We hope you will enjoy this video and blog with more information on spring flowering bulbs.

Plant Fall Bulbs with Garden Answer

Your Fall Planted Bulb Questions Answered

Espoma Products

Where to Buy
https://www.espoma.com/wp-content/uploads/2019/08/vase-of-spring-flowering-bulbs.jpg 1280 919 espoma https://www.espoma.com/wp-content/uploads/2023/05/espoma-logo340w-1.png espoma2019-08-22 08:00:122019-08-13 10:16:10Tulip Time

How to Care for Colorful Calathea

August 14, 2019/in Indoor Gardening

With their dark green leaves, maroon undersides and geometric patterns, calathea plants are striking additions to any space.

Calathea, maranta, and other marantaceae plants open and close depending on the time of day, hence their nickname: prayer plant. 

At first glance, growing them may seem like a stretch for those of us with brown thumbs or low light, but many calathea are great for new plant parents. They combine the best of both worlds with their vibrant colors and tolerance of low-light conditions. And most are non-toxic to children and pets.

As a bonus, these plants are extremely forgiving. They could lose practically all leaves and still come back in full force.

Photo courtesy of Costa Farms

These plants, however, demand a little more from the average plant parent. If you’re looking for a challenge, try Calathea warsewiczii, Calathea zebrine and Calathea white fusion.

To help them thrive, give calathea the right conditions. Place in an area that receives low to bright indirect light. Keep  out of direct sun since it’ll bleach the leaves. Generally, the darker the foliage, the less light these plants need.

Calathea like humid environments, so surround them with other plants or place their pot over a tray of pebbles with some water. If your calathea’s leaf tips are browning, chances are plants need more humidity. Calathea enjoy moist soil—but not wet soil, so check every few days and water generously, draining excess water. Mist soil occasionally to increase moisture, but be sure not to directly mist leaves.

Calathea can be fussy about the kind of water they drink. They prefer filtered or dechlorinated water. If only the tips of leaves are brown, this is a sign your water may contain too many minerals or chemicals. Fill your watering can the night before and leave it out to dissipate the chlorine or try using filtered water instead.

Use Espoma’s organic potting soil when it’s time to repot your calathea.

In the event your calathea is not looking so hot, cut the leaves off to the bottom of the stem to encourage new growth. These plants are good at making a comeback and grow quickly. Feed plants regularly with Espoma’s liquid Indoor! fertilizer to promote new growth.

Ready for more low light houseplants?

Espoma Products for Coloful Calathea

Where to Buy

https://www.espoma.com/wp-content/uploads/2019/08/WaterWick-IMG_9955.jpg 3648 5472 espoma https://www.espoma.com/wp-content/uploads/2023/05/espoma-logo340w-1.png espoma2019-08-14 08:00:332019-08-13 10:11:11How to Care for Colorful Calathea

Grow Them, Cut Them, Smell Them, Share Them

August 8, 2019/in Flowers

Gardening has many rewards and one of the best might be picking your own bouquet from the garden. Starting with the earliest spring flowering bulbs and extending to late fall mums and asters, having fresh flowers in the house is a wonderful luxury. Plus, it’s a joy to share and bring flowers to friends and family.

If you have room for a cutting garden —create one! It doesn’t need to be big or fancy to be effective. Just remember to feed the plants to get the best flower power. Try Espoma’s organic Flower-tone or  liquid  Bloom! fertilizer to give plants the nutrients they need.

Creating a beautiful floral arrangement can be fun and stress-relieving. Here are some tips to get you started.

Select a Vase

Select a vase, mason jar, vintage watering can or whatever fun object suits your mood. Make sure it’s clean, dirty containers can contaminate plants with bacteria. Think about the colors and the height of the flower stems when making your choice.

Clean the Stems

Remove leaves that will be below the water’s surface to help keep water clean and clear. If you’re working with roses, cut off the thorns to avoid getting pricked. Many people choose to remove the stamens of lilies because the pollen can stain skin and clothing. In any case, give the stems a fresh cut at a 45-degree angle and place them in water right away.

Choose a Style

Monochromatic arrangements use different flowers that have the same color. Choose varying shapes and textures to keep it interesting. Try using complementary or contrasting colors. Google a color wheel for inspiration. Using just one kind of flower in a vase gives a pop of color with a clean look. The more flowers you use in this design style the more dramatic the arrangement will be. Use odd numbers of flowers for a natural look.

Height and Width

The height of your arrangement should be about one and a half times as tall as your vase for a classic design. Taller flowers are used in the center while smaller flowers and fillers like green foliage should be used around them to create a width that’s pleasing to you.

No Rules

The hottest trend right now is perhaps the easiest of all arrangement styles — it’s called a field bouquet. The rules pretty much all go out the window here. These are bouquets that have a variety of colors, and forms. They needn’t match per se. The design is free form. Sit down, take your time and keep turning the vase so you are seeing all sides of it. They aren’t necessarily symmetrical, they’re loose and playful. Let your creative self shine. When there are no rules, it can’t be wrong!

Here are a few of our blog posts we think you’ll might be interested in. 

Nature Never Goes out of Style – Transition into a Fall Cutting Garden

7 Flowers for a Sun-Kissed July Bouquet

Best Wildflowers for Your Wedding Bouquet

Espoma Products

Where to Buy
Bloom! Plant Food

FB

https://www.espoma.com/wp-content/uploads/2018/07/zinnia-cut-flower-bouquet.jpg 667 1000 espoma https://www.espoma.com/wp-content/uploads/2023/05/espoma-logo340w-1.png espoma2019-08-08 08:00:352019-07-31 15:12:26Grow Them, Cut Them, Smell Them, Share Them

How to Plant a Terrarium with Summer Rayne, Homestead Brooklyn

August 6, 2019/in Espoma Videos, Fruits & Vegetables - None, Indoor Gardening

Terrariums are beautiful, fun to make and easy to care for. Our favorite Brooklyn plant expert, Summer Rayne Oakes, guides us through the process step-by-step in this episode of Plant One on Me.

Summer covers which plants, tools, containers and soil mix you’ll need. Plus, how to water, the number one reason people kill plants.

If this terrarium seems too large to start with, go with a smaller version.

You don’t need a green thumb for this DIY project, promise.

Getting Started

First of all, choose a glass container. It’s easiest if the container is big enough to fit your hand inside. Next, choose plants that have the same kinds of light and water requirements. Check the plant tags to make sure they’ll be compatible. Generally speaking, terrariums are best in bright, indirect light. Full sun can be magnified by the glass and burn foliage. Base the container size on the number of plants you’d like to include.

Tools

Summer uses a set of aquarium tools for her terrariums. It’s a clever idea because they are extra-long. Having said that, it isn’t really necessary to buy this type of set when starting out. A long pair of chopsticks does a great job. She also uses a spoon and a narrow garden trowel. A watering can with a thin spout is handy to direct the water.

Soil Mix

The soil for terrariums needs to be a light, free draining mixture. Espoma’s organic Cactus Mix combined with perlite makes the perfect blend. If plants are small you can start with a drainage layer of an inch or so consisting of small rock and or charcoal. In this case, she didn’t use a drainage layer because the plants were relatively large and would have rooted into the drainage layer too quickly.

Planting

Add an inch or two of the soil mixture to your glass container. Play around with the plants until you have an idea of how you’d like them to look. Every plant won’t be blooming all of the time so choose ones with different textures and foliage to create the terrariums subtle beauty. Plant around the edge first, adding soil around the plants as you go. Plant the centerpiece last.

Watering

Terrariums create their own humidity which means they’ll need to be watered less frequently than houseplants in pots. Water sparingly and keep an eye on them. If plants seem to be wilting, water them. As time goes by, you’ll find the right watering schedule for your terrarium. Once every two weeks is about average.

Plant List

Here is a list of the plants Summer used in this video:

  • Monstera siltepcana – light and dark varieties
  • Peperomia trinervula
  • Hemigraphis/Strobilanthes alternate
  • Pilea asp.
  • Begonia conchifolia
  • Peperomia caperata

More Information

Here are links to other videos and blog posts we think you may find interesting:

How to Make an Easy Terrarium

DIY Terrarium Ideas

Everything Old Can be New Again with Terrariums

Where to Buy
https://www.espoma.com/wp-content/uploads/2019/08/Espoma-screenshot.png 1564 2872 espoma https://www.espoma.com/wp-content/uploads/2023/05/espoma-logo340w-1.png espoma2019-08-06 12:00:062019-08-06 12:01:23How to Plant a Terrarium with Summer Rayne, Homestead Brooklyn
Where to Buy

Get News & Updates

Recent Posts

  • VIDEO: How to Plant a Raised Bed Like a Pro with Farmer Nick
  • VIDEO: Transplanting Magnolias 🪴🌺 with Wyse Guide
  • VIDEO: How to Care for Roses 🌹 & Hydrangeas 🌸 with Garden Answer
  • VIDEO: How to Grow a Hummingbird Garden 🕊️🌿🌺 | Growing Joy with Maria
  • VIDEO: Boost Your Blooms: 🌸 Fertilizing Hydrangeas the Organic Way with Skye Hamilton

Tags

All-Purpose Potting Mix bio-tone Bio-tone Starter Bio-tone Starter Plus cactus and succulents Cactus Mix caring for houseplants Container Gardening DIY project Espoma espoma grown espoma organic Espoma Organics Espoma Video fall gardening flower garden flowers garden Garden Answer Gardening gardening tips gardens grow holly-tone houseplants Indoor! indoor gardening indoor plants Kaleb Wyse organic organic fertilizer Organic Gardening organic plant food Organic Potting Mix Outdoor Gardening Planting plants Potting Mix potting soil Spring Gardening succulents summer rayne oakes vegetable garden Vegetable Gardening Wyse Guide

Espoma. A Family Tradition Since 1929.

Espoma Organic logo
  • Espoma Dealer
  • Espoma Pro
  • Garden Club
  • Privacy Policy

Scroll to top