Espoma Organic
  • Products
    • Close
    • Product Line Overview
    • Plant food finder
    • Garden Fertilizers
    • Potting Soils
    • Liquid Fertilizers
    • Lawn Fertilizers
    • Single Ingredients
    • Conventional Plant Foods
    • Animal Care Products
  • Where to Buy
  • Our Story
    • Close
    • Our Story
    • Locations
    • Historical Timeline
    • Our Commitment
    • Directions
    • Solar
    • Join our Team
    • Espoma Brand Partners
  • Learn
    • Close
    • Espoma Blog
    • FAQ’s
    • Pocket Guide
    • Espoma Guides
    • Garden Clubs
    • Safe Paws Lawn
    • PRODUCT FACT SHEETS
    • Fertilizer Fundamentals
      • Close
      • Understanding Plant Nutrition
      • Reading Labels
      • Choosing the Right Type of Fertilizer
      • Terms & Definitions
    • Gardening Projects
    • Resource Links
  • Contact Us
  • Menu Menu

Bringing Plants Indoors for the Winter

October 31, 2018/in Espoma Videos

How to Overwinter Your Plants

Laura with Garden Answer is answering some commonly asked questions on how to get your plants and containers prepared to bring inside for the winter. She lays out her step-by-step instructions on how to keep your plants happy and healthy, even when they are inside.

Step 1 – Figure Out What You Want to Bring Inside

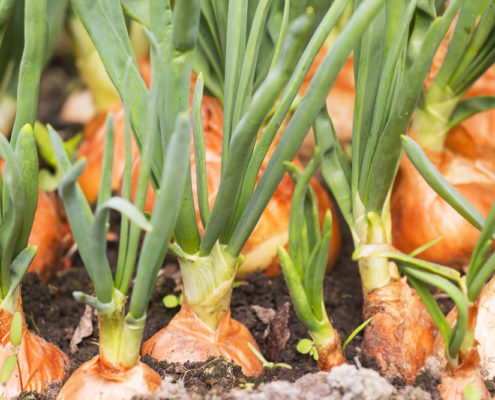
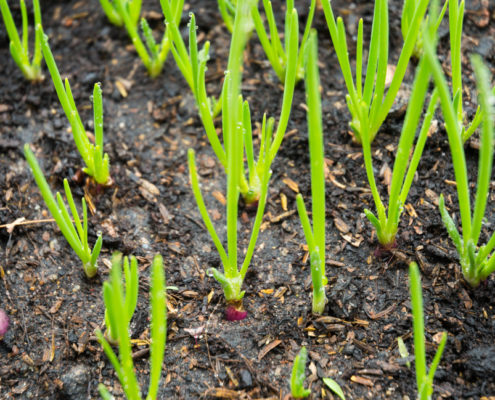
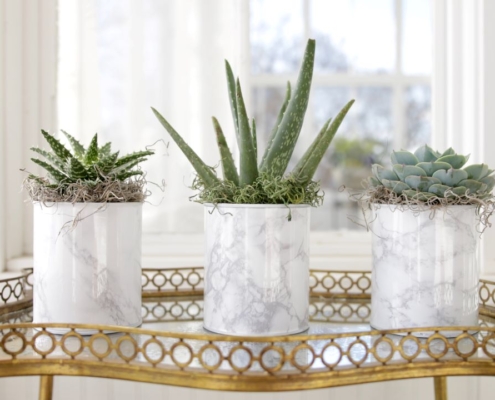
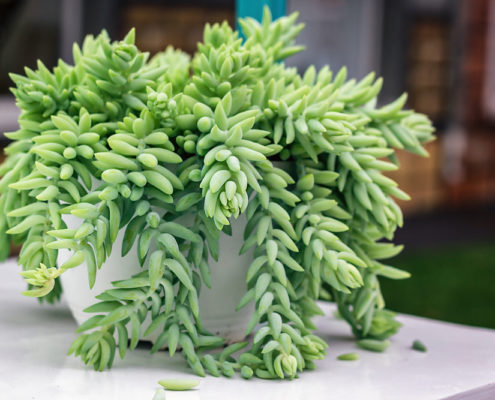
Walk around your garden and gather what you want to save. Think about your succulents, perennials and herbs out in the garden. Even, window boxes, displays and smaller containers can survive indoors with a little bit of help.

Once you have gathered everything you want to bring inside, think about the containers they are currently in. Will they work for inside your home? Will you dig something out of your garden that needs a new container? These questions will lead you to gather the right supplies.

Step 2 – Gather All Your Supplies in One Place

It’s easier to have one designated area to work. It will keep you from moving your supplies all over your garden and keep the mess contained.

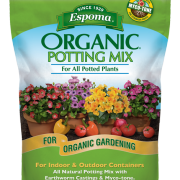
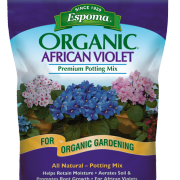
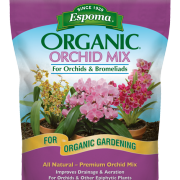
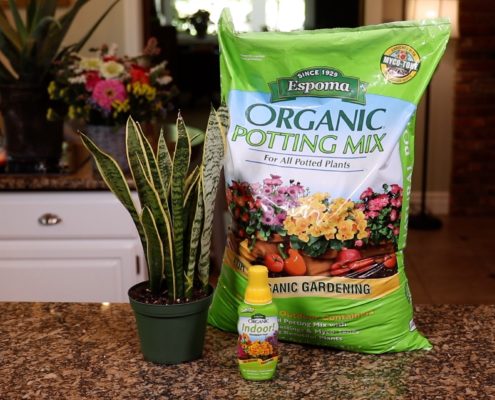
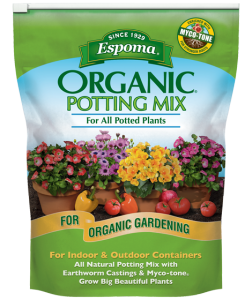
Tools you might need are a trowel, a shovel, snips, pruners, gloves and containers. If the containers were previously used, be sure to sanitize them with 1-part bleach to 10-parts water to rid of any insects or diseases that may be hiding. The last thing you will need is the right kind of soil.  Succulents and cactus, African violet and orchids and regular everyday plants all have different soil needs to thrive.

Step 3 – Groom and Trim Plants

Trim off any leggy branches or make any aesthetic cuts. Also, trim dead leaves and spent blooms as those are what diseases and insects use to find their way indoors.

Step 4 – Check for Insects

It’s best not to bring insects inside your home. Be sure to check the top of the soil, the top of leaves and the underside of leaves. Anything that is crawling around in there should stay outside. This will guarantee other houseplants will not be infected later on.

Step 5 – Refresh Your Soil

If you aren’t repotting, evenly scrape off the top inch or two, whatever will come up easily, and replace it with fresh soil. This will help ensure all insect eggs are out of the soil.

Step 6 – Repot If Necessary

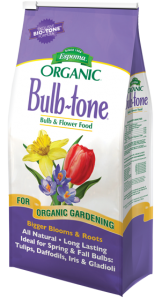
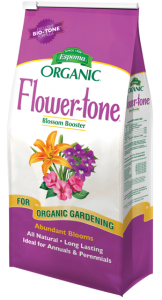
Now is the time to repot any containers if they need to go up a size or you want to match your interiors. This is also when you should pot anything that you have dug up from the garden. Remember, use the right kind of soil for your plants. Espoma has soil for every kind of plant.

Step 7 – Water with a Deep Soak

While this isn’t required to do before moving your plants into the house, it is highly recommended. While they can still drain outdoors, give your plants a big drink of water. It will help get them established in their new containers and release the nutrients in the fresh top soil.

Step 8 – Bring Your Plants Inside

Think about how much light each of these plants need and find the appropriate place to put them. If they like full light, find a window with bright light they will enjoy living in for a few months. It’s best to place a saucer underneath each of the pots to catch anything that may find its way out.

Espoma Organic Potting Soil Mix

Espoma Organic Orchid Mix


Where to Buy
https://www.espoma.com/wp-content/uploads/2018/10/IMG_1797.jpg 1604 2851 espoma https://www.espoma.com/wp-content/uploads/2023/05/espoma-logo340w-1.png espoma2018-10-31 13:30:532019-05-07 09:57:33Bringing Plants Indoors for the Winter

5 Flowers for Halloween

October 24, 2018/in Flowers

With Halloween just around the corner, it’s time to start decorating. While some enjoy   spooky and scary décor, others delight in the whimsical side of Halloween. Planting orange plants will provide some living décor for a Happy, and not so scary, Halloween!

These plants provide an instant festive flare and grow well in containers on your porch, deck or patio. Place them alongside pumpkins and other décor. You can bring some of these inside, to add to your own haunted house! Try a few of these for a fun, floral twist this Halloween:

5 Orange Plants for Halloween

Photo courtesy of Proven Winners

Bracteantha

These beautiful flowers will elevate your space with their pumpkin orange petals and bright yellow centers. While they are an annual, they work well for the fall season without having to commit all year long. Plant them in full sun to watch these foot-tall stems steal the show. Use Espoma’s Organic Flower-tone when planting to keep the vibrancy of these flowers through the Halloween holiday.

Marigolds

The bold color and wonderful scent set marigolds apart. Known for sparking strong emotions in people, this flower works well for the occasion. Since they are easy-to-grow and require full sun, you will see marigolds all season long. Plus, they start to bloom in the spring and will continue through the end of autumn – they are worth the work. They are hardy and will grow in zones 2-11.

Goldenrod

While this is not exactly the bright orange Halloween suggests, goldenrod is still one of the most visually stunning plants to put in your yard. It is debated often whether it is a weed or a wildflower, so if you are on the fence about it, plant it in a container or a garden bed to contain where it will go. It grows well in full sun and just about anywhere.

Dahlias

As a fan favorite, your neighbors will be checking out your garden every chance they get! This might be the easiest bloom to grow on the list. They are technically a ‘tuber’, and are best fed with  Espoma Organic Bulb-tone in the spring (once the ground is no longer frozen). They are available in all shapes and sizes. Be sure to pick out your favorite orange varieties to make a stunning fall appeal. In zones 8-10 simply plant and forget them (though you won’t forget the flowers!).  In cooler zones grow them as annuals or dig them up in the fall and store dry indoors.  You can divide them and replant the following spring.  Be sure to use some Bio-tone Starter Plus when planting!

Helenium

Sometimes known as sneezeweed, this vibrant orange bloom will not affect allergy sufferers. It will however, brighten up your space and attract all kinds of pollinators. They come in shades of orange, yellow, dark red and golden brown with a prominent center and stiff skirt-like petals. Plant them in full sun with a well-draining soil. Helenium grows well in zones 3-9.

Want to add more fall flair to your yard? Laura from Garden Answer shows us how to create a fall container.


Where to Buy
https://www.espoma.com/wp-content/uploads/2018/10/Helenium-1-1.jpg 667 1000 espoma https://www.espoma.com/wp-content/uploads/2023/05/espoma-logo340w-1.png espoma2018-10-24 17:02:292024-08-23 08:34:585 Flowers for Halloween

Plant Now, Harvest Early

October 18, 2018/in Fall Gardening

Crisp fall days are perfect for planting garlic, onions and shallots. Fall planting gives them a big jump-start. The rule of thumb is to plant the sets (individual bulbs) after the fall equinox. They’ll thrive in a sunny location with well-drained soil, rich in organic matter.  Apply Espoma’s Bio-tone Starter Plus, an organic fertilizer that contains beneficial bacteria and mycorrhizae to encourage strong root development. Your plants will put on roots in the fall but little or no top growth to survive the winter. Mulch the beds with a 4-6” layer of seedless straw, or leaves for winter protection and weed control. Plant additional bulbs in the spring for a double harvest.

Garlic

Garlic grows best in full sun with loose, fertile soil that is moist but well-drained. Mix Espoma Organic Potting Soil  into the planting bed to promote soil health. Plant your garlic cloves root side down, about 2” deep and 4-6” apart. Space the rows about 12” apart.  Apply Espoma’s Bio-tone Starter Plus and water deeply before applying a thick layer of mulch. Young garlic shoots will appear in early spring and be ready for harvest by mid-summer. Garlic comes in all shapes and sizes. Their flower stems can also be picked and used in cooking.

Onions

Onions prefer the same sort of soil as garlic, loose and fertile. It’s easiest to dig a trench 2-4” deep and set bulbs pointy side up, every 6” or so. Apply Espoma’s Organic Garden-tone to promote rooting and over all good health for the plants and soil. Water well if there is no rain in the forecast and apply a thick layer of mulch. Mulch will help keep the weeds down and the moisture in. The shoots will pop up in early spring. They are remarkably tolerant of frost.

Shallots

Plant shallots in full sun in loose, rich soil that is moist but well-drained. Plant the bulbs 1-2” deep and spaced about 6-8” apart. Like garlic, each shallot bulb will yield a cluster of new bulbs. Use Espoma’s Bio-tone Starter Plus, an organic fertilizer to feed the soil and the bulbs. Shallots are shallow rooted. Mulching will help maintain an evenly moist soil.

Products to Buy:


Where to Buy
https://www.espoma.com/wp-content/uploads/2018/10/onion-planting-.jpg 667 1000 espoma https://www.espoma.com/wp-content/uploads/2023/05/espoma-logo340w-1.png espoma2018-10-18 17:00:212019-05-07 09:57:34Plant Now, Harvest Early

Easy, Breezy Houseplants that Cool Your Home

October 12, 2018/in Indoor Gardening

While everyone loves being indoors in air conditioning on hot summer days, indoor spaces sometimes could use a good pop of plant life. Plus, Mother Nature has her own way of cooling things down. Try cooling your house down the eco-friendly way with houseplants.

Not only do our favorite houseplants look good, they also have humidifier properties and  clean the air too. If you live in dry regions, having houseplants with humidifying effects will help beat the heat.

Photo courtesy of Garden Answer

 Aloe Vera

Not only will you be able to treat sunburns all summer, but Aloe leaves have a high water content which release cool moisture into the air. Aloe is also known to remove toxins from the air. The plant prefers a lot of sun and well-draining soil, such as Espoma’s Organic Cactus Mix. Water approximately every three weeks to allow the soil to dry 1-2 inches between watering’s. Fertilize once per month with Espoma’s Cactus! Liquid fertilizer.

Bamboo Palm

The bamboo palm’s luscious leaves are excellent humidifiers and have air purifying qualities as well. The more mature the plant gets, the more moisture it releases. Bamboo Palms prefer well drained soil and pots. They are relatively low maintenance and only require watering when the soil surface feels dry. It is important not to over water Bamboo Palms. Set the pot in an area with bright, indirect light to get healthy growth.

Photo courtesy of Garden Answer

 Sansevieria

Sansevieria has a variety of names but is commonly known as “snake plant.” This snake-like plant has incredible air cooling and cleansing properties. Not to mention, it may be the easiest houseplant you can find. It only requires watering when the soil is completely dry. This can take up to six weeks depending on the size of the plant, humidity, light and temperature conditions in your home. They prefer indirect, medium-to-low light.

 Peace Lily

The Peace Lily is a home essential. Not only does it have stunning green foliage, but if given enough light, classic lily blooms will flower. They have air cleansing and cooling abilities making them perfect as part of your air-cooling house plant team. Peace lilies prefer medium to low light and well-drained soil. For quality potting soil and houseplant success, try Espoma’s Organic Potting Mix. The biggest danger with Peace Lilies, and most plants, is over watering. It is best to check the soil once per week. If the plant starts to wilt or the top 1” of the soil is dry, it is time to water. They only require fertilizing once or twice per year.

Areca Palm Tree

Like the other heat-battling, air-cleansing plants on this list, the Areca Palm tree is an excellent air humidifier and also removes toxins from the air. It requires a little more attention than the other plants on this list and will not survive neglect. They prefer lightly moist soil so be sure to check on your plant frequently, especially in warmer temperatures. It is best to fertilize frequently in the spring. For a lush, healthy tree try Espoma’s Indoor! Liquid Fertilizer. They are light-loving plants so near a non-drafty window would be the perfect spot.

Espoma Products for Houseplants:

Espoma Organic Potting Soil Mix


Where to Buy


https://www.espoma.com/wp-content/uploads/2018/01/aloe-vera-918662_1920.jpg 853 1280 espoma https://www.espoma.com/wp-content/uploads/2023/05/espoma-logo340w-1.png espoma2018-10-12 16:30:032024-08-21 18:47:42Easy, Breezy Houseplants that Cool Your Home

Succulents with Flowers – Beauty Meets Simplicity

October 9, 2018/in Indoor Gardening

Succulents can be the most intricate houseplants out there. They are available in a variety of colors, styles, shapes and sizes, perfect to match any houseplant lover’s wants and needs.

It is a common misconception that only cacti can flower. But that’s not true! There are succulents with beautiful flowers. We have picked out some amazing and unusual flowering succulents to showcase for  your collection.

If you are just getting started with succulents, check out our tips for beginners. An important tip to remember is succulents need well-draining, dry soil to thrive. Espoma’s Cactus Mix will help keep your plants healthy and happy.

4 Flowering Succulents You Need for Your Home:

Kalanchoes

This stunning succulent comes in a variety of vibrant and cheerful colors that will brighten up any home. The blooms on this succulent last almost all year long. Kalanchoes prefer bright indirect light, with only being in direct light about 2 hours a day. Water every two weeks when the top inch has dried out. Trim off the dead flowers where it meets the foliage to keep it looking its best.

Jade

Also known as the luckiest houseplant, this succulent will bloom tiny white flowers, though it doesn’t happen very often. Jade needs to be in an environment similar to its native growing habits in order to bloom – cool nights, bright days, and lack of water. Don’t give up on this plant so quickly, as it needs to be fully matured before it will flower.

Euphorbia Milii

Commonly known as Crown of Thorns for the thick base and long thorns, the Euphorbia Milii’s flowers come in small clusters. The blooms are usually a light red, but can be found in vibrant yellows and deep reds as well. It is a common houseplant, preferring bright light and dry soil.

Donkey Tail Plant

These trailing succulents cascade over their containers. With their grey-green tear-drop shaped leaves, the “donkey tails” can grow up to two feet long. Flowers with small blossoms in red, yellow or white will emerge in late summer. Place these sun-loving succulents near a sunny window and water weekly during spring and summer.

Watch as Laura gives a few tips to get you started on succulent care.


Espoma products for flowering succulents:


Where to Buy
https://www.espoma.com/wp-content/uploads/2017/02/shutterstock_crown-of-thorns.jpg 853 1280 espoma https://www.espoma.com/wp-content/uploads/2023/05/espoma-logo340w-1.png espoma2018-10-09 17:33:422024-10-21 13:40:30Succulents with Flowers – Beauty Meets Simplicity

Autumn Fairy Garden DIY (Extended Cut)

October 1, 2018/in Espoma Videos

Cooler temperatures, changing leaves, crisp apples and pumpkin picking are all signs that fall is here. Make fall come to life in your very own fairy garden!


Fairy gardens do better when in an area protected from the elements. When thinking about where to create or place your fairy garden, think about the environmental factors like wind and rain that can ruin the garden. When Laura is done creating her fairy garden, she will place it on her covered porch where it will be protected!

Before we begin, there are a few things to note:

  • There is no drainage in this miniature garden, so water lightly and only when the plants need it. Laura suggests using a syringe to get the right amount of water exactly where it’s needed.
  • If using shapecrete, it may still be soft after 30 minutes of curing, so don’t put too much weight on it. It will continue to cure for 24 hours.
  • This is a seasonal project, so before winter comes find a new home for the plants, either in a greenhouse or indoors, in order to preserve them.

Watch Laura dive into this fun autumn fairy garden! Here is a list of supplies she uses.

Materials Used:
Old Suitcase
Heavy Black Plastic
Espoma’s Organic Potting Mix
Small Plants
Tree Figurines with LED lights
Shapecrete
Native soil
Putka Pods (Look like Miniature Pumpkins)
Autumn Themed Fairy Figurines and Décor
Mulch
Embellishments

Plants Laura Used:
Tiny Tim Euphorbia
Irish Moss
Straw Flower
Creeping Jenny
Sempervivums

How to Create an Autumn Fairy Garden:

  1. Line an old suitcase with heavy plastic in order to preserve it and keep the soil in one place.
  2. Fill with Espoma’s Organic Potting Mix and trim the excess plastic from the container to make it look clean and precise.
  3. Add plants. Remember to work from back to front adding height and texture to the miniature landscape. Use plants that will stay small, so they don’t outgrow your garden.
  4. Add tree figurines. If they light up, keep them near the sides so the cords don’t get wet.
  5. Create a road or pathway for your fairies. Cut photo paper to make a guide where you want the road to go. Mix water with shapecrete and pour between the photo paper. Let dry 30 minutes before removing the paper. It’ll continue to cure for 24 hours.
  6. Now is the time to set the autumn scene and add in your fairy garden figurines. Laura used putka pods, miniature straw bales, apples in a barrel, a Farmer’s Market stand, a worker and a truck full of pumpkins! Feel free to add some mulch and native soil to give it an authentic field feel.
  7. Decorate the lid of your suitcase with fall themed embellishments. Laura added a bunting banner in fall colors.

Enjoy your new fairy garden!

Use Espoma’s organic potting mix in your fairy garden.

Espoma Organic Potting Soil Mix


Where to Buy
https://www.espoma.com/wp-content/uploads/2018/10/IMG_0177.jpg 3232 5759 espoma https://www.espoma.com/wp-content/uploads/2023/05/espoma-logo340w-1.png espoma2018-10-01 17:31:402024-08-30 15:10:13Autumn Fairy Garden DIY (Extended Cut)

Autumn Fairy Garden DIY

October 1, 2018/in Espoma Videos

Cooler temperatures, changing leaves, crisp apples and pumpkin picking are all signs that fall is here. Make fall come to life in your very own fairy garden!


Fairy gardens do better when in an area protected from the elements. When thinking about where to create or place your fairy garden, think about the environmental factors like wind and rain that can ruin the garden. When Laura is done creating her fairy garden, she will place it on her covered porch where it will be protected!

Before we begin, there are a few things to note:

  • There is no drainage in this miniature garden, so water lightly and only when the plants need it. Laura suggests using a syringe to get the right amount of water exactly where it’s needed.
  • If using shapecrete, it may still be soft after 30 minutes of curing, so don’t put too much weight on it. It will continue to cure for 24 hours.
  • This is a seasonal project, so before winter comes find a new home for the plants, either in a greenhouse or indoors, in order to preserve them.

Watch Laura dive into this fun autumn fairy garden! Here is a list of supplies she uses.

Materials Used:
Old Suitcase
Heavy Black Plastic
Espoma’s Organic Potting Mix
Small Plants
Tree Figurines with LED lights
Shapecrete
Native soil
Putka Pods (Look like Miniature Pumpkins)
Autumn Themed Fairy Figurines and Décor
Mulch
Embellishments

Plants Laura Used:
Tiny Tim Euphorbia
Irish Moss
Straw Flower
Creeping Jenny
Sempervivums

How to Create an Autumn Fairy Garden:

  1. Line an old suitcase with heavy plastic in order to preserve it and keep the soil in one place.
  2. Fill with Espoma’s Organic Potting Mix and trim the excess plastic from the container to make it look clean and precise.
  3. Add plants. Remember to work from back to front adding height and texture to the miniature landscape. Use plants that will stay small, so they don’t outgrow your garden.
  4. Add tree figurines. If they light up, keep them near the sides so the cords don’t get wet.
  5. Create a road or pathway for your fairies. Cut photo paper to make a guide where you want the road to go. Mix water with shapecrete and pour between the photo paper. Let dry 30 minutes before removing the paper. It’ll continue to cure for 24 hours.
  6. Now is the time to set the autumn scene and add in your fairy garden figurines. Laura used putka pods, miniature straw bales, apples in a barrel, a Farmer’s Market stand, a worker and a truck full of pumpkins! Feel free to add some mulch and native soil to give it an authentic field feel.
  7. Decorate the lid of your suitcase with fall themed embellishments. Laura added a bunting banner in fall colors.

Enjoy your new fairy garden!

Use Espoma’s organic potting mix in your fairy garden.

Espoma Organic Potting Soil Mix


Where to Buy
https://www.espoma.com/wp-content/uploads/2018/10/IMG_0167.jpg 3368 6000 espoma https://www.espoma.com/wp-content/uploads/2023/05/espoma-logo340w-1.png espoma2018-10-01 17:13:122019-05-07 09:57:34Autumn Fairy Garden DIY
Where to Buy

Get News & Updates

Recent Posts

  • VIDEO: How to Plant a Raised Bed Like a Pro with Farmer Nick
  • VIDEO: Transplanting Magnolias 🪴🌺 with Wyse Guide
  • VIDEO: How to Care for Roses 🌹 & Hydrangeas 🌸 with Garden Answer
  • VIDEO: How to Grow a Hummingbird Garden 🕊️🌿🌺 | Growing Joy with Maria
  • VIDEO: Boost Your Blooms: 🌸 Fertilizing Hydrangeas the Organic Way with Skye Hamilton

Tags

All-Purpose Potting Mix bio-tone Bio-tone Starter Bio-tone Starter Plus cactus and succulents Cactus Mix caring for houseplants Container Gardening DIY project Espoma espoma grown espoma organic Espoma Organics Espoma Video fall gardening flower garden flowers garden Garden Answer Gardening gardening tips gardens grow holly-tone houseplants Indoor! indoor gardening indoor plants Kaleb Wyse organic organic fertilizer Organic Gardening organic plant food Organic Potting Mix Outdoor Gardening Planting plants Potting Mix potting soil Spring Gardening succulents summer rayne oakes vegetable garden Vegetable Gardening Wyse Guide

Espoma. A Family Tradition Since 1929.

Espoma Organic logo
  • Espoma Dealer
  • Espoma Pro
  • Garden Club
  • Privacy Policy

Scroll to top