Espoma Organic
  • Products
    • Close
    • Product Line Overview
    • Plant food finder
    • Garden Fertilizers
    • Potting Soils
    • Liquid Fertilizers
    • Lawn Fertilizers
    • Single Ingredients
    • Conventional Plant Foods
    • Animal Care Products
  • Where to Buy
  • Our Story
    • Close
    • Our Story
    • Locations
    • Historical Timeline
    • Our Commitment
    • Directions
    • Solar
    • Join our Team
    • Espoma Brand Partners
  • Learn
    • Close
    • Espoma Blog
    • FAQ’s
    • Pocket Guide
    • Espoma Guides
    • Garden Clubs
    • Safe Paws Lawn
    • PRODUCT FACT SHEETS
    • Fertilizer Fundamentals
      • Close
      • Understanding Plant Nutrition
      • Reading Labels
      • Choosing the Right Type of Fertilizer
      • Terms & Definitions
    • Gardening Projects
    • Resource Links
  • Contact Us
  • Menu Menu

How to Plant an Organic Vegetable Garden

April 30, 2015/in Vegetable Gardening

Want to always have fresh veggies on hand, taste juicy tomatoes and save $600 annually on grocery bills?

We thought so! Get all that and more by planting an organic vegetable garden.

The veggies will be the best you’ve ever had, hands down. And, you’ll feel incredibly empowered by growing your own food. When you plant and harvest your own vegetables, you know your food.

You can be confident you’re feeding your family the absolute best. No worrying about the freshness of the produce, or any applied pesticides. Your veggie garden will be organic from start to finish.

And you’ll slash your grocery bills. The average family spends $70 to make a vegetable garden and grows an estimated $600 worth of vegetables, according to the National Gardening Association. Think about all you could do this summer with that extra money.

The first step to creating a veggie garden like that is deciding what to grow.

To save the most, grow veggies that are expensive at the store —tomatoes, salad greens, herbs and onions, etc. Plus, plant what you love to eat!

Next, strengthen your soil. Improving soil creates big, healthy roots, which absorb more nutrients and water. Before planting, ensure success by performing a quick soil test.

Then, make sure your soil is jam-packed with the nutrients your veggies need, so they will always have something to eat.

An organic fertilizer like Espoma Organic Garden-tone, provides vegetables with nutrients they need to grow big and strong. When fed with an organic plant food regularly, you’ll have a bigger veggie crop than you ever thought possible.

Created for professionals, Garden-tone also helps improve the soil as it feeds the veggies.

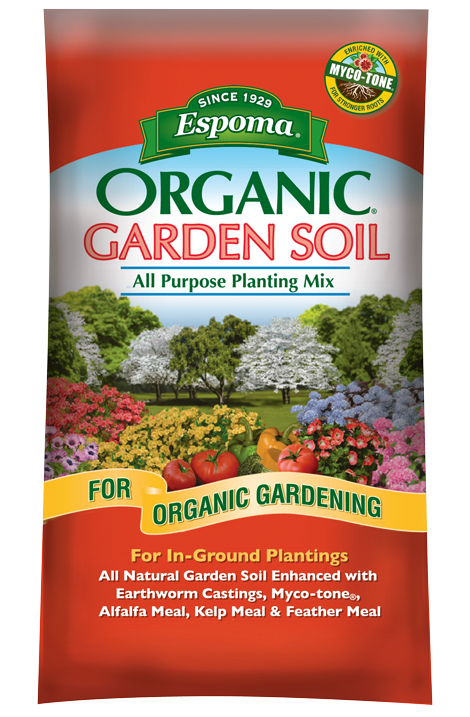
So, when preparing your vegetable bed, use 3.5 pounds of Espoma Garden-tone per 50 square feet. Then, pair with either compost or Espoma Organic Garden Soil. Mix both into the top 4-5” of soil.

Once your soil is ready, plant either cool-season or warm-season crops depending on what your weather is like.

We know this winter and spring have been cold for many regions. If a hard frost is still possible, plant cool-season crops like broccoli, salad greens and herbs. If the threat of frost is gone, feel free to plant warm-season crops too, such as peppers, tomatoes and beans. Get the lowdown on frost dates here.

Now here comes the fun part – planting.

Remove plants from their containers. Dig a hole as deep and an inch wider than the container they were growing in. To see how far apart to plant them, check the plant tag!

Arrange them in the hole and fill with soil. Remove any pesky air pockets by pressing down on the soil.

All that’s left to do now is lightly water them since vegetables need about 1” of water a week.

In 7-10 days, feed your new veggies another helping of Garden-tone.

What’s the best (or most memorable) vegetable you’ve ever grown? Comment below to share your story.

https://www.espoma.com/wp-content/uploads/2015/04/How-to-Plant-an-Organic-Vegetable-Garden.jpg 853 1280 espoma https://www.espoma.com/wp-content/uploads/2023/05/espoma-logo340w-1.png espoma2015-04-30 07:49:032019-05-07 10:09:23How to Plant an Organic Vegetable Garden

How to Know When to Feed Acid-Loving Plants

April 28, 2015/in Landscaping

Are your plants suffering from a long winter?

Popular plants such as azaleas, rhododendrons, blueberries, strawberries and heathers, are all acid-loving, meaning they need a soil pH of about 5.5.

Knowing whether your soil is acidic or not is the first step to healthier plants season after season.

If your leaves or needles take on a yellow-green hue, your soil is too alkaline is and this condition is called chlorotic. Plants become chlorotic when they cannot access important nutrients due to the soil’s high pH level. Plants that struggle for too long may lose leaves, branches and flowers. Left untreated for seasons, the plant could die.

Another sure sign of a high soil pH is if your hydrangea’s flowers are blooming pink.

However, it’s easy to correct the problem — simply lower the pH level and fertilize.

First, check your soil pH with a quick, DIY kit found at your local garden center. Grab a trowel of soil near your acid-loving plants and follow the kit’s directions.

Don’t worry. No matter what your pH is, fixing it can be easy.

If you have a soil pH higher than 5.5., add Espoma’s Organic Soil Acidifier to amend alkaline soil. If your soil has a number lower than 5.5., remedy with Garden Lime.

Save your coffee grounds, which are rich in nutrients and acidic, and sprinkle them lightly under your shrubs to help keep pH down.

Shredded leaves, sawdust, peat and pine needles also make great additions to your soil before planting. This decaying organic material will decrease the pH of the soil over time.

After you’ve identified and fixed your soil’s pH, it’s time to feed acid loving plants. Feeding them with Holly-tone in spring creates bigger blooms — and more of them. Feeding them again in the fall will ensure year-round health and beauty of your Acid-Loving plants.

Fertilize evergreens, like spruces, firs, hemlock and pines, to encourage a deep, healthy green color. Check out this video to learn more.

Fertilizing acid-loving plants only takes a few minutes, but creates bigger, better flowers and trees than ever before. You’ll be amazed by the results!

There are many plants that survive or thrive in low pH soils. Perhaps the most well-known acid-loving plant is the blueberry, which thrives in about 4.0 – 5.0 pH. However, strawberries and blackberries also favor acidic soil.

Find out if you have acid-loving plants here.

Each spring, begin your gardening with a simple pH test of your soil and plan your soil amendment around the results. Then, be sure to feed with Holly-tone spring and fall. Your rhodos, azaleas and camellias will thank you with bright-green leaves and huge, colorful blooms.

Help us share the knowledge. Tweet “Time to fertilize acid-loving evergreens and plants for bigger, better blooms and greenery.”


Featured in this post:

Espoma Holly-tone


Where to Buy
https://www.espoma.com/wp-content/uploads/2015/04/How-to-Know-When-to-Feed-Acid-Loving-Plants.jpg 960 1280 espoma https://www.espoma.com/wp-content/uploads/2023/05/espoma-logo340w-1.png espoma2015-04-28 07:50:082019-05-07 10:09:23How to Know When to Feed Acid-Loving Plants

Love Your Trees? Keep Them Healthy with an Organic Feeding

April 23, 2015/in Trees & Shrubs

If you start each day by sipping a cup of coffee and gazing at your trees through the window, then you know just how valuable trees are to your daily life. There is nothing quite like watching the evolution of seasons, from leaves budding, blossoming, changing color and eventually falling.

However, spring and summer offer spectacular viewing, just when our trees are in full flowering and blooming stages for the season.

Blooming trees are a sure sign of warmer weather and a shady escape from the sun. Plus, if they’re fruit trees, they offer that fresh homegrown taste of summer.

While your trees might look like they’re doing fine on their own, they need a bit of TLC from time to time.

Trees need proper food. When fed, shade trees grow larger and resist diseases better. Plus, fruit trees produce more fruit regularly when fertilized.

Reap the benefits and feed trees now before growth starts.

So, what plant food is right for your trees?

If you want less work (and who doesn’t?), use a slow release fertilizer to keep trees well fed until fall.

If you’re feeding fruit trees, an organic fertilizer is a must. After all, you and your family will be eating these homegrown fruits. The only way to get that piece of mind is to use a 100 percent organic fertilizer on fruit trees.

Organic Tree-tone from Espoma works wonders for all shade, fruit or ornamental trees. Since it’s made just for trees, this organic plant food provides the exact nutrients they need.

To know how much tree fertilizer to use, first measure your tree trunk all the way around, and at a height 4 feet above the ground. Divide that number by 3, and there’s your tree trunk diameter!

Fertilize New Trees When Planting:

Kudos for planting a tree! Trees help reduce the carbon footprint, increase home value, help prevent soil erosion and provide homes for our feathered friends.

To begin, dig a hole twice as wide and the same depth as the root ball. Then, arrange the tree at the same depth it was growing before and fill half the hole with compost or an organic peat moss.

For a trunk diameter up to 1.5 inches, use 4 pounds of Tree-tone. If the trunk is 2-3”, use 4 pounds of Tree-tone per inch. So, if your tree trunk is 2.5 inches, use 10 pounds of Tree-tone. And, for tree trunks over 3 inches, use 5 pounds of Espoma Tree-Tone per inch.

Now, mix in the organic Tree-Tone with the soil.

Pack soil to remove any air pockets, then water. Once the soil settles, fill the remainder of the hole with amended soil.

Next, evenly spread 2-3” of mulch around the tree’s drip line. Keep mulch far away from the tree trunk, and keep it even — not in a pile like a volcano.

Organically Feed Established Trees:

Do you have a small, medium or large sized tree? Small trees have up to 3” in trunk diameter, medium tree trunks are 3-6” and large trees have a diameter over 6”.

Feed Small and Medium Trees:

For small trees, use 3 pounds of Tree-tone. For medium trees, feed them 4 pounds of Tree-Tone per inch.

Sprinkle the organic tree food under and slightly beyond the branch spread.

Feed Large Trees with an Organic Fertilizer:

Large trees need food delivered right to their roots.

Under the tree’s outermost branches, make holes 2-3” in diameter, 12-18” deep and 2-3’ apart using an auger or iron bar.

Use 6 pounds of Tree-tone per inch of your tree’s diameter, and divide the organic tree food among the holes.

Then, fill holes with soil. Finish by watering.

What are your most loved trees in your yard? Comment below!

https://www.espoma.com/wp-content/uploads/2015/04/Love-Your-Trees-Keep-Them-Healthy-with-an-Organic-Feeding.jpg 1280 960 espoma https://www.espoma.com/wp-content/uploads/2023/05/espoma-logo340w-1.png espoma2015-04-23 07:51:412019-05-07 10:09:24Love Your Trees? Keep Them Healthy with an Organic Feeding

Get More Blooms on Roses with a Monthly Organic Feeding

April 21, 2015/in Flowers, Spring Gardening

Imagine growing a rose bush bursting with big, beautiful flowers. It’s easy.

All your roses need is a well-balanced meal. Roses are one of the hungriest plants, so they need to be fed often to perform their best.

You’ll instantly see the difference once you start regularly feeding your roses. Bigger, better and even more roses are on their way! Plus, your plants will look healthier since they’ll fight off disease more efficiently.

It’s amazing how much a healthy, organic meal can improve your roses.

Your roses are waking up now since spring is just beginning. They’ve made it through a long winter and they are starving! Feed them the most nutritious meal you can.

Espoma’s organic Rose-tone includes more nutrients than any other rose food. Most rose fertilizers contain three nutrients — nitrogen, phosphorus and potassium (N-P-K). Rose-tone goes far beyond that. This organic rose food contains 12 more micronutrients roses need, including iron, calcium and magnesium.

Feeding roses with Rose-tone is like providing a perfectly balanced meal. Your roses get all the nutrients they need to work as hard as they can.

Another benefit of organic rose foods, such as Rose-tone, is the gradual release of nutrients. Due to its slow-release formula, Rose-tone will never burn or leach plants. Plus, this is the only organic rose food that improves soil structure.

In beds, spread 6 pounds of per 100 square feet. For individual roses, use 1¼ cups of Rose-tone per plant.

Now, let’s boost your roses and soil with an organic feeding.

For established roses in beds, spread 6 pounds of Rose-tone per 100 square feet. For individual roses, use 1¼ cups of Rose-tone per plant.

Sprinkle the granular organic rose food around each plant out to the widest branch. This encourages your roses to stretch their feet and grow a little!

Then, scratch the food into the top 1” of soil.

If you’re planting new roses, add a mixture of peat moss and 3 cups Rose-tone to the planting hole.

Either way, feed your roses monthly from early spring to mid-September to keep them producing beautiful blooms.

Feeding roses with organic plant food is one of the best ways to get bigger, healthier roses. Share another trick to keep roses booming below.

https://www.espoma.com/wp-content/uploads/2015/04/roses-espoma2.jpg 872 873 espoma https://www.espoma.com/wp-content/uploads/2023/05/espoma-logo340w-1.png espoma2015-04-21 11:01:542019-05-07 10:09:24Get More Blooms on Roses with a Monthly Organic Feeding

Feed Boxwood with Organic Plant Food in Early Spring

April 21, 2015/in Trees & Shrubs

Evergreens — the name says it all. These plants and shrubs add color to your garden all year long, even in the dead of winter!

Though, we admit there’s one evergreen we love most: boxwoods.

Boxwood shrubs do it all. They’re super easy to care for, stay green all winter and are deer resistant.

These shrubs add instant definition, structure and privacy to outdoor spaces. Plus, boxwood shrubs morph into any shape when pruned. If an artful topiary isn’t for you though, they look just as beautiful when pruned slightly or left to grow free-form.

As easy as these shrubs are, there’s one BIG mistake people make when growing boxwood.

All too often, people believe that Holly-tone fertilizer is the feeding solution for boxwoods, just like they do with other evergreens. But that’s not the case.

While boxwood is part of the evergreen family, there’s one thing that makes them different. Most evergreens need to be fed Holly-tone, an organic fertilizer for acid-loving plants. But, boxwood — and arborvitaes — are evergreen shrubs that are not acid-loving plants. So, they need an all-purpose plant food.

Avoid the #1 mistake people make when growing boxwood. Fertilize your boxwood with an organic all-purpose plant food to keep them a healthy green. Plus, feeding these shrubs in early spring helps them fight off disease all season.

How to Feed Established Boxwood:

To see how much fertilizer your boxwood needs, measure the width of your boxwood with a tape measure.

For each foot, use 1 cup of Espoma Plant-tone. For example if your boxwood is 4’ wide, use 4 cups of organic plant food.

Then, sprinkle around the boxwood’s drip line, which is a circle formed around the shrub’s widest branch.

How to Feed New Boxwood:

If you want to add a border or line a path, boxwood is just what you’re looking for. Go ahead and get planting.

Boxwood grows best in zones 6-8. As always before planting, make sure the area you’d like to plant matches the plant’s likings. Read that plant tag! Most boxwood need full to partial sun and well-drained soil.

Once you’ve found the perfect spot and the perfect boxwood, it’s time to plant.

Dig a hole as deep and twice as wide as the root ball. Scoop a handful of soil to test, too. Boxwood needs a soil pH between 6 and 7. If your pH is too low, add Espoma Organic Garden Lime. If your soil pH is higher than 7, amend with Espoma Organic Soil Acidifier.

Now, loosen roots and position boxwood in the hole.

Replace 1/3 of the soil with compost or Espoma Organic All Purpose Garden Soil. And, mix in 1-2 cups of Organic Plant-tone. Adding an organic plant food now helps plants thrive in their new home.

Then, fill the rest of the hole with amended soil or Espoma Garden Soil.

Lightly water now, and continue watering once a week during spring and summer.

Finally, make the boxwood look right at home by adding 2-3” of mulch to control weeds and conserve water.

Boxwood transforms any area into a defined, stately space. Soon, these beautiful evergreens will even be dotted with sweet, white blooms.

What’s your favorite evergreen? Comment below to share!


Where to Buy


https://www.espoma.com/wp-content/uploads/2015/04/Feed-Boxwood-with-Organic-Plant-Food-in-Early-Spring.jpg 720 1280 espoma https://www.espoma.com/wp-content/uploads/2023/05/espoma-logo340w-1.png espoma2015-04-21 08:01:252021-01-20 13:40:12Feed Boxwood with Organic Plant Food in Early Spring

How to Turn Pink Hydrangeas Blue

April 13, 2015/in Landscaping

Picture the bluest hydrangea you’ve ever seen. It’s easy, isn’t it? This vibrant flower is as bright and bold as Elvis’ blue suede shoes.

So, how can you get a blue hydrangea? The secret is in the soil, and the power is in your hands.

Create a blue hydrangea simply by amending the soil. Most hydrangeas, except white ones, change color based on the pH or acidity levels of their soil.

And, it doesn’t stop there.

You can continually tweak the soil pH until you get exactly the shade of blue you’ve been dreaming of.

Transforming your hydrangeas to a jaw-dropping blue does take a bit of time. For especially big hydrangeas, the color conversion can take months. But, it is definitely worth the wait.

Creating breathtaking blue hydrangeas is extremely easy. All you need to do is amend your soil with Espoma Organic Soil Acidifier.

Other soil acidifiers contain Aluminum Sulfate, which can be incredibly harsh on plants, and even toxic to some, such as Rhododendrons. To keep your garden organic, all-natural and safe for people, pets and the planet, lower soil pH levels using an organic soil acidifier like Espoma Organic Soil Acidifier.

Before changing your pink hydrangeas to blue, check two things.

First, are there any other plants growing near your hydrangeas? Make sure they like acidic soil, too.

Finally, are your hydrangeas growing near a concrete walking path or patio? Concrete often contains lime, which can make it tough to turn hydrangeas blue.

Now let’s make magic happen!

To turn new hydrangeas blue, use 1¼ cups of Espoma Organic Soil Acidifier. Or to transform established hydrangeas into blue beauties, apply 2½ cups of Organic Soil Acidifier.

Spread evenly around the hydrangea out to its drip line, or the widest reaching branches.

Then, water well.

Repeat every 60 days until you’ve got the perfect color for you.

The intensity of blue hydrangeas is dependent on your soil’s pH levels. For deep blue blooms, aim for a soil pH of 4.5. For a more muted blue, you want your soil pH to be 5. Finally, if you want violet-blue hydrangea blossoms, your soil pH should be 5.5.

Perform a simple, DIY soil test if you want to discover your soil’s exact pH levels.

Craving hydrangeas super-saturated with blue color? Feed hydrangeas regularly with Espoma Holly-tone. Holly-tone fertilizer for acid loving plants also lowers your soil’s pH. Plus, a well-fed hydrangea will have bigger, better blooms.

Let’s get the word out about this gardening magic trick. Tweet if you’re going to magically turn hydrangeas from pink to blue!

Featured in this post:


Where to Buy
https://www.espoma.com/wp-content/uploads/2015/04/hydrangeas-385767_960_720.jpg 390 960 espoma https://www.espoma.com/wp-content/uploads/2023/05/espoma-logo340w-1.png espoma2015-04-13 07:57:092021-01-21 08:54:42How to Turn Pink Hydrangeas Blue

How to Plant Colorful Flowering Shrubs: Azaleas and Rhododendrons

April 7, 2015/in Landscaping, Trees & Shrubs

A yard without shrubs is like a completed puzzle, minus one piece. The look is almost perfect, but something is missing! Shrubs work wonders — especially ones with bold, colorful flowers. These easy to care for plants instantly fill in gaps in your garden landscape and look fabulous every season. Complete your garden by planting a shrub or two today! Azaleas and rhododendrons are some of the most popular flowering shrubs. Blooming from late spring to early summer, these shrubs thrive in almost any garden. Plus, they come in virtually every color of the rainbow — from bold pinks, purples, and reds to soft, muted yellows and whites. As an added bonus, hummingbirds and bees cannot get enough of azaleas and rhododendrons.

For Established Shrubs: Spring feeding helps develop new growth and the production of new flower buds. Sprinkle one cup of Holly-tone per foot of branch spread now. Holly-tone is long-lasting so you’ll only need to fertilize twice in a season. Don’t wait too long, or you risk encouraging green vegetative growth at the expense of flower bud development. Once now, and again in the fall will ensure a perfect Rhody!

For New Shrubs: Spring is the perfect time to plant so pick your favorite color and variety. Before buying, check the plant tag to see if you have enough space for a full-grown shrub. Azaleas and rhododendrons can range from 2 feet to more than 20 feet tall! If planting shrubs in a row, ensure you have enough space to plant 2 feet to 6 feet apart depending on how big your shrubs will get. Now, before you start digging, choose a spot for your shrub and envision the great impact these plants will have on your landscape! Both these flowering shrubs like to hang in the shade and do not grow well in full sunlight. So, make sure you’ve selected a perfectly shaded spot!

Before you start digging, plan for growth. If planting shrubs in a row, ensure you have enough space to plant 2-6’ apart depending on how big your shrubs will get. These flowering shrubs are so easy to care for because most of the work is done before planting. Keep azaleas and rhododendrons bursting with beautiful blooms by picking the right spot and ensuring you’ve got ideal soil for growing. Don’t forget to test the soil! These acid-loving shrubs need a soil pH of 4.5-5.5. If your soil test reveals a higher pH, your soil is alkaline. Solve the problem by amending with Espoma Organic Soil Acidifier.

Pink Flowers on bush

Once your soil is ready, it’s time to plant! Dig a hole as deep as the root ball and twice as wide. Then, remove the shrub from its original container, loosen the roots and dip in a bucket of water. Next, arrange the shrub in the hole, so the top of the root ball is slightly about the ground’s surface. Fill half the hole with compost, peat moss or humus, and mix in 1 cup Holly-tone fertilizer for better blooms. This organic plant food is specially crafted for acid loving plants, like azaleas and rhododendrons. Feeding new shrubs with an organic fertilizer now keeps them well-fed for months, spurs deep evergreen color and dynamic blooms. Fill half the hole with Espoma Organic All Purpose Garden Soil. Now finish planting your shrub by filling the hole with Espoma Organic All Purpose Garden Soil, and add 2-3” of mulch. Water now, and tomorrow, too.

Doesn’t your garden instantly look brighter? For more tips on caring for azaleas, rhododendrons or other acid-loving plants, click here. We’d love to see how a flowering shrub completed your garden. Share a before and after picture on our Facebook page!

*****

Featured Products: 

Where to Buy


https://www.espoma.com/wp-content/uploads/2015/04/blossom-1194065_1920.jpg 1303 1920 espoma https://www.espoma.com/wp-content/uploads/2023/05/espoma-logo340w-1.png espoma2015-04-07 09:56:172024-09-25 07:51:43How to Plant Colorful Flowering Shrubs: Azaleas and Rhododendrons

Feed Your Flower Bulbs Now with an Organic Fertilizer

April 6, 2015/in Flowers, Landscaping

Breathe it in! Spring has arrived and brought the first flowers of the year with it! After the white of winter, sunny daffodils and a rainbow of tulips are a welcome sight.

Flower bulbs are inexpensive, easy to plant, provide stunning cut flowers and can last for years when taken care of properly.

The secret to keep spring flowering bulbs producing year after year is a spring time feeding of Bulb-tone.

Think about it. When planted, bulbs are packed full of nutrients to last all winter. Come spring, they’ve used all the food they have stored.

It’s like they’ve just run a winter-long marathon — and now they need you to greet them at the finish line with snacks and water.

Right now, your spring bulbs — tulips and daffodils included — are exhausted and starving even if they don’t look like it!

So, they need a hefty feeding to keep them robust.

Bulb-tone gives them everything they need to come back strong next year. Fertilizing spring bulbs also helps them fight off diseases and pests.

So, when should you feed spring flowering bulbs?

Fertilize spring bulbs after the plants have bloomed and are about 6” tall. That’s just about as tall as a dollar bill!

Now, what should you look for in bulb food?

Use an organic plant or bulb food that is low in nitrogen and has a higher amount of phosphorous. Nitrogen is the first of three numbers on fertilizer bags, — phosphorus is the second number on the bag. For example, Bulb tone by Espoma has a 3-5-3 Nitrogen- Phosphorous-Potassium ratio, which is exactly what bulbs need.

The advantage of using a plant food made specifically for bulbs is that it provides a complete feeding.

Your bulbs will love Espoma Organic Bulb-tone. This specially formulated bulb food is fortified with microbes to create a healthy soil and environment for bulbs. Plus, of course, it’s pet and kid friendly.

Now to boost spring bulbs, apply Bulb-tone at a rate of 4 lbs. per 60 square feet. Simply sprinkle the organic bulb food around the bulbs to ensure they come back stronger than ever next year.

One thing to remember – leaves on flowering bulbs produce food, and keep bulbs well fed throughout winter. So embrace your bulbs’ leaves! They add a lovely pop of glossy greenery to your landscape.

Only cut bulbs’ leaves when they begin yellowing or showing signs of decay. For tulips and daffodils, this can happen as late as June or July.

Now that your spring blooming bulbs are stocked with food and nutrients, they should come back next year!

What’s your favorite spring blooming bulb? We love white and yellow daffodils with green leaves – since they showcase Espoma colors! Share your favorite on our Facebook Page.

https://www.espoma.com/wp-content/uploads/2015/04/2499490616_d446043e1a_z.jpg 480 640 espoma https://www.espoma.com/wp-content/uploads/2023/05/espoma-logo340w-1.png espoma2015-04-06 10:02:092019-05-07 10:09:24Feed Your Flower Bulbs Now with an Organic Fertilizer

30 Tips in 30 Days to Celebrate Lawn Care Month!

April 1, 2015/in Lawn

Hello April! In addition to rain, spring blooms and warmer temps, this month is great for growing healthier lawns with Espoma’s 30 days of tips!

Starting today, we’re sharing daily lawn care tips to kick off National Lawn Care month and help people make the switch to organic lawns and create “Safe Paws” environments. Follow along on Facebook or Twitter to learn how to create a lush, green and organic lawn in 30 days.

To show our commitment to chemical free lawns that are safe for pets, we are also hosting a #SafePawsChallenge and donating $500 to the National Canine Cancer Foundation for every 5,000 new likes during the month of April. The foundation funds research and raises awareness to fight cancers that affect dogs.

Creating an organic lawn keeps your family and pets safe. But did you know an organic lawn can save you money and time, too?

According to Environmental Grassroots Education, you’ll save money making the switch to organic lawns in the long-term. Specifically, you can save more than 25% by using organic lawn products. How’s that possible?

With conventional, chemical lawn programs, you spend money every year on products engineered to be short-term solutions. And you leave your lawn craving more.

Organic lawn care is different. 

From all-natural soil amendments to organic lawn fertilizer, they all improve your soil’s health and structure over time. As natural lawn foods break down, your soil becomes stronger on its own and needs less help.

As an added bonus, organic lawns need less watering, fertilizing and mowing all summer long. Yes — that means you get to spend more time enjoying your beautiful lawn and less time caring for it!

Saving money and time are big advantages of organic lawn care. But we haven’t even got to the most important one yet!

Every time you opt for organic lawn care products, you’re creating a safer environment for your pets and family. Plus, you’re taking care of the planet.

Listen to this: Americans spread 90 million pounds of pesticides on their lawns every year according to the EPA.

All those chemicals and pesticides are potentially harmful to kiddos playing barefoot and pets running in the grass.

With organic lawn care products, there’s no need to worry about harmful effects on your family or the planet.

So, spend this spring and summer fully enjoying your outdoor sanctuary.

The first step is to follow Espoma on Facebook. Next, watch for our daily tips using the hashtag #LawnCareMonth. You’ll learn how to create a plush, healthy and organic lawn within 30 days. We’re covering everything from using an organic lawn fertilizer to eliminating weeds and perfecting your soil’s pH levels.

What questions do you have about organically caring for your lawn? Let us know below, and we’ll answer!

https://www.espoma.com/wp-content/uploads/2015/04/LawnPg.jpg 1672 2508 espoma https://www.espoma.com/wp-content/uploads/2023/05/espoma-logo340w-1.png espoma2015-04-01 10:16:532019-05-07 10:09:2430 Tips in 30 Days to Celebrate Lawn Care Month!
Where to Buy

Get News & Updates

Recent Posts

  • VIDEO: How to Plant a Raised Bed Like a Pro with Farmer Nick
  • VIDEO: Transplanting Magnolias 🪴🌺 with Wyse Guide
  • VIDEO: How to Care for Roses 🌹 & Hydrangeas 🌸 with Garden Answer
  • VIDEO: How to Grow a Hummingbird Garden 🕊️🌿🌺 | Growing Joy with Maria
  • VIDEO: Boost Your Blooms: 🌸 Fertilizing Hydrangeas the Organic Way with Skye Hamilton

Tags

All-Purpose Potting Mix bio-tone Bio-tone Starter Bio-tone Starter Plus cactus and succulents Cactus Mix caring for houseplants Container Gardening DIY project Espoma espoma grown espoma organic Espoma Organics Espoma Video fall gardening flower garden flowers garden Garden Answer Gardening gardening tips gardens grow holly-tone houseplants Indoor! indoor gardening indoor plants Kaleb Wyse organic organic fertilizer Organic Gardening organic plant food Organic Potting Mix Outdoor Gardening Planting plants Potting Mix potting soil Spring Gardening succulents summer rayne oakes vegetable garden Vegetable Gardening Wyse Guide

Espoma. A Family Tradition Since 1929.

Espoma Organic logo
  • Espoma Dealer
  • Espoma Pro
  • Garden Club
  • Privacy Policy

Scroll to top