Espoma Organic
  • Products
    • Close
    • Product Line Overview
    • Plant food finder
    • Garden Fertilizers
    • Potting Soils
    • Liquid Fertilizers
    • Lawn Fertilizers
    • Single Ingredients
    • Conventional Plant Foods
    • Animal Care Products
  • Where to Buy
  • Our Story
    • Close
    • Our Story
    • Locations
    • Historical Timeline
    • Our Commitment
    • Directions
    • Solar
    • Join our Team
    • Espoma Brand Partners
  • Learn
    • Close
    • Espoma Blog
    • FAQ’s
    • Pocket Guide
    • Espoma Guides
    • Garden Clubs
    • Safe Paws Lawn
    • PRODUCT FACT SHEETS
    • Fertilizer Fundamentals
      • Close
      • Understanding Plant Nutrition
      • Reading Labels
      • Choosing the Right Type of Fertilizer
      • Terms & Definitions
    • Gardening Projects
    • Resource Links
  • Contact Us
  • Menu Menu

Tag Archive for: container garden

VIDEO: How to Grow a Hummingbird Garden 🕊️🌿🌺 | Growing Joy with Maria

May 1, 2025/in Blog

🌿 Learn how to create your hummingbird garden using Espoma Organic soil and fertilizer. With the right organic products, you can support pollinators and grow a garden that’s good for your heart — and the planet. 💚

Spring is here, and Maria from Growing Joy with Maria is transforming her balcony into an organic hummingbird and pollinator paradise! 🌸🐦 In her latest video, Maria shares how she builds a vibrant, eco-friendly garden packed with flowers designed to attract hummingbirds, bees, and butterflies — all using organic fertilizer and organic soil to give her plants the healthiest start.

To create strong, thriving plants, Maria relies on Espoma Organic Potting Mix and Espoma Organic Bio-tone Starter Plus. These trusted organic products help her container garden hold moisture, support root development, and produce long-lasting blooms, making them irresistible to local pollinators.

Maria’s setup is renter-friendly and easy to replicate. She fills colorful grow bags and planters with organic soil, adding trumpet-shaped flowers like fuchsia, bee balm, salvia, and petunias — all favorites of hummingbirds. She even shares DIY tips for making hummingbird feeders and reflects on how using organic fertilizers helps protect pollinators and nurture the environment.

*****

Learn more about Growing Joy with Maria:

🪴🌿 Website

🪴🌿 Facebook

🪴🌿 Instagram

🪴🌿 YouTube

Featured Products:


Espoma Organic Bio-tone Starter Plus Bag ImageEspoma Organic Potting Mix


Where to Buy


https://www.espoma.com/wp-content/uploads/2025/05/GJWM_APNL.jpeg 1152 2048 Matt Dauphinais https://www.espoma.com/wp-content/uploads/2023/05/espoma-logo340w-1.png Matt Dauphinais2025-05-01 16:07:572025-05-01 16:07:57VIDEO: How to Grow a Hummingbird Garden 🕊️🌿🌺 | Growing Joy with Maria

VIDEO: 6 Container Gardening MISTAKES | Growing Joy with Maria

April 10, 2025/in Blog, Espoma Videos, Growing Joy with Maria

Balcony gardening is a rewarding but sometimes tricky endeavor, especially for beginners. In this video tutorial, Maria shares six common mistakes that she and many others have made while gardening in containers on balconies. She also highlights how Espoma Organic products can help prevent these pitfalls and ensure healthy, thriving plants.

1: Choosing the Wrong Plant Varieties

Many beginners choose plants that are too large for container growth. Maria advises selecting micro, dwarf, or patio-specific varieties like ‘Patio Baby’ eggplant or ‘Tidy Treats’ cherry tomatoes. These are bred to be compact and manageable, ideal for small balcony spaces.

2: Using the Wrong Potting Mix

Standard garden soil is not suitable for containers as it can be too dense and poorly aerated. Maria recommends using Espoma Organic Potting Mix, which includes perlite and wood bark for proper aeration. This ensures that roots receive enough air and water, crucial for healthy plant growth.

 3: Inconsistent Watering

Balcony plants need regular watering, and failing to plan can lead to wilted or dead plants. Maria suggests using self-watering planters or multiple watering cans to maintain consistency. This strategy, along with early morning watering, ensures plants get the hydration they need.

4: Not Fertilizing Regularly

Container soil loses nutrients quickly. Maria uses Espoma Organic Bio-tone Starter Plus, an organic starter fertilizer at the time of planting to minimize transplant shock and boost initial growth. Throughout the season, she fertilizes monthly with Espoma’s specialized granular or liquid fertilizers such as Garden-tone, Flower-tone, Grow, or Tomato! liquid plant food.

5: Forgetting Plant Tags

Keeping track of which plant varieties perform best is essential. Maria emphasizes saving plant tags or using aesthetically pleasing labels. This simple step helps replicate success in future seasons.

6: Misunderstanding Light Exposure

Light availability is often overestimated. Balcony gardeners must consider shadows from buildings, railings, and trees. Maria advises using a compass to determine the direction of exposure and observing the balcony throughout the day to identify sunlight duration. Southern-facing balconies get the most sun, while northern ones are more limited.

Maria’s guidance is a blend of heartfelt experience and practical advice. By using Espoma Organic products and being mindful of these six common mistakes, balcony gardeners can transform small spaces into a gardening paradise. With the right organic soil, fertilizer, and planning, even a modest balcony can yield joy and an abundance of plants.

*****

Learn more about Growing Joy with Maria:

🪴🌿 Website

🪴🌿 Facebook

🪴🌿 Instagram

🪴🌿 YouTube

Featured Products:


Espoma Organic Bio-tone Starter Plus Bag ImageEspoma Organic Garden-toneEspoma Organic Flower-tone bag


Espoma Organic Potting MixGrow! Liquid FertilizerEspoma Organic Tomato! Liquid Plant Food Image


Where to Buy

https://www.espoma.com/wp-content/uploads/2025/04/GJWM_6-Container-Gardeing-Mistakes_Thumbnail-.jpg 720 1280 Matt Dauphinais https://www.espoma.com/wp-content/uploads/2023/05/espoma-logo340w-1.png Matt Dauphinais2025-04-10 11:47:272025-04-10 11:56:58VIDEO: 6 Container Gardening MISTAKES | Growing Joy with Maria

Beginners Guide to Greenhouses

July 29, 2022/in Blog, Bloom and Grow Radio, Container Gardening, Gardening

A Beginner’s Guide to Greenhouses

There comes a time in every plant parent’s life when we start to get curious and excited about having a dedicated space for all of our plants. If you’re an outdoor gardener, the promise of a greenhouse for seed starts and overwintering plants is even more exciting!

If you feel like you’re ready to take the leap of installing a greenhouse – whether it’s a small kit, or a large structure in your backyard – consider this blog a beginner’s guide to building the greenhouse of your dreams!

This blog is inspired by Episode 151 of Bloom and Grow Radio Podcast, where host Maria Failla interviewed Patrick Grubbs, founder of Greenhouse Info. 

Do Greenhouses Need Permits? 

Before you even begin shopping for greenhouses, you need to consider licensing and permitting. In the US, we have two authorities you should keep in mind when you’re building a greenhouse: zoning regulations and building codes. Almost always, you can simply contact your local government office and they’ll be able to tell you all of the required permits for an accessory building with a permanent foundation. 

The one exception? If you’re getting a small greenhouse (or a cold frame) where you don’t need to set up a foundation, those generally aren’t regulated since they aren’t really considered permanent structures. Usually, these are cheaper greenhouse kits that cost about $500 or less. 

What’s the Best Greenhouse Construction Material?

Here are the pros and cons to each type of greenhouse material to help you choose the best option for your space. 

Glass is a classic greenhouse material. 

  • Pros: it lasts forever and is easy to maintain. It’s a great long-term option for permanent greenhouses.
  • Cons: it’s expensive, fragile, and not a great insulator in general. Insulation is really important for greenhouses, especially if you’re in a Northern climate. 

Polycarbonate is one of the most common greenhouse materials. 

  • Pros: it’s strong, durable, and much lighter than glass. 
  • Cons: it starts to yellow and degrade after about 10 years, reducing the amount of light to your plant. Opt for the UV resistant choice to help it last longer. 

Acrylic is another common greenhouse material (brand names like plexiglass). 

  • Pros: strong and durable
  • Cons: fairly expensive and heavy, contracts with temperature fluctuations so you may need a special mounting solution to attach it. 

Polyethylene is another plastic greenhouse material. 

  • Pros: can buy rolls of plastic to replace material
  • Cons: flimsy plastic, likely only used as a temporary material as it’s really only good for one season

Should I use a Greenhouse Kit or DIY My Own Greenhouse?

For a beginner greenhouse hobbyist, a kit is a great option. It’s more affordable, has instructions, and great to start with. A smaller 6’ x 8’ kit that doesn’t need a foundation is a good option and will take a few hours to put together with a group of helpers. Once you get into more of the reclaimed windows and doors for a do-it-yourself greenhouse, carpentry skills are much more of a necessity. 

If you want a permanent structure with a foundation and electricity, it might be time to look into other options outside of kits. This kind of project could require a backhoe, 6’ holes, and electrical wiring to get it up and running. 

How Much Should I Pay for a Beginner Greenhouse? 

A standard 6’ by 8’ greenhouse kit is one of the cheapest starter greenhouses you can get. These kits will probably run you about $500 to $600 for a new kit. Pro tip: check Facebook Marketplace and Craigslist for used greenhouses–you’ll often find some great options for a fraction of the cost. 

When you consider the extra components you need to buy, like fans and heaters, it’ll probably end up costing you around a thousand dollars for a very entry-level greenhouse that will satisfy.

What Direction Should My Greenhouse Face? 

The point of a greenhouse is to capture the heat from the sunlight and maximize the exposure your plants get. The best way to do that in the Northern hemisphere is to align the roof of your greenhouse going East to West. That will ensure you get the maximum amount of sun in both Winter and Summer. Keep in mind that this is the reverse if you’re in the Southern hemisphere.


What Kind of Floor Should My Greenhouse Have? 

The primary consideration for your greenhouse flooring is drainage. If you have a big greenhouse, you might have a foundation underneath like a concrete slab. And in this case, you need to be sure that any water you pour in your greenhouse can get out.

If you don’t have a foundation, you still have the same consideration regarding drainage, it’s just much easier to handle. It can be as simple as concrete pavers with gravel in between. That provides a flat surface, it’s easy to clean and walk on, and it’s stable. Since there’s space in between the pavers, there’s room for water to drain into the ground.

Greenhouse Ventilation Requirements

Greenhouses are super effective at their jobs. They can raise the temperature anywhere from five to 30 degrees Fahrenheit greater than the ambient temperature. You could very easily cook your plants if you don’t have proper ventilation. 

The first thing you need to do for all of your greenhouse air conditioning needs is to calculate the total volume of your greenhouse. Multiply the length times the width times 1.5 of the height, which accounts for the volume that isn’t really there at the top. This number will tell you the cubic feet of air in your greenhouse. 

You’re going to reference this number whenever you’re looking at ventilation or heating options. You want to try to cycle all of the air in your greenhouse in one minute. If you have a 10’ by 10’ by 10’ greenhouse, that equals 1,000 cubic feet of air. You then need to find an exhaust fan that is rated to push 1,000 cubic feet of air per minute. 

Greenhouse Fans

There are a couple types of fans for greenhouses. First is a shop fan or a desk fan, which works for pushing air around, but it’s not the most effective way to cool a greenhouse. 

And second is an exhaust fan that’s set into the walls of your greenhouse and moves air from inside to outside and vice versa. Usually these fans come in pairs so you can put one on each side of the greenhouse to circulate air efficiently. 

Greenhouse Vents

There are many different kinds of greenhouse vents, but the best options are solar vents. They have wax inside of them that expands and contracts when it gets warm, which automatically opens and closes the vents with no electricity. Most greenhouse kits you buy probably won’t have any ventilation built in, so make sure to factor that into the cost of building a greenhouse. 

Ventilation is a necessity for a greenhouse in order to control the humidity, temperature, and air flow. Plan to incorporate fans and vents for proper greenhouse ventilation. 

Managing Humidity and Mold in Your Greenhouse

Ventilation is your number one defense against humidity. A trick to dealing with root rot or mold is to have airflow underneath your pots.

Many greenhouses have plant benches and the bottom of the bench is actually a grate so air and water can freely flow through. This is important because it means the air accesses the plant roots, which is where plants take in most of their oxygen. Having that additional airflow dries out the potting media faster, which will help prevent mold and rot. 

What’s the Ideal Greenhouse Temperature and Humidity?

A good greenhouse temperature is around 80 to 85 degrees Fahrenheit, but it all depends on what you’re growing. Opt for low humidity, especially in Summer, so temperatures are more bearable. 

To really control the temperature in your greenhouse, try a remote thermometer. It makes monitoring the temperature much easier, especially when dealing with snow and freezing outdoor temperatures. You can also plug all of your appliances into a smart plug bar. The bar allows you to connect to Bluetooth using an app, which helps you control temperature, light, and humidity from your phone. 

3 Beginner Greenhouse Tips from Patrick

Tip 1: A greenhouse isn’t necessarily the next step for improving your gardening skills. It’s a whole different category. Unfortunately growing in a greenhouse alone won’t make your plants healthier and happier: there’s a learning curve. Make sure you dial in the right parameters to optimize growth in your greenhouse to get those happy plants. 

Tip 2: You will deal with pests in greenhouses, but you have options. Greenhouses can actually give you enough space for a dedicated quarantine section of insect-ridden plants. You can use a corner shelf with all of your remedy supplies, far away from other plants. Put a sticky note with the date you placed it on the shelf, then transition it to the rest of your plants after about a month. 

You can also implement predatory insects in your greenhouse. Some great examples are ladybugs, praying mantises, lacewings, and parasitic wasps. Just make sure you’re not purchasing the invasive ladybug. 

Tip 3: If you’re not in a place in your life where you expect to be there for a while, then a greenhouse probably isn’t the best option. It’s a big investment in terms of money, time, and space. Many of them are at least a 10 year commitment unless you have a way to transport it. You still have options, like a cold frame or something a bit smaller like a grow tent.

To learn more about greenhouses, check out Patrick’s website Greenhouse Info.

*****

About Bloom & Grow Radio Podcast

Bloom & Grow Radio Podcast helps people care for plants successfully and cultivate more joy in their lives. Host Maria Failla, a former plant killer turned happy plant lady, interviews experts on various aspects of plant care, and encourages listeners to not only care for plants, but learn to care for themselves along the way.

About Our Interviewee

Patrick Grubbs has a B.S. in Biology, where he fell in love with plants through his first botany class. He’s published aquatic ecology research and authored several books related to succulents and gardening pests. 

Patrick has spent a great deal of his career split between science communication and hands-on permaculture and ecology projects. His passion is teaching other people to enjoy plants and animals the same way he does.

​​Follow Patrick:

Website

Email


Where to Buy

https://www.espoma.com/wp-content/uploads/2022/07/Greenhouse-1-1.png 700 700 Danielle Kirschner https://www.espoma.com/wp-content/uploads/2023/05/espoma-logo340w-1.png Danielle Kirschner2022-07-29 16:11:152022-09-09 14:34:08Beginners Guide to Greenhouses

BAGR Episode 150 Blog: All the Bulb Basics You Need

July 11, 2022/in Blog, Bloom and Grow Radio, Gardening, Spring Gardening

All the Bulb Basics You Need

Bulbs produce some of the most desirable flower gardens we all know and love, but a bulb can be really confusing to a beginner gardener. We look at this little stub in our hands that has no green attached to it and think, “Seriously, a daffodil is going to sprout up from this thing?!”

Jenks Farmer is a bulb expert and lifelong gardener, here to break down everything you need to know about the beauty and basics of bulbs.

 This blog is inspired by Episode 150 of Bloom and Grow Radio Podcast now known as Groing Joy with Maria Podcast – where host Maria Failla interviewed Jenks Farmer, founder of Jenks Farmer.

What Are Bulbs?

An easy way to think about a bulb is something that lives below ground, shoots up for the season, brings us some beautiful flowers, and then goes back below ground.

Bulbs are essentially a big energy storage system for the plants. Carbohydrates are stored underground in the bulb, so that that plant can survive wildfire, floods, or being eaten by animals. In botanical terms, a bulb is a modified stem with the leaves acting as food reserves.

What Kinds of Bulbs Are There?

Speaking of onions, the Allium genus contains all kinds of great bulbs including onions and garlic, but also many beautiful ornamental bulbs. There are tiny alliums at about 6” tall that have yellow, pink, and white flowers. There are also giant alliums you often see in English garden magazines with big purple spheres.

Other flowering bulbs include daffodils, tulips, dahlias, crinums, amaryllis, gladiolas, crocuses, and lots more!

Growing Crinum Bulbs

Jenks has been growing crinums for decades and they’ve become somewhat of his specialty. Crinums have huge bulbs, measuring as large as a softball. When they are clumped together, crinum bulbs can weigh up to 500 pounds!

Their flowers are like fireworks, coming in rich, hot, very modern pinks and whites. One of their common names is Milk and Wine Lily, referring to the fact that some of them have a wine-colored stripe down the middle.

Jenk’s new book Crinum: Unearthing the History and Cultivation of the World’s Largest Bulb is a deep dive into the amazing world of crinums. Not only does he discuss the gorgeous flowers, but he delves into their traditional medicinal uses originating in Africa and how they’re being used today in current medicine. They have strong ties to human history, being passed down for generations from family members in the South and really tying in the rich cultural history plants have in many societies.

Crinums have traditionally been thought of as a deep South flower because they don’t do great in really cold climates. But in cooler climates, they are certainly one of those flowering bulbs, like Dahlias,  you can dig up, bring indoors, and replant outside the next year.

What’s the Difference Between Annual Vs. Perennial Bulbs?

In gardening terms, an annual is something you plant once and it dies and you’re happy for it to live one season. Perennials are plants that you plant once and they keep coming back year after year. It’s best to have both perennial and annual bulbs in your garden for varying blooms.

Examples of perennial bulbs: are daffodils, tulips, crocuses, lilies, and dahlias (in warmer climates).

Examples of annual bulbs: are caladiums, and crinums.

What Does It Mean When a Plant “Naturalizes” or “Perennializes”?

When you have something perennialized in an outdoor garden, that means that it stays in its place and comes back annually for years. If something naturalizes, that means that it’s going to set seeds or send out some kind of a runner, moving around in your garden.

A lot of bulbs like alliums, tulips, daffodils, and snowdrops come from Mediterranean climates with hot, dry summers. They generally don’t perennialize well for many U.S. gardeners, because they need that dry baking period. When we’re talking about whether something is perennial or not, it completely depends on your climate.

When to Plant Bulbs

Within the wide world of bulbs, there are Fall, Spring, and Summer-flowering bulbs. Generally, you plant your bulbs a season ahead of the time you expect them to flower.

Daffodils and tulips, for example, are Spring-flowering bulbs, so you would plant them in the Fall when the ground is still workable. The first thing they do underground is grow a set of roots to get established. And then they start to grow up in early Spring and produce flowers in late Spring.

Summer-flowering bulbs include dahlias, crinums, amaryllis, and gladiolas, so you should plant them in the Spring when your soil is warming up.

Red spider lilies and some crocus varieties are Fall-flowering bulbs. You can plant them almost any time from early Spring through mid-summer.

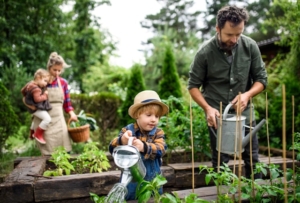
Can You Grow Flowering Bulbs Indoors?

If you don’t have a large garden space, or if you just want to see some beautiful bulbs growing indoors, you definitely still have options! You can grow bulbs in a container inside, known as  “forcing bulbs” indoors. If you’re going to force bulbs, the time of year is similar to the above recommendations. For example, if you want Fall flowers for pots, you could plant some red spider lilies and Fall-flowering crocuses in early Spring.

Two Ways to Force Bulbs Indoors?

Here are two ways to force bulbs indoors: 

  1.  Refrigerate your bulbs for about 6 weeks and then plant them in pots. 
  2. Pot your bulbs up and put them outside, where they will get cold treatment naturally without taking up your space in the fridge. When you’re ready, bring your pots inside about 6 weeks before you want them to bloom and the heat indoors starts to force those bulbs into flower.

Caladiums are a fantastic option for indoor growing. They have big elephant ear-like leaves that are pink, red, and white and all mottled together. A rare bulb that also does great indoors is the Blood Lily that you can keep year-round. It has a beautiful, broad leaf and flowers in the middle of Summer, with a softball-sized, scarlet flower. Pineapple lilies also make great container plants. They have a stalk that looks like a pineapple with a long, extended flower and thousands of tiny burgundy red flowers.

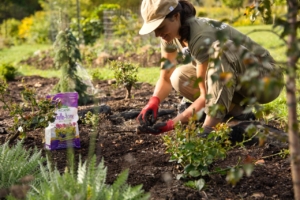
How to Plant and Fertilize Bulbs

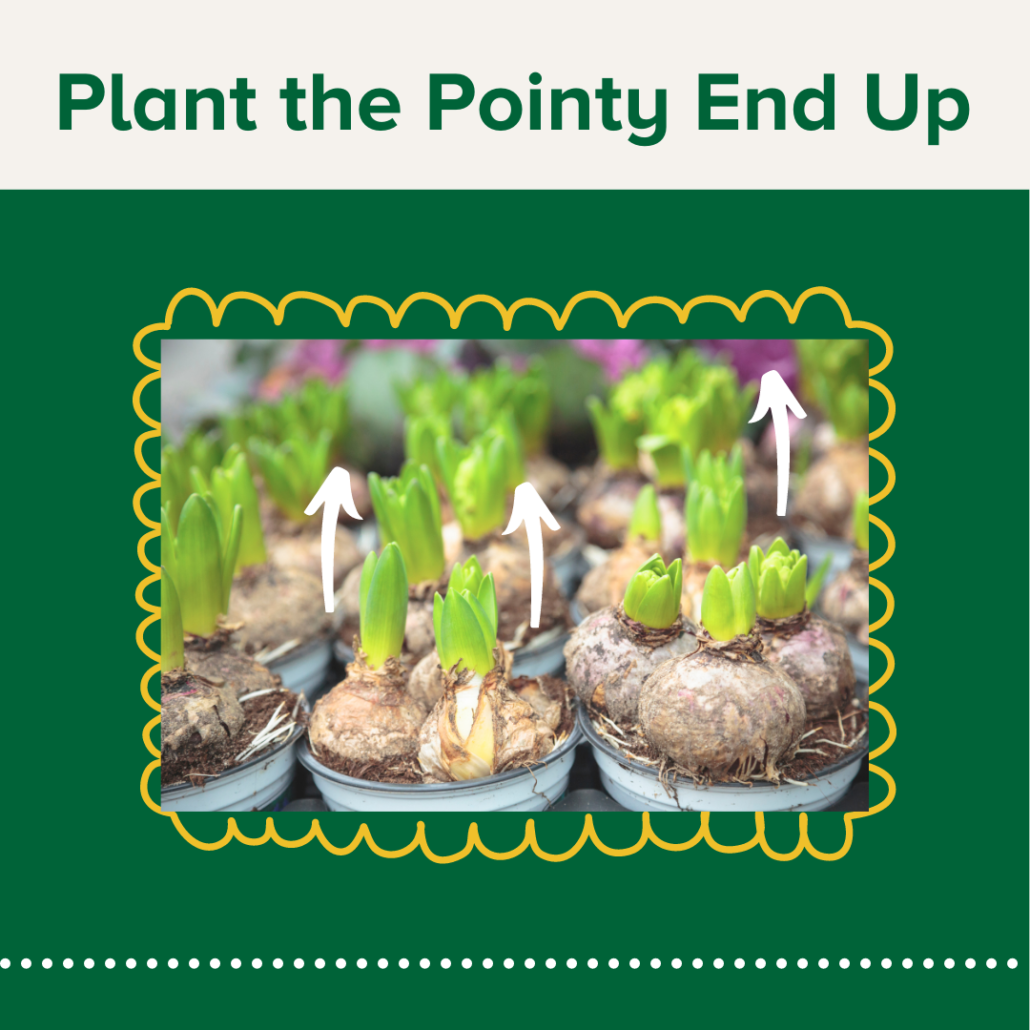
Contrary to what you might think, bulbs don’t necessarily have to be planted right-side up. But planting them upside down can delay their flowering. If you can, make sure to plant the pointy side of your bulb up.

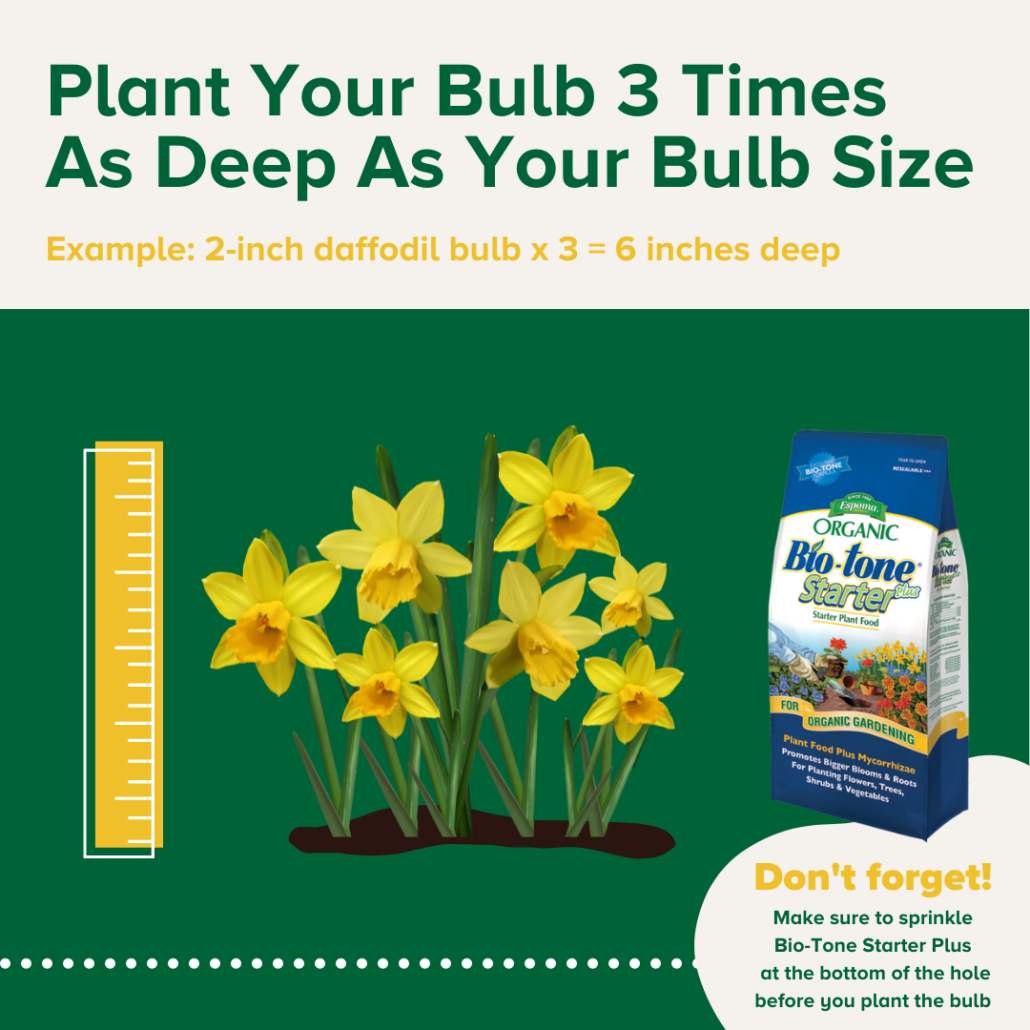
One of the most important parts of planting bulbs is getting the bulb depth right. The general rule is to plant bulbs three times as deep as the bulb size. A two-inch daffodil, for example, would be planted about six inches deep (2*3 = 6”).

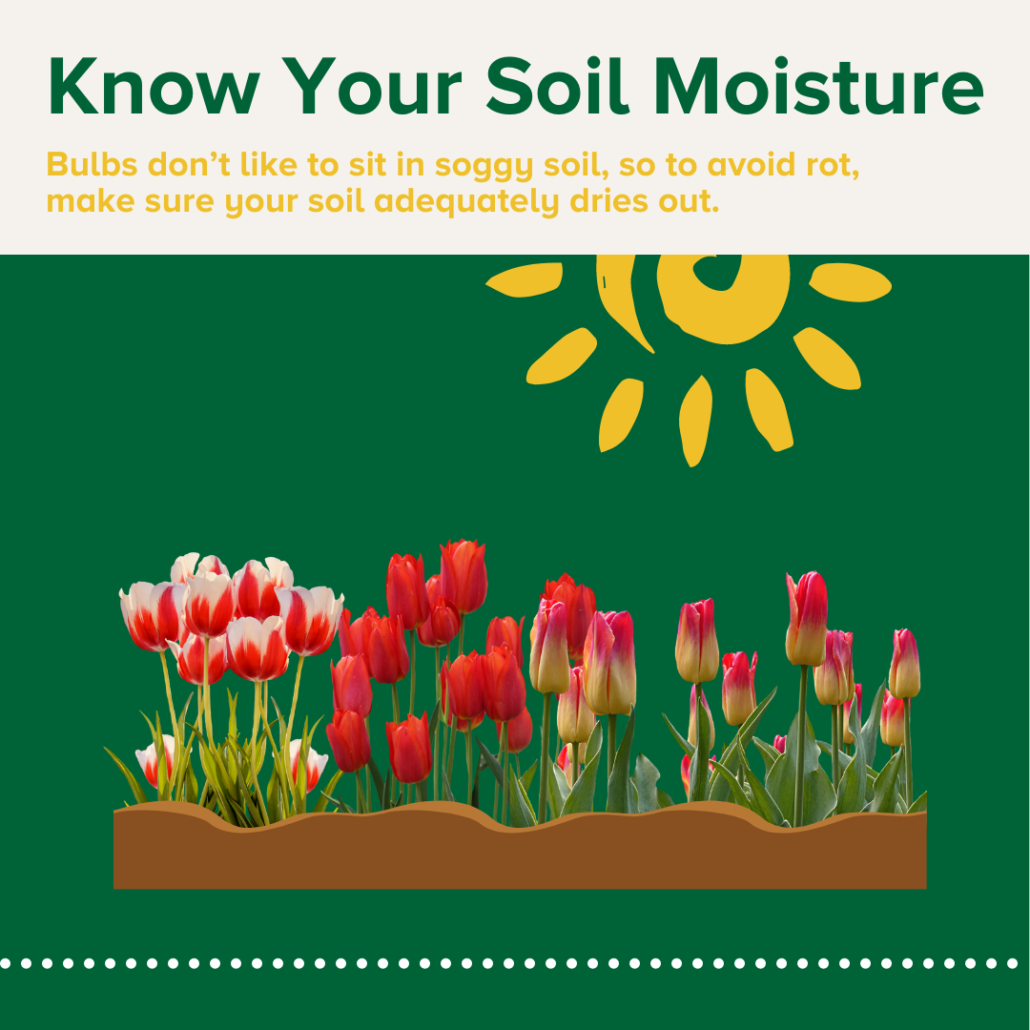
As far as soil goes, the key is making sure that the kind of bulb you’re planting is adapted to your soil moisture. Many bulbs are from dry places, so make sure your soil adequately dries out during the growing season.

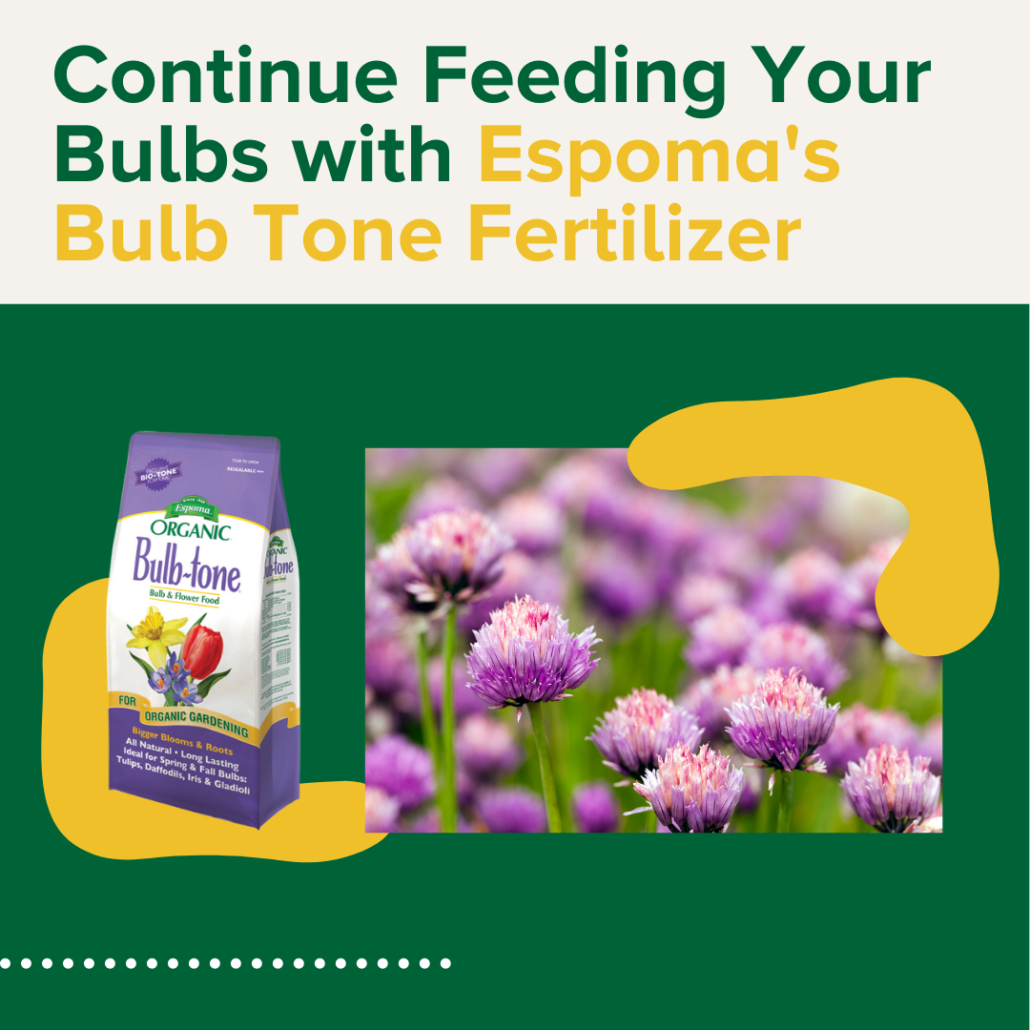
For fertilizing, wait until Spring right after your bulbs have flowered, then add in compost or some other organic fertilizer like Espoma’s Bulb-tone fertilizer, which is specifically designed to support bulb growth. After flowering, your bulb is trying to collect lots of nutrients for the bulb below ground to be ready for the next year.

When Will My Bulb Bloom?

You’ve planted your bulbs in the Fall and are on the edge of your seat, just waiting for those Spring bulbs to arrive. Below are some bulbs that will bloom in Spring, Summer, and Fall.

Spring: tulips, some alliums, daffodils, snowdrops, snowflakes, and irises.

Summer: dahlias, gloriosa lilies, true lilies, blood lilies, canna lilies, crinum.

Fall: dahlias, autumn crocus, red spider lilies.

How to Divide Bulbs

Most bulbs grow in a clump and over time, they will multiply underground, creating a clump of 10 to 15 bulbs. Many bulbs need to be divided to rejuvenate.

You want to wait to divide bulbs until the foliage starts to die off. The foliage helps to collect energy for the bulb for the next season, so if you move the bulb while the leaf is green and trying to build energy, you can damage it.

After the foliage has died off, dig down to the bulbs and start separating them. Sometimes you need water to force them apart. Let them dry out on the surface and then store them in a cool, dry location until you’re ready to replant them in the Fall or Spring.

Want to learn more about all things flower bulbs? Make sure to check out Jenks’ blog and brand new book, Crinum: Unearthing the History and Cultivation of the World’s Largest Bulb, available now!

******

About Bloom & Grow Radio Podcast

Bloom & Grow Radio Podcast is now Groing Joy with Maria.

The podcast helps people care for plants successfully and cultivate more joy in their lives. Host Maria Failla, a former plant killer turned happy plant lady, interviews experts on various aspects of plant care, and encourages listeners to not only care for plants but learn to care for themselves along the way.

About Our Interviewee

Jenks Farmer got his first flower bulb in the 1970s and has been growing them ever since. For the last twenty years, Jenks has led teams responsible for establishing two of South Carolina’s major botanical gardens. His designs for homes, museums, and businesses have received recognition and awards and have delighted hundreds of thousands of visitors with the joyful, easy exuberance of hand-crafted gardens.

Jenks wrote and published three books, including The Crinum Book, Funky Little Flower Farm, and Deep-Rooted Wisdom.

​​Follow Raffaele: 

Blog

Instagram

Website

Featured Products:

Where to Buy
https://www.espoma.com/wp-content/uploads/2022/07/How-to-Plant-_-Fertilize-Bulbs-5.png 1080 1080 espoma https://www.espoma.com/wp-content/uploads/2023/05/espoma-logo340w-1.png espoma2022-07-11 14:01:402023-09-11 16:55:28BAGR Episode 150 Blog: All the Bulb Basics You Need

Cutting Flowers and Planting Fall Crops with Garden Answer

August 31, 2021/in Fruits & Vegetables - None

Follow along as Laura from @Garden Answer cuts some especially beautiful flowers for some friends! Stick around as she provides some helpful tips for cutting flowers and to see which Espoma products she uses while planting fall crops!


Featured Products:


Where to Buy

https://www.espoma.com/wp-content/uploads/2021/08/Screen-Shot-2021-08-31-at-1.42.07-PM.png 1512 2834 Danielle Kirschner https://www.espoma.com/wp-content/uploads/2023/05/espoma-logo340w-1.png Danielle Kirschner2021-08-31 13:49:162021-08-31 13:50:00Cutting Flowers and Planting Fall Crops with Garden Answer

May Gardening Checklist: 5 Essential To-Dos for a Thriving Garden

May 2, 2017/in Blog, Spring Gardening

May is one of the busiest and most exciting months in the garden. Flowers are blooming, veggies are sprouting, and summer crops are ready to go in. But to keep your garden thriving naturally, it’s important to use the right organic products to nurture your soil, plants, and harvest.

Here’s your Espoma-approved May checklist to prep your garden for a healthy, productive summer season.

Garden Clean up

1: Tidy Up Your Garden Space

Start fresh by clearing out weeds, dead plants, and old debris — this keeps pests and diseases in check and opens up space for new growth. As you tidy up, top off your beds with Espoma Organic Land & Sea Gourmet Compost to enrich the soil with nutrients and improve texture.

Once your garden is clean, you can apply a layer of mulch to help conserve moisture and regulate soil temperature. This simple prep sets the stage for everything that comes next.

spring crops

2: Harvest Early Spring Crops

Your cool-weather crops like lettuce, spinach, radishes, and peas are likely ready to harvest. After picking, don’t leave that soil depleted! Replenish it by working in Espoma Organic Garden-tone or Plant-tone to restore nutrients before planting your summer vegetables.

For container gardens, refresh the mix with Espoma Organic Raised Bed Mix or Potting Mix so your new plants have a rich, organic base to grow in. Healthy soil = healthy crops.

People planning a project

3: Plan Your Garden Layout Thoughtfully

Before you rush to plant, take a little time to sketch out your garden plan. Group plants with similar needs together, and research what varieties perform best in your area. If you’re unsure, visit a local garden center and look for recommendations — and while you’re there, pick up organic fertilizers suited for what you’re planting (like Espoma Organic Tomato-tone for tomatoes, Berry-tone for berries, or Rose-tone for roses).

Planning ahead ensures you can match the right organic products to the right plants, maximizing growth and minimizing problems down the line.

planting with organic fertilizer

4: Get Planting — and Feed Organically

Once your area is frost-free, it’s time to plant! Whether you’re planting veggies, flowers, or herbs, give them the best start by enriching the planting hole with Espoma Organic Bio-tone Starter Plus. This starter fertilizer contains mycorrhizae, which help plants establish strong root systems and reduce transplant shock.

As the season goes on, continue feeding regularly with Espoma Organic Tone Fertilizers, depending on what you’re growing. These slow-release, organic fertilizers keep plants nourished naturally, without the risk of burning or chemical buildup.

planting

5: Transfer Indoor Seedlings Outdoors Carefully

If you started seeds indoors, harden them off gradually before moving them outside. Once ready, plant them in your garden or containers and mix Espoma Organic Bio-tone Starter Plus into the soil. This ensures young plants have access to the nutrients and beneficial microbes they need to get established and grow strong healthy roots.

For containers, fill pots with Espoma Organic Potting Mix, which provides excellent drainage and moisture retention while feeding plants with organic ingredients. Don’t forget to water thoroughly after transplanting to help roots settle in.

family in vegetable garden

🌸 Bonus Tip: Keep Feeding and Caring All Season Long

Throughout the summer, keep an eye on your plants. Feed every month or as needed with the appropriate Espoma Organic fertilizer for each plant type. Water deeply at the base, mulch to retain moisture, and enjoy the lush, organic garden you’ve worked so hard to create.

With the right products and a little care, you’ll be harvesting beautiful, homegrown food and flowers all summer long — the organic way!

Featured Products:

Espoma Organic Potting soil Mix Big bagEspoma Organic Land and SeaEspoma Raised Bed Mix bag  Espoma Organic Tomato-toneEspoma Organic Rose-tone bagEspoma Organic Plant-tone organic fertilizer

Where to Buy

https://www.espoma.com/wp-content/uploads/2018/05/Curb-appeal-hosta-black-eyed-susan.jpg 850 1280 espoma https://www.espoma.com/wp-content/uploads/2023/05/espoma-logo340w-1.png espoma2017-05-02 08:00:312025-05-06 14:10:27May Gardening Checklist: 5 Essential To-Dos for a Thriving Garden
Where to Buy

Get News & Updates

Recent Posts

  • VIDEO: How to Plant a Raised Bed Like a Pro with Farmer Nick
  • VIDEO: Transplanting Magnolias 🪴🌺 with Wyse Guide
  • VIDEO: How to Care for Roses 🌹 & Hydrangeas 🌸 with Garden Answer
  • VIDEO: How to Grow a Hummingbird Garden 🕊️🌿🌺 | Growing Joy with Maria
  • VIDEO: Boost Your Blooms: 🌸 Fertilizing Hydrangeas the Organic Way with Skye Hamilton

Tags

All-Purpose Potting Mix bio-tone Bio-tone Starter Bio-tone Starter Plus cactus and succulents Cactus Mix caring for houseplants Container Gardening DIY project Espoma espoma grown espoma organic Espoma Organics Espoma Video fall gardening flower garden flowers garden Garden Answer Gardening gardening tips gardens grow holly-tone houseplants Indoor! indoor gardening indoor plants Kaleb Wyse organic organic fertilizer Organic Gardening organic plant food Organic Potting Mix Outdoor Gardening Planting plants Potting Mix potting soil Spring Gardening succulents summer rayne oakes vegetable garden Vegetable Gardening Wyse Guide

Espoma. A Family Tradition Since 1929.

Espoma Organic logo
  • Espoma Dealer
  • Espoma Pro
  • Garden Club
  • Privacy Policy

Scroll to top