Espoma Organic
  • Products
    • Close
    • Product Line Overview
    • Plant food finder
    • Garden Fertilizers
    • Potting Soils
    • Liquid Fertilizers
    • Lawn Fertilizers
    • Single Ingredients
    • Conventional Plant Foods
    • Animal Care Products
  • Where to Buy
  • Our Story
    • Close
    • Our Story
    • Locations
    • Historical Timeline
    • Our Commitment
    • Directions
    • Solar
    • Join our Team
    • Espoma Brand Partners
  • Learn
    • Close
    • Espoma Blog
    • FAQ’s
    • Pocket Guide
    • Espoma Guides
    • Garden Clubs
    • Safe Paws Lawn
    • PRODUCT FACT SHEETS
    • Fertilizer Fundamentals
      • Close
      • Understanding Plant Nutrition
      • Reading Labels
      • Choosing the Right Type of Fertilizer
      • Terms & Definitions
    • Gardening Projects
    • Resource Links
  • Contact Us
  • Menu Menu

BAGR Blog 159: Houseplants that Bloom

November 22, 2022/in Blog, Bloom and Grow Radio

This blog is inspired by Episode 159 of Bloom and Grow Radio Podcast, where host Maria Failla interviewed Lisa Eldred Steinkopf of The Houseplant Guru.

Houseplants are celebrated for their amazing foliage, but are often overlooked for another ability—the ability to bloom! To give us a better grasp of this beautiful subcategory, let’s dive into the must-knows of houseplants that bloom. 

How to Care for Blooming Houseplants

The main difference between blooming houseplants and normal foliage houseplants is light requirements. If you want to start caring for blooming houseplants, you need to have a good light setup.

Blooming houseplants require a bit more light. That can look like a Southern-, Western-, or an Eastern-facing window for natural light. If you have Northern-facing windows, you will need to supplement with grow lights.

The type of grow light you have will determine the amount of hours needed, but at most your blooming houseplants will need 12 hours of direct light. Inadequate lighting is often the culprit if your blooming houseplants don’t bloom. 

What Does a Houseplant Bloom Cycle Look Like?

Across blooming houseplants, there are long-day, short-day, and day-neutral plants that affect the bloom cycle. A day-neutral plant like the African violet (Saintpaulia) can bloom year round, as it’s not sensitive to day length. A short-day plant, however, will start blooming when the nights get longer, focusing on how much darkness they need.

Houseplants like poinsettias, kalanchoe, and cyclamen are all short-day plants, blooming in the Fall when nights are longer. Most of the annual flowers outdoors like snapdragons and marigolds need light for as long as possible to bloom, so they are categorized as long-day plants. These long-day flowers bloom best in Summer when day length is greatest.

If your plant is not blooming within a year, it may need something different. Often the key can be more light, but it could also be that it’s simply not mature enough yet to produce blooms. If you grow a citrus from seed, it won’t flower for six to seven years—but if you grow a cutting from a mature plant, it could bloom within a year. Consider a plant’s maturity for each variety before you write off your plant parent skills. 

Fertilizing Requirements for Blooming Houseplants

While sun and photosynthesis tend to be the most important factors in getting your plants to bloom, fertilizers can certainly help. An all-purpose fertilizer like Espoma’s Organic Indoor Houseplant Food is a great overall fertilizer. To help your blooms last longer, Espoma’s Super Bloom Booster that’s high in phosphorus will give your plants strong, healthy blooms. Opt for every two to four weeks if you choose a liquid fertilizer. 

How to Make Blooms Last Longer

To get your houseplant blooms to last as long as possible, focus on consistency. Blooming plants want consistent moisture, so do not let them dry out. Keep your plants in a well-lit spot, but not so hot that they become stressed. Be consistent with moisture and temperature during blooming and your plants will be happy. 

Now that we’ve covered some basic care for blooming houseplants, let’s go into some great starter plants for beginners. 

The 6 Best Blooming Houseplants for Beginners

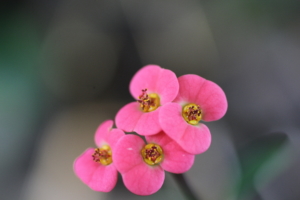
The crown of thorns (Euphorbia milii) is a wonderful blooming houseplant if you have high light. It can even bloom year round with enough light. They come in many colors ranging from white. red, yellow, pink, and orange. 
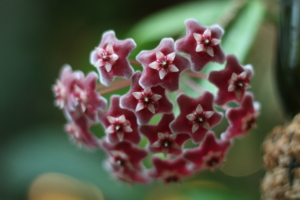
Hoyas (Hoya carnosa) are another blooming houseplant that are great for beginners. The key with hoyas is to know they won’t bloom until they’re mature enough. It can take anywhere from three to seven years for hoya plants to reach maturity.
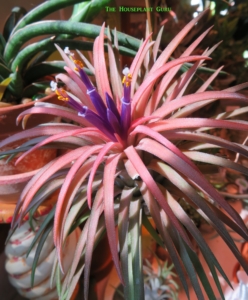
Air plants (Tillandsias) are next for beginners. While they need lots of light, they almost constantly bloom and grow. They will send out new pups, because once they bloom, they slowly die off. 
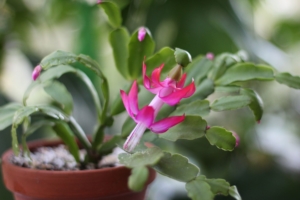
The holiday cactus (Schlumbergera spp.) is another great beginner blooming houseplant, and an often underrated one. Holiday cacti include Christmas, Easter, and Thanksgiving varieties, each slightly different in the shape of their stem segments. Their blooms also come in a range of colors including pink, orange, salmon, and white. 
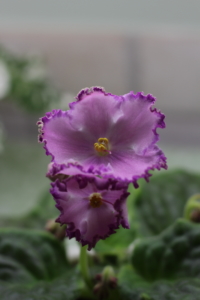
African violets (Streptocarpus sect. Saintpaulia) are another beautifully blooming houseplant that would be a great fit for a mindful plant parent. African violets prefer to never dry out and to be repotted about every 6 months. Their leaves and stems are easy to propagate, making them a fun houseplant to share with other plant lovers. Try feeding your violets with Espoma Organic Violet! African violet liquid plant food.
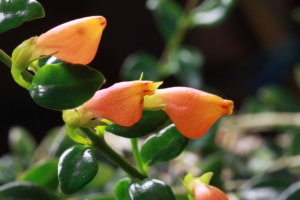
The goldfish plant (Columnea nematanthus) is another fantastic blooming houseplant that doesn’t need much light to bloom. Their blooms are orange and shaped like goldfish, looking like a sea of goldfish swimming when in full bloom.
Intermediate Level Blooming Houseplants

If you’re ready to move up to the intermediate level, here are three blooming houseplants to get you started. 

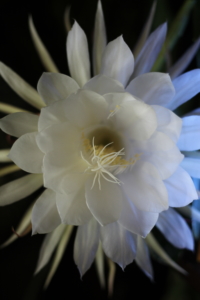
Orchid cacti (Epiphyllums) are a type of climbing cacti with flat, leaflike stems. Despite being a tropical succulent, they actually need stretches of cold before they will bloom again. Give them enough light and enough of a cold period, and you’ll be wowing everyone with these stunning blooms.  
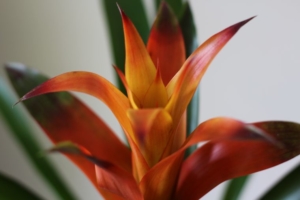
Bromeliads (Bromeliaceae) are another long-blooming houseplant that are typically bought in their blooming stage. Their blooms eventually die back, but not before they send out new babies at the bottom.
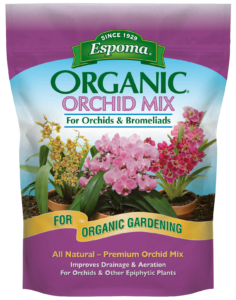
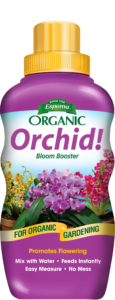
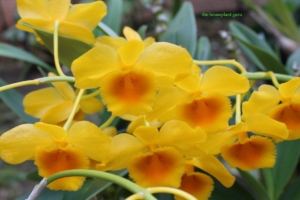
While there are beginner orchids, there are plenty of interesting varieties for an intermediate plant parent to try. Dendrobiums, Cattleyas, and Miltonias tend to be a bit more care intensive. To troubleshoot why your orchid isn’t blooming, it can often be a lack of light. Orchids also need to be repotted at least every two years to ensure adequate air for their roots. Try Espoma’s Organic Orchid Mix potting soil to help with drainage and aeration. Apply Espoma Organic Orchid! liquid plant food to make sure your plant has the essential nutrients needed for successful growth. 
*****

For an in-depth look into blooming houseplants, make sure to read Lisa’s new book Bloom: The Secrets of Growing Flowering Houseplants Year-Round. 

About Bloom & Grow Radio Podcast

 Bloom & Grow Radio Podcast helps people care for plants successfully and cultivate more joy in their lives. Host Maria Failla, a former plant killer turned happy plant lady, interviews experts on various aspects of plant care, and encourages listeners to not only care for plants, but learn to care for themselves along the way.

About Our Interviewee

Lisa Eldred Steinkopf is The Houseplant Guru. She’s a blogger, freelance writer, and houseplant enthusiast who loves taking care of her own plants and teaching others to take care of theirs. If you love plants, want to know more, or are just looking to keep your houseplant plant alive, you’re in the right place!

Lisa’s new book Bloom: The Secrets of Growing Flowering Houseplants Year-Round celebrates the beloved houseplants we can grow for blooms in addition to foliage. It focuses on how to get many houseplants to bloom and how to keep them in bloom. 

​​Follow Lisa:

Website

Instagram

Facebook

Books


Featured Products: 



Where to Buy


https://www.espoma.com/wp-content/uploads/2022/11/ryan-gerrard-J7DoRy8SLkA-unsplash-scaled.jpg 2560 1707 Matt Dauphinais https://www.espoma.com/wp-content/uploads/2023/05/espoma-logo340w-1.png Matt Dauphinais2022-11-22 17:19:592022-11-22 17:27:03BAGR Blog 159: Houseplants that Bloom

BAGR 154: How to Build a Terrarium

November 21, 2022/in Blog, Bloom and Grow Radio

This blog is inspired by Episode 154 of Bloom and Grow Radio Podcast, where host Maria Failla interviewed Patricia Buzo of Doodle Bird Terrariums.

Terrariums do so much more than encapsulate our plants within the confines of a vessel. They capture a feeling. They capture a sense of wonder that a simple potted plant just can’t do. We can create entire worlds within a terrarium, and even ecosystems. They become a place that we can escape into for a mindful moment and use to amplify our passion for playing.

In this blog, terrarium guru Patricia of Doodle Bird Terrariums and Maria from Bloom & Grow Radio break down the differences and similarities of terrariums, paludariums, and vivariums to equip you with the knowledge you need to set your first one up!

What’s the Difference Between Terrariums, Vivariums, and Paludariums?

In the plant community, a terrarium usually refers to a small glass jar or fishbowl that has only plants inside. It’s not going to house any type of pet. 

A vivarium, on the other hand, contains pets like frogs or lizards, but has plants too. It’s also typically much bigger than a terrarium.

A paludarium is a type of vivarium that’s usually an even larger enclosure. It incorporates both terrestrial and aquatic elements into it, so it’s like having an aquarium and a terrarium in one. It often houses animals like fish, lizards, or frogs in the top portion.

Benefits and Common Problems of Growing in a Terrarium

One of the benefits to a terrarium is being able to grow diverse plants that you might not have otherwise been able to, as they create a microclimate of higher humidity. Most miniature terrarium plants need very high humidity, which likely doesn’t exist in your home or garden! 

Another benefit of terrariums is that they can be portable. If you’re traveling a lot and miss your plants, you can simply place them in a jar and take them with you.

A common problem in terrariums though, is mold growth. The warm, humid environment creates perfect conditions for mold to take over and eat away at your plants. You can prevent mold growth by avoiding biodegradable items in your terrarium like sticks, leaves, and pine cones. Adding little creatures like springtails and isopods (aka rolly pollies) that feed on decomposing materials can also significantly reduce mold growth. 

How to Choose the Best Terrarium Plants

When choosing which plants you want in your terrarium, opt for smaller varieties of plants to avoid requiring you to keep sizing up your vessel. 

Take advantage of the high humidity terrarium conditions and choose humidity-loving plants. Look for plants in the terrarium or fairy garden section at your local nursery for options. 

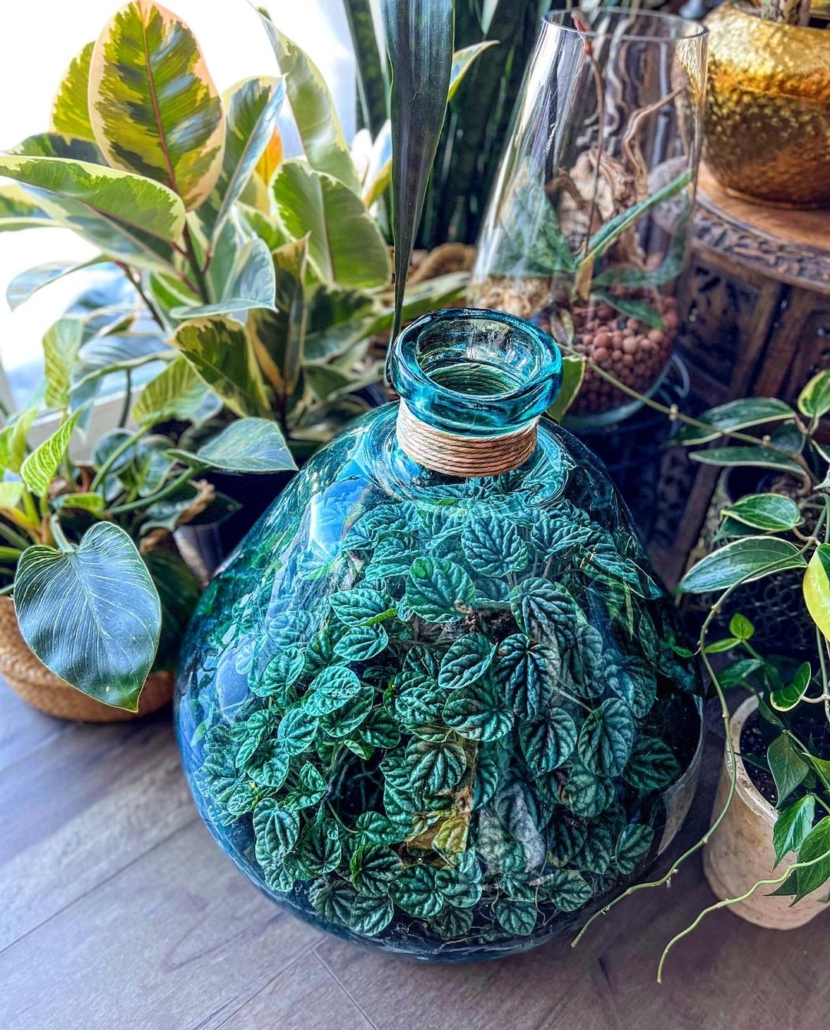
Small and miniature orchids work really well in terrariums, growing only an inch or two high with pretty flowers. Peperomia Ripple (Peperomia caperata) grows well in a bigger jar and loves the terrarium environment. 

Asparagus ferns (Asparagus aethiopicus), the little tree plant (Biophytum sensitivum), jewel orchids (Ludisia discolor), and creeping figs (Ficus pumila) are also great plant options for terrariums.

How to Set Up a Terrarium 

Materials Needed: 

  • Aquarium tongs
  • Spray bottle
  • Scissors
  • Small glass container
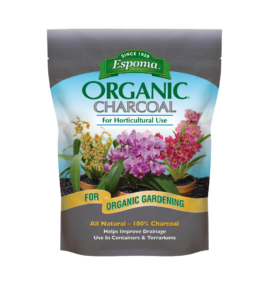
  • Drainage layer: Espoma’s Horticultural Charcoal
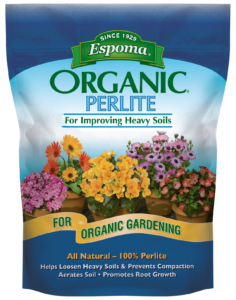
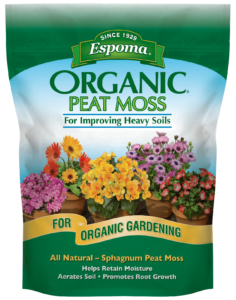
  • Soil: Espoma’s peat moss or coco coir base mixed with Espoma’s perlite or Espoma Potting Mix 


Step 1: Make a list of plants you want in your terrarium. Do a quick search of conditions they prefer, including light, temperature, and moisture. 

Step 2: For a humid-loving plant, choose a jar with a lid to maintain humidity. For a plant that needs to dry out a bit, opt for an open jar. You can find great jars secondhand at thrift stores or estate sales, but affordable glass jars are also available at home goods and craft stores.

Step 3: Layer your materials in your glass jar with horticultural charcoal, soil, and plants. Use aquarium tongs to place your plants in the soil and scissors to trim excess plant material. 

Step 4: Water your terrarium using distilled water. Use a spray bottle for moss and if you have rooted plants, pour a small amount of water onto the soil. 

Step 5: Add your bioactive creatures like springtails or isopods and place your lid on top for humidity-loving plants. (This is optional.)

Step 6: Put your completed jar in bright, indirect light and enjoy your new terrarium! 

*****

For a more in-depth look at building terrariums, vivariums, and paludariums, check out Patricia Buzo’s book, A Family Guide to Terrariums. 

About Bloom & Grow Radio Podcast

 Bloom & Grow Radio Podcast helps people care for plants successfully and cultivate more joy in their lives. Host Maria Failla, a former plant killer turned happy plant lady, interviews experts on various aspects of plant care, and encourages listeners to not only care for plants, but learn to care for themselves along the way.

About Our Interviewee

Patricia Buzo founded Doodle Bird Terrariums in 2008 out of her love of plants and creating unique works people would treasure. Each terrarium she creates is handcrafted using the highest grade plants and supplies, utilizing special tricks to carefully package these fragile vessels so they arrive safely.

Now, over 10 years later, she has authored the book A Family Guide to Terrariums, inspired many on her Instagram account, and has been featured in The New York Times.

​​Follow Lisa:

Website

Instagram

Blog

Shop


Featured Products:


Where to Buy

https://www.espoma.com/wp-content/uploads/2022/11/280107698_1828951650627149_8927427597614221368_n.jpg 1167 1080 Matt Dauphinais https://www.espoma.com/wp-content/uploads/2023/05/espoma-logo340w-1.png Matt Dauphinais2022-11-21 17:24:402022-11-21 17:29:10BAGR 154: How to Build a Terrarium

Beginners Guide to Growing Cut Flowers

August 18, 2022/in Blog, Bloom and Grow Radio, Flowers

Beginners Guide to Growing Cut Flowers

Growing flowers in your garden can be as appealing as growing food, because not only are flowers beautiful, but they’re pollinator magnets. Let’s get into the basics of growing cut flowers. 

This blog is inspired by Episode 128 of Bloom and Grow Radio Podcast, where host Maria Failla interviewed Brooklyn Sherri, owner of Petal and Herb Farm.

Why Are Seed Packets Important? 

Seed packets can be crucial in helping you understand all the components that go into growing your cut flower garden. They provide information on when to plant, how long until germination, plant description, growing habits, how deep the seed should be planted, and helpful details on growth and harvesting. Make sure you do your homework on the seed company of your choosing to make sure they fit your needs. 

What Is My Growing Zone? 

Your growing zone helps you determine how long your frost-free growing season is. If you’re in the U.S., you can find your USDA plant hardiness zone by entering your zip code. 

Once you find your hardiness zone, you can also search for the last frost date in your zip code. Your first and last frost dates will show you how many frost-free growing days you have in a season. This can help you figure out when to plant each of your cut flower varieties. 

What Growing Conditions Do Flowers Need? 

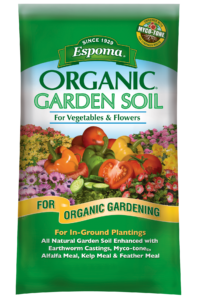
Most flowers prefer well-draining soil. If you’re starting with clay soil that tends to hold water, you want to amend it with compost or peat moss to provide more drainage. Additionally, you can mix in bagged garden soil, like Espoma’s Vegetable & Flower Garden Soil to add structure and drainage. 

Sun needs will also vary by flower, but a general rule is 6 hours of direct sun for flowers. Whether you’re direct sowing seeds outdoors or transplanting plants, make sure each variety is in a location with enough sun. 

Water requirements for annual flowers may be higher during Summer months, but in general, deep, infrequent watering is best. About one inch of water per week is enough. 

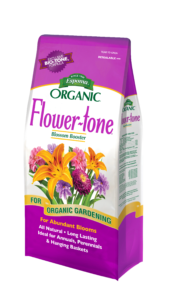
Fertilizing requirements will depend on the specific flower you’re growing. If you notice foliage yellowing, it can often mean your plant is low in nitrogen. Or if you have lots of green foliage but no blooms, that could indicate you have a phosphorous problem. Try Espoma’s Flower-Tone Fertilizer to get large, healthy blooms. 


Now that you know basic care for growing cut flowers, check out our list of the 7 best flowers to grow from seed as a beginner! 

1) Sunflowers

Sunflowers are some of the easiest annual flowers to grow from seed. You can directly sow them outdoors in full sun with minimal effort. They come in so many sizes and colors too! 

2) Zinnias

Zinnias are another easy annual flower to grow from seed in full sun. They only take about 60-70 days to bloom from seed, and there are tons of varieties like double flowered, dwarfs, cactus, and giant zinnias. They also come in a wide range of stunning colors! 

3) Daisies

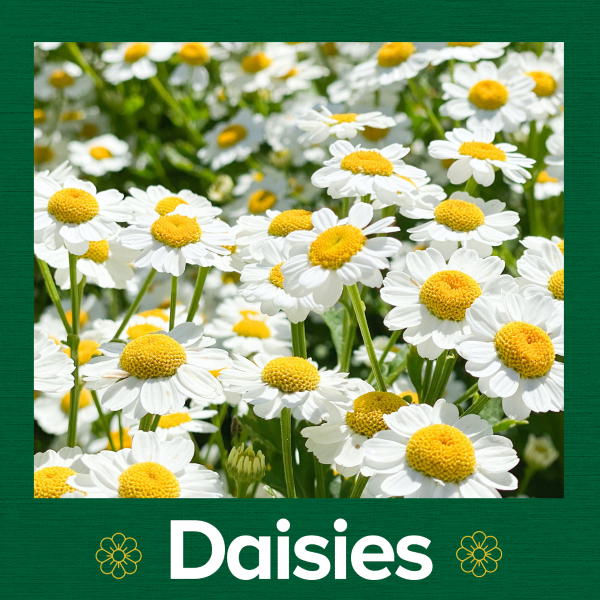
Unlike sunflowers and zinnias, daisies are a perennial flower that will come back year after year. You can start them from seed outdoors as long as you keep them moist for up to twenty days. Otherwise, they grow great from transplants and continue to spread every year. They come in whites, yellows, pinks, and reds.

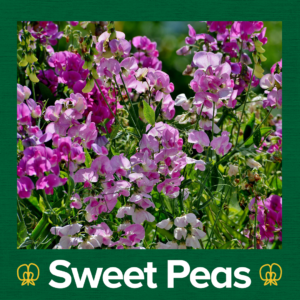
4) Sweet Peas

Sweet peas are an annual flower that can deal with cooler temperatures. Plant them in very early Spring and you’ll have beautiful pastel bouquets in a couple of months. Since they are vining plants, give them something to climb like a trellis.

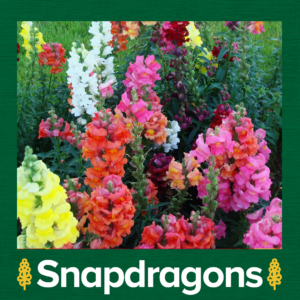
5) Snapdragons

While snapdragons will need to be started from seed indoors 2-3 months before your last frost, the payoff in blooms will be worth it. Pay attention to the seed packet for best germination methods. The more you cut snapdragon blooms and create branching, the more blooms you’ll get. And snapdragons come in so many different colors that you’ll be creating gorgeous bouquets for weeks! 

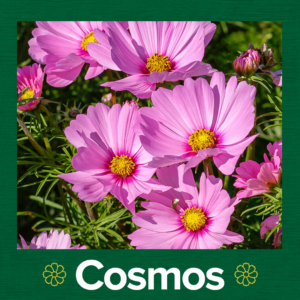
6) Cosmos

Cosmos are another easy-to-grow annual that produce tons of Summer blooms. They come in a variety of heights and colors, and their long, slender stems make for an easy addition to any cut flower bouquet.

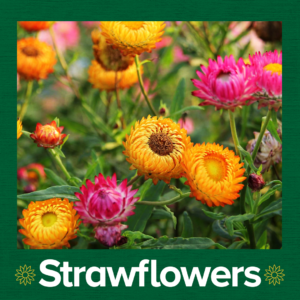
7) Strawflower

And finally we have the humble, yet unmistakable strawflower. This annual is another easy-to-grow flower from seed that can handle any soil quality you have. Its textured petals feel similar to straw and make gorgeous cut or dried flower bouquets. 

*****

To give your cut flowers a healthy start, try using Espoma’s Flower-Tone Fertilizer during the growing season for larger, more abundant blooms. 

About Bloom & Grow Radio Podcast

 Bloom & Grow Radio Podcast helps people care for plants successfully and cultivate more joy in their lives. Host Maria Failla, a former plant killer turned happy plant lady, interviews experts on various aspects of plant care, and encourages listeners to not only care for plants, but learn to care for themselves along the way.

About Our Interviewee

Brooklyn Sherri is a flower farmer with many skills. She runs her own flower farm, Petal & Herb, where they produce flowers, vegetables, berries, herbs, and microgreens all on 5 acres of land in Colorado. Brooklyn also hosts Ya Grandma’s Garden & Houseplants on Clubhouse and teaches horticulture at The Cool Choice to improve the opportunities for children and families in her neighborhood. 

​​Follow Brooklyn:

Instagram

Petal and Herb Farm

Ya Grandma’s Garden & Houseplants on Clubhouse

Featured Products:

Where to Buy


https://www.espoma.com/wp-content/uploads/2022/08/Flower-Power-1-2.png 1080 1080 Matt Dauphinais https://www.espoma.com/wp-content/uploads/2023/05/espoma-logo340w-1.png Matt Dauphinais2022-08-18 15:06:212022-08-19 16:15:16Beginners Guide to Growing Cut Flowers

Beginners Guide to Greenhouses

July 29, 2022/in Blog, Bloom and Grow Radio, Container Gardening, Gardening

A Beginner’s Guide to Greenhouses

There comes a time in every plant parent’s life when we start to get curious and excited about having a dedicated space for all of our plants. If you’re an outdoor gardener, the promise of a greenhouse for seed starts and overwintering plants is even more exciting!

If you feel like you’re ready to take the leap of installing a greenhouse – whether it’s a small kit, or a large structure in your backyard – consider this blog a beginner’s guide to building the greenhouse of your dreams!

This blog is inspired by Episode 151 of Bloom and Grow Radio Podcast, where host Maria Failla interviewed Patrick Grubbs, founder of Greenhouse Info. 

Do Greenhouses Need Permits? 
Before you even begin shopping for greenhouses, you need to consider licensing and permitting. In the US, we have two authorities you should keep in mind when you’re building a greenhouse: zoning regulations and building codes. Almost always, you can simply contact your local government office and they’ll be able to tell you all of the required permits for an accessory building with a permanent foundation. 

The one exception? If you’re getting a small greenhouse (or a cold frame) where you don’t need to set up a foundation, those generally aren’t regulated since they aren’t really considered permanent structures. Usually, these are cheaper greenhouse kits that cost about $500 or less. 

What’s the Best Greenhouse Construction Material?

Here are the pros and cons to each type of greenhouse material to help you choose the best option for your space. 

Glass is a classic greenhouse material. 

  • Pros: it lasts forever and is easy to maintain. It’s a great long-term option for permanent greenhouses.
  • Cons: it’s expensive, fragile, and not a great insulator in general. Insulation is really important for greenhouses, especially if you’re in a Northern climate. 

Polycarbonate is one of the most common greenhouse materials. 

  • Pros: it’s strong, durable, and much lighter than glass. 
  • Cons: it starts to yellow and degrade after about 10 years, reducing the amount of light to your plant. Opt for the UV resistant choice to help it last longer. 

Acrylic is another common greenhouse material (brand names like plexiglass). 

  • Pros: strong and durable
  • Cons: fairly expensive and heavy, contracts with temperature fluctuations so you may need a special mounting solution to attach it. 

Polyethylene is another plastic greenhouse material. 

  • Pros: can buy rolls of plastic to replace material
  • Cons: flimsy plastic, likely only used as a temporary material as it’s really only good for one season

Should I use a Greenhouse Kit or DIY My Own Greenhouse?

For a beginner greenhouse hobbyist, a kit is a great option. It’s more affordable, has instructions, and great to start with. A smaller 6’ x 8’ kit that doesn’t need a foundation is a good option and will take a few hours to put together with a group of helpers. Once you get into more of the reclaimed windows and doors for a do-it-yourself greenhouse, carpentry skills are much more of a necessity. 

If you want a permanent structure with a foundation and electricity, it might be time to look into other options outside of kits. This kind of project could require a backhoe, 6’ holes, and electrical wiring to get it up and running. 

How Much Should I Pay for a Beginner Greenhouse? 

A standard 6’ by 8’ greenhouse kit is one of the cheapest starter greenhouses you can get. These kits will probably run you about $500 to $600 for a new kit. Pro tip: check Facebook Marketplace and Craigslist for used greenhouses–you’ll often find some great options for a fraction of the cost. 

When you consider the extra components you need to buy, like fans and heaters, it’ll probably end up costing you around a thousand dollars for a very entry-level greenhouse that will satisfy.

What Direction Should My Greenhouse Face? 

The point of a greenhouse is to capture the heat from the sunlight and maximize the exposure your plants get. The best way to do that in the Northern hemisphere is to align the roof of your greenhouse going East to West. That will ensure you get the maximum amount of sun in both Winter and Summer. Keep in mind that this is the reverse if you’re in the Southern hemisphere.


What Kind of Floor Should My Greenhouse Have? 

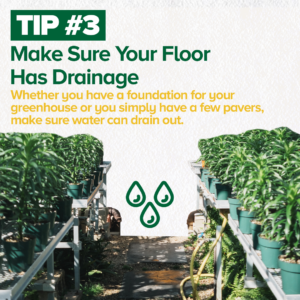
The primary consideration for your greenhouse flooring is drainage. If you have a big greenhouse, you might have a foundation underneath like a concrete slab. And in this case, you need to be sure that any water you pour in your greenhouse can get out.

If you don’t have a foundation, you still have the same consideration regarding drainage, it’s just much easier to handle. It can be as simple as concrete pavers with gravel in between. That provides a flat surface, it’s easy to clean and walk on, and it’s stable. Since there’s space in between the pavers, there’s room for water to drain into the ground.

Greenhouse Ventilation Requirements

Greenhouses are super effective at their jobs. They can raise the temperature anywhere from five to 30 degrees Fahrenheit greater than the ambient temperature. You could very easily cook your plants if you don’t have proper ventilation. 

The first thing you need to do for all of your greenhouse air conditioning needs is to calculate the total volume of your greenhouse. Multiply the length times the width times 1.5 of the height, which accounts for the volume that isn’t really there at the top. This number will tell you the cubic feet of air in your greenhouse. 

You’re going to reference this number whenever you’re looking at ventilation or heating options. You want to try to cycle all of the air in your greenhouse in one minute. If you have a 10’ by 10’ by 10’ greenhouse, that equals 1,000 cubic feet of air. You then need to find an exhaust fan that is rated to push 1,000 cubic feet of air per minute. 

Greenhouse Fans

There are a couple types of fans for greenhouses. First is a shop fan or a desk fan, which works for pushing air around, but it’s not the most effective way to cool a greenhouse. 

And second is an exhaust fan that’s set into the walls of your greenhouse and moves air from inside to outside and vice versa. Usually these fans come in pairs so you can put one on each side of the greenhouse to circulate air efficiently. 

Greenhouse Vents

There are many different kinds of greenhouse vents, but the best options are solar vents. They have wax inside of them that expands and contracts when it gets warm, which automatically opens and closes the vents with no electricity. Most greenhouse kits you buy probably won’t have any ventilation built in, so make sure to factor that into the cost of building a greenhouse. 

Ventilation is a necessity for a greenhouse in order to control the humidity, temperature, and air flow. Plan to incorporate fans and vents for proper greenhouse ventilation. 

Managing Humidity and Mold in Your Greenhouse

Ventilation is your number one defense against humidity. A trick to dealing with root rot or mold is to have airflow underneath your pots.

Many greenhouses have plant benches and the bottom of the bench is actually a grate so air and water can freely flow through. This is important because it means the air accesses the plant roots, which is where plants take in most of their oxygen. Having that additional airflow dries out the potting media faster, which will help prevent mold and rot. 

What’s the Ideal Greenhouse Temperature and Humidity?

A good greenhouse temperature is around 80 to 85 degrees Fahrenheit, but it all depends on what you’re growing. Opt for low humidity, especially in Summer, so temperatures are more bearable. 

To really control the temperature in your greenhouse, try a remote thermometer. It makes monitoring the temperature much easier, especially when dealing with snow and freezing outdoor temperatures. You can also plug all of your appliances into a smart plug bar. The bar allows you to connect to Bluetooth using an app, which helps you control temperature, light, and humidity from your phone. 

3 Beginner Greenhouse Tips from Patrick

Tip 1: A greenhouse isn’t necessarily the next step for improving your gardening skills. It’s a whole different category. Unfortunately growing in a greenhouse alone won’t make your plants healthier and happier: there’s a learning curve. Make sure you dial in the right parameters to optimize growth in your greenhouse to get those happy plants. 

Tip 2: You will deal with pests in greenhouses, but you have options. Greenhouses can actually give you enough space for a dedicated quarantine section of insect-ridden plants. You can use a corner shelf with all of your remedy supplies, far away from other plants. Put a sticky note with the date you placed it on the shelf, then transition it to the rest of your plants after about a month. 

You can also implement predatory insects in your greenhouse. Some great examples are ladybugs, praying mantises, lacewings, and parasitic wasps. Just make sure you’re not purchasing the invasive ladybug. 

Tip 3: If you’re not in a place in your life where you expect to be there for a while, then a greenhouse probably isn’t the best option. It’s a big investment in terms of money, time, and space. Many of them are at least a 10 year commitment unless you have a way to transport it. You still have options, like a cold frame or something a bit smaller like a grow tent.

To learn more about greenhouses, check out Patrick’s website Greenhouse Info.

*****

About Bloom & Grow Radio Podcast

Bloom & Grow Radio Podcast helps people care for plants successfully and cultivate more joy in their lives. Host Maria Failla, a former plant killer turned happy plant lady, interviews experts on various aspects of plant care, and encourages listeners to not only care for plants, but learn to care for themselves along the way.

About Our Interviewee

Patrick Grubbs has a B.S. in Biology, where he fell in love with plants through his first botany class. He’s published aquatic ecology research and authored several books related to succulents and gardening pests. 

Patrick has spent a great deal of his career split between science communication and hands-on permaculture and ecology projects. His passion is teaching other people to enjoy plants and animals the same way he does.

​​Follow Patrick:

Website

Email


Where to Buy

https://www.espoma.com/wp-content/uploads/2022/07/Greenhouse-1-1.png 700 700 Danielle Kirschner https://www.espoma.com/wp-content/uploads/2023/05/espoma-logo340w-1.png Danielle Kirschner2022-07-29 16:11:152022-09-09 14:34:08Beginners Guide to Greenhouses

BAGR Episode 150 Blog: All the Bulb Basics You Need

July 11, 2022/in Blog, Bloom and Grow Radio, Gardening, Spring Gardening

All the Bulb Basics You Need

Bulbs produce some of the most desirable flower gardens we all know and love, but a bulb can be really confusing to a beginner gardener. We look at this little stub in our hands that has no green attached to it and think, “Seriously, a daffodil is going to sprout up from this thing?!”

Jenks Farmer is a bulb expert and lifelong gardener, here to break down everything you need to know about the beauty and basics of bulbs.

 This blog is inspired by Episode 150 of Bloom and Grow Radio Podcast now known as Groing Joy with Maria Podcast – where host Maria Failla interviewed Jenks Farmer, founder of Jenks Farmer.

What Are Bulbs?

An easy way to think about a bulb is something that lives below ground, shoots up for the season, brings us some beautiful flowers, and then goes back below ground.

Bulbs are essentially a big energy storage system for the plants. Carbohydrates are stored underground in the bulb, so that that plant can survive wildfire, floods, or being eaten by animals. In botanical terms, a bulb is a modified stem with the leaves acting as food reserves.

What Kinds of Bulbs Are There?

Speaking of onions, the Allium genus contains all kinds of great bulbs including onions and garlic, but also many beautiful ornamental bulbs. There are tiny alliums at about 6” tall that have yellow, pink, and white flowers. There are also giant alliums you often see in English garden magazines with big purple spheres.

Other flowering bulbs include daffodils, tulips, dahlias, crinums, amaryllis, gladiolas, crocuses, and lots more!

Growing Crinum Bulbs

Jenks has been growing crinums for decades and they’ve become somewhat of his specialty. Crinums have huge bulbs, measuring as large as a softball. When they are clumped together, crinum bulbs can weigh up to 500 pounds!

Their flowers are like fireworks, coming in rich, hot, very modern pinks and whites. One of their common names is Milk and Wine Lily, referring to the fact that some of them have a wine-colored stripe down the middle.

Jenk’s new book Crinum: Unearthing the History and Cultivation of the World’s Largest Bulb is a deep dive into the amazing world of crinums. Not only does he discuss the gorgeous flowers, but he delves into their traditional medicinal uses originating in Africa and how they’re being used today in current medicine. They have strong ties to human history, being passed down for generations from family members in the South and really tying in the rich cultural history plants have in many societies.

Crinums have traditionally been thought of as a deep South flower because they don’t do great in really cold climates. But in cooler climates, they are certainly one of those flowering bulbs, like Dahlias,  you can dig up, bring indoors, and replant outside the next year.

What’s the Difference Between Annual Vs. Perennial Bulbs?

In gardening terms, an annual is something you plant once and it dies and you’re happy for it to live one season. Perennials are plants that you plant once and they keep coming back year after year. It’s best to have both perennial and annual bulbs in your garden for varying blooms.

Examples of perennial bulbs: are daffodils, tulips, crocuses, lilies, and dahlias (in warmer climates).

Examples of annual bulbs: are caladiums, and crinums.

What Does It Mean When a Plant “Naturalizes” or “Perennializes”?

When you have something perennialized in an outdoor garden, that means that it stays in its place and comes back annually for years. If something naturalizes, that means that it’s going to set seeds or send out some kind of a runner, moving around in your garden.

A lot of bulbs like alliums, tulips, daffodils, and snowdrops come from Mediterranean climates with hot, dry summers. They generally don’t perennialize well for many U.S. gardeners, because they need that dry baking period. When we’re talking about whether something is perennial or not, it completely depends on your climate.

When to Plant Bulbs

Within the wide world of bulbs, there are Fall, Spring, and Summer-flowering bulbs. Generally, you plant your bulbs a season ahead of the time you expect them to flower.

Daffodils and tulips, for example, are Spring-flowering bulbs, so you would plant them in the Fall when the ground is still workable. The first thing they do underground is grow a set of roots to get established. And then they start to grow up in early Spring and produce flowers in late Spring.

Summer-flowering bulbs include dahlias, crinums, amaryllis, and gladiolas, so you should plant them in the Spring when your soil is warming up.

Red spider lilies and some crocus varieties are Fall-flowering bulbs. You can plant them almost any time from early Spring through mid-summer.

Can You Grow Flowering Bulbs Indoors?

If you don’t have a large garden space, or if you just want to see some beautiful bulbs growing indoors, you definitely still have options! You can grow bulbs in a container inside, known as  “forcing bulbs” indoors. If you’re going to force bulbs, the time of year is similar to the above recommendations. For example, if you want Fall flowers for pots, you could plant some red spider lilies and Fall-flowering crocuses in early Spring.

Two Ways to Force Bulbs Indoors?

Here are two ways to force bulbs indoors: 

  1.  Refrigerate your bulbs for about 6 weeks and then plant them in pots. 
  2. Pot your bulbs up and put them outside, where they will get cold treatment naturally without taking up your space in the fridge. When you’re ready, bring your pots inside about 6 weeks before you want them to bloom and the heat indoors starts to force those bulbs into flower.

Caladiums are a fantastic option for indoor growing. They have big elephant ear-like leaves that are pink, red, and white and all mottled together. A rare bulb that also does great indoors is the Blood Lily that you can keep year-round. It has a beautiful, broad leaf and flowers in the middle of Summer, with a softball-sized, scarlet flower. Pineapple lilies also make great container plants. They have a stalk that looks like a pineapple with a long, extended flower and thousands of tiny burgundy red flowers.

How to Plant and Fertilize Bulbs

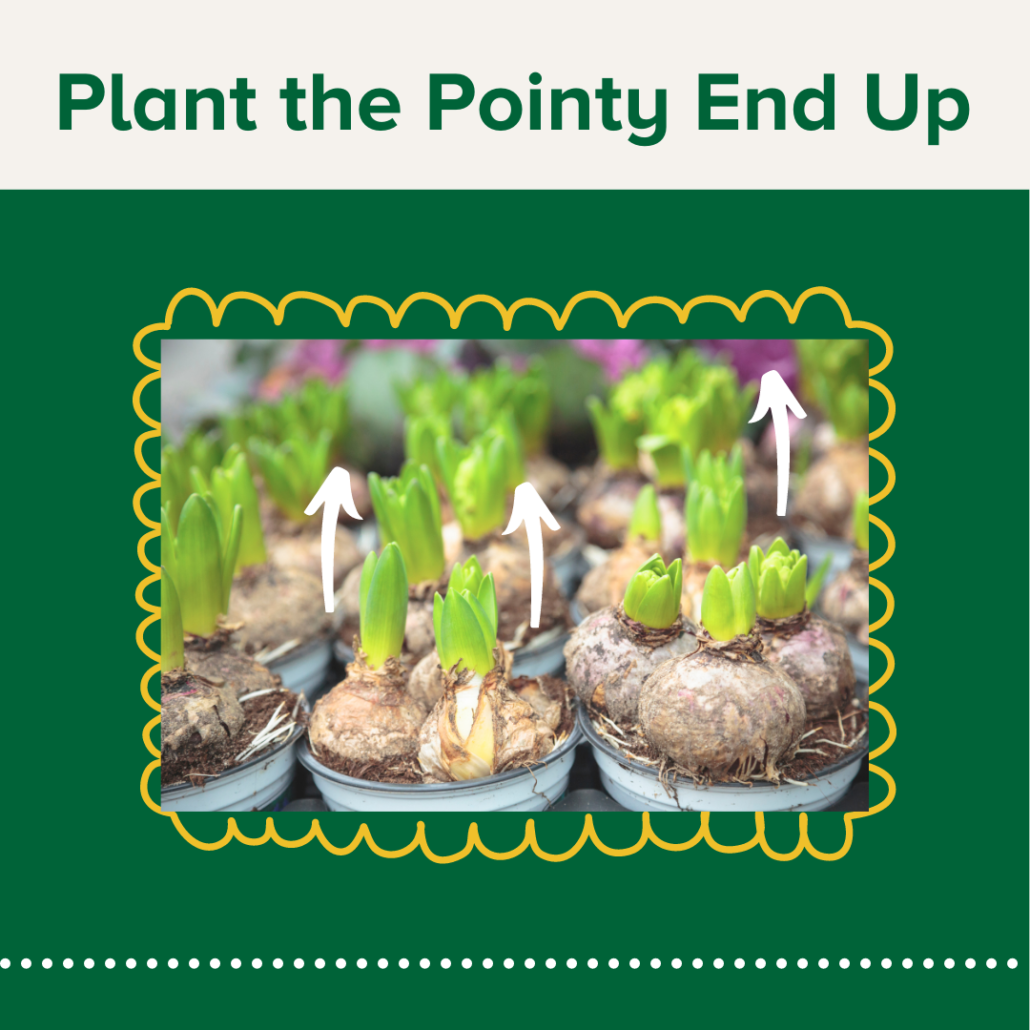
Contrary to what you might think, bulbs don’t necessarily have to be planted right-side up. But planting them upside down can delay their flowering. If you can, make sure to plant the pointy side of your bulb up.

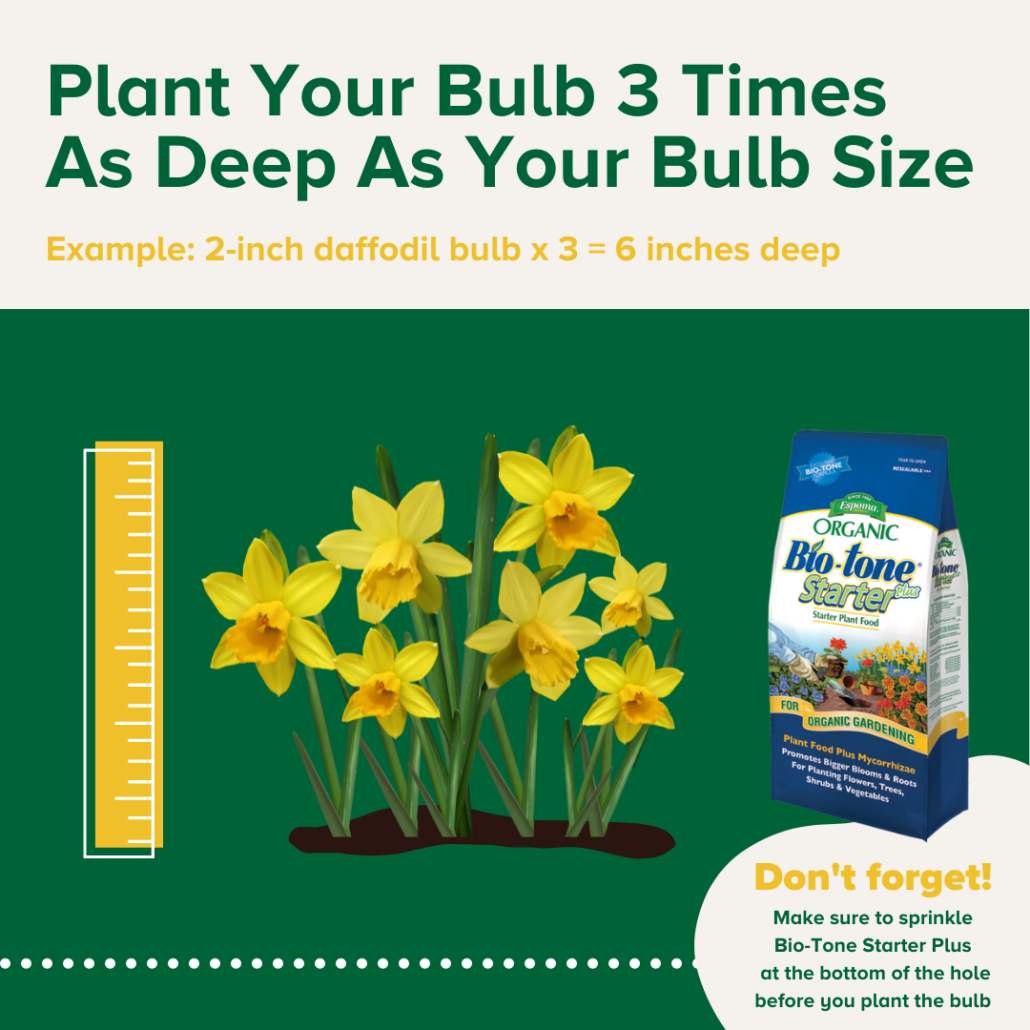
One of the most important parts of planting bulbs is getting the bulb depth right. The general rule is to plant bulbs three times as deep as the bulb size. A two-inch daffodil, for example, would be planted about six inches deep (2*3 = 6”).

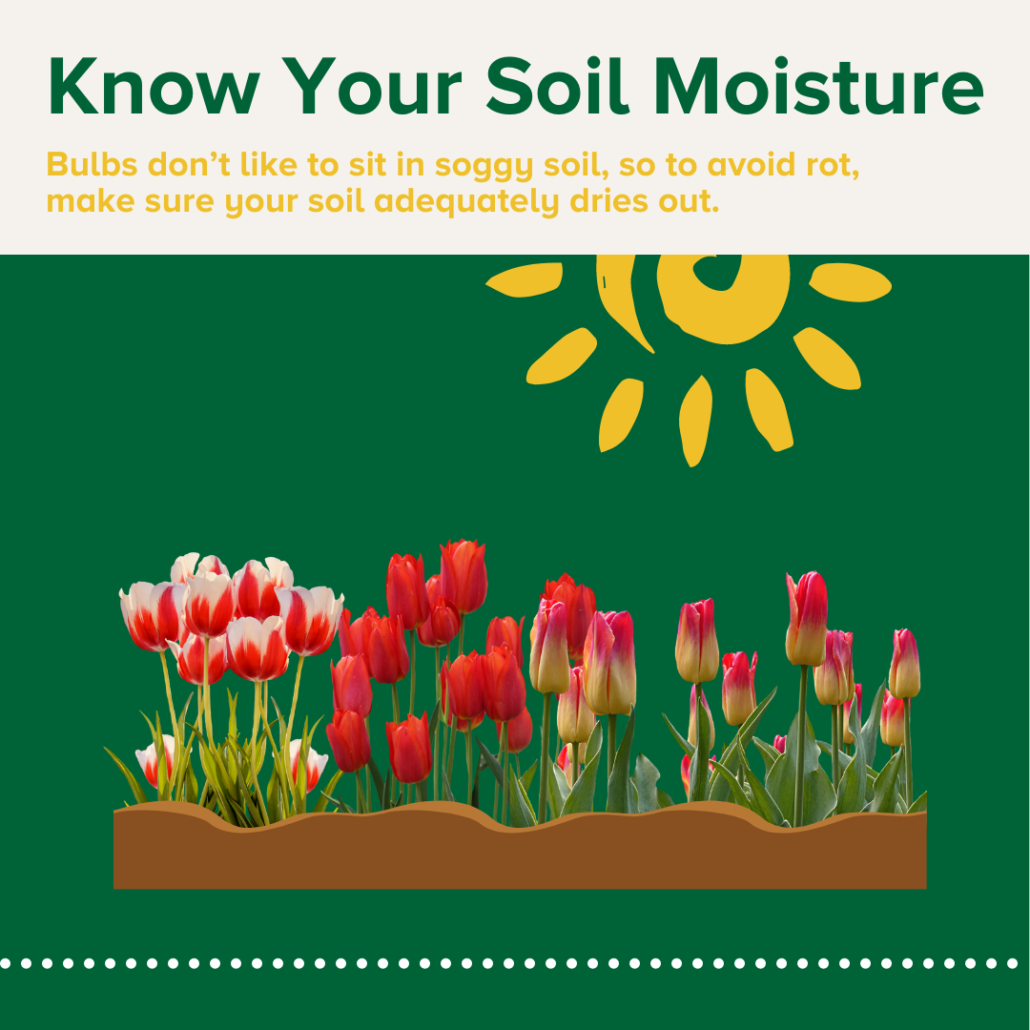
As far as soil goes, the key is making sure that the kind of bulb you’re planting is adapted to your soil moisture. Many bulbs are from dry places, so make sure your soil adequately dries out during the growing season.

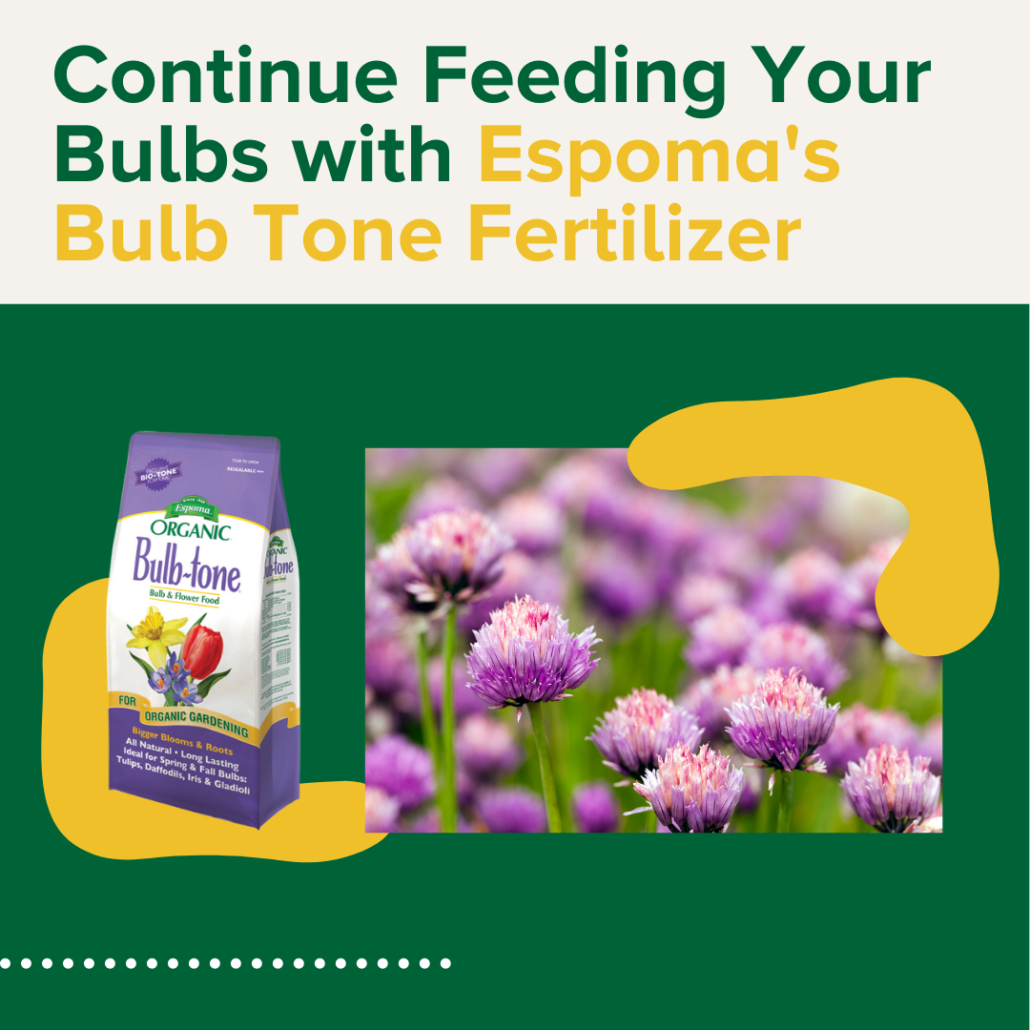
For fertilizing, wait until Spring right after your bulbs have flowered, then add in compost or some other organic fertilizer like Espoma’s Bulb-tone fertilizer, which is specifically designed to support bulb growth. After flowering, your bulb is trying to collect lots of nutrients for the bulb below ground to be ready for the next year.

When Will My Bulb Bloom?

You’ve planted your bulbs in the Fall and are on the edge of your seat, just waiting for those Spring bulbs to arrive. Below are some bulbs that will bloom in Spring, Summer, and Fall.

Spring: tulips, some alliums, daffodils, snowdrops, snowflakes, and irises.

Summer: dahlias, gloriosa lilies, true lilies, blood lilies, canna lilies, crinum.

Fall: dahlias, autumn crocus, red spider lilies.

How to Divide Bulbs

Most bulbs grow in a clump and over time, they will multiply underground, creating a clump of 10 to 15 bulbs. Many bulbs need to be divided to rejuvenate.

You want to wait to divide bulbs until the foliage starts to die off. The foliage helps to collect energy for the bulb for the next season, so if you move the bulb while the leaf is green and trying to build energy, you can damage it.

After the foliage has died off, dig down to the bulbs and start separating them. Sometimes you need water to force them apart. Let them dry out on the surface and then store them in a cool, dry location until you’re ready to replant them in the Fall or Spring.

Want to learn more about all things flower bulbs? Make sure to check out Jenks’ blog and brand new book, Crinum: Unearthing the History and Cultivation of the World’s Largest Bulb, available now!

******

About Bloom & Grow Radio Podcast

Bloom & Grow Radio Podcast is now Groing Joy with Maria.

The podcast helps people care for plants successfully and cultivate more joy in their lives. Host Maria Failla, a former plant killer turned happy plant lady, interviews experts on various aspects of plant care, and encourages listeners to not only care for plants but learn to care for themselves along the way.

About Our Interviewee

Jenks Farmer got his first flower bulb in the 1970s and has been growing them ever since. For the last twenty years, Jenks has led teams responsible for establishing two of South Carolina’s major botanical gardens. His designs for homes, museums, and businesses have received recognition and awards and have delighted hundreds of thousands of visitors with the joyful, easy exuberance of hand-crafted gardens.

Jenks wrote and published three books, including The Crinum Book, Funky Little Flower Farm, and Deep-Rooted Wisdom.

​​Follow Raffaele: 

Blog

Instagram

Website

Featured Products:

Where to Buy
https://www.espoma.com/wp-content/uploads/2022/07/How-to-Plant-_-Fertilize-Bulbs-5.png 1080 1080 espoma https://www.espoma.com/wp-content/uploads/2023/05/espoma-logo340w-1.png espoma2022-07-11 14:01:402023-09-11 16:55:28BAGR Episode 150 Blog: All the Bulb Basics You Need

Preserving Asian Heritage Through Seeds and Stories

July 10, 2022/in Blog, Bloom and Grow Radio, Fruits & Vegetables, Gardening, Seed Starting, Vegetable Gardening

Seeds not only provide us with food to eat, but they represent the future and allow us to reflect on our history. They are heirlooms, a connection to our ancestors and their stories. In this blog, we celebrate stories of Asian culture and connection to nature and food through seeds, with YC Miller from Kitazawa Seed Company. 

YC walks us through the importance of preserving our heritage through seeds with heartwarming stories from Kitazawa customers on how a simple vegetable can carry so much family history and pride. 

This blog is inspired by Episode 152 of Bloom and Grow Radio Podcast, where host Maria Failla interviewed YC Miller from Kitazawa Seed Company. 

How Growing Food Can Reconnect Us with Our Heritage

YC didn’t grow up growing any Korean vegetables. Coming to them as an adult has played a huge part in how she has reconnected with their heritage.

Fifteen years ago, YC went on a heritage trip to Korea. For a portion of the trip, she worked on a farm. She recalls that experience as one of the first times she understood what roots really meant. It really spoke to YC’s soul about who she was as a person and created a deep sense of belonging. 

That moment served as an awakening of their heritage, but also a reconnection with food and the plants, vegetables, and agricultural practices that went along with that. Ever since then, it’s been a constant learning process through their work at Kitazawa Seed Company.

Many Americans, descendants of immigrants, share a similar experience in reconnecting with their culturally significant vegetables and stories of families bringing seeds over from their home countries. With their work at Kitazawa Seed Company, YC says it’s been a pleasure to be able to celebrate and honor that connection, and to be a source of seeds and food that help foster that connection.

How Two Brothers Built Kitazawa Seed Company

Kitazawa Seed Company was started by two brothers in 1917.  It is the oldest Asian seed company in the United States, specializing in Asian varieties. The brothers were selling seeds to Japanese farmers in California, and also providing traditional Japanese vegetable seeds to home gardeners who were growing them for their families and communities.

From 1942 to 1945 Kitazawa Seed Company was forced to abandon the business due to WWII. The Kitazawa family, along with all other Japanese-Americans, were moved and put into Relocation Camps during that time. The brothers restarted the business after the war. Many of their customers had relocated due to land ownership changes. This is when Kitazawa began selling and shipping seeds across the United States and really flourishing. It has continued the tradition of selling both to commercial farmers and to the home gardener. 

A major goal of Kitazawa has been to bring in seeds that are otherwise inaccessible. It started as a company that focused mostly on Japanese vegetables, because that was primarily the customer base. With waves of immigration from Asia to the United States, there’s been a changing demand for different kinds of Asian vegetables. Now Kitazawa has expanded its offerings to be able to provide vegetables for lots of different communities. 

Preserving Seed Diversity and the Immigrant Experience

Kitazawa strives to provide lots of hybrid seed varieties that are reliable, but they also value open pollinated varieties. If you were to grow an open pollinated squash variety in California and grow that same variety in New York, saving seeds year after year, those seeds would adapt to the different microclimates they were grown in. While they’re still the same variety of squash, certain traits would emerge, making them better suited for each region.

An interesting parallel to note is the similarity in the seed and the home grower who originally brought it to the United States. Seeds come from a different homeland and take on the soil, the air, and the sunshine from their new home. As seeds thrive, they continue to change and evolve. Similar to the immigrant experience in adapting to your new environment. 

As home gardeners, we may not think much about saving seeds. But it’s something YC highly encourages us to do to create more locally adapted, resilient seed varieties. 

Where and How Does Kitazawa Source Their Seed Varieties?

A lot of Kitazawa’s seeds are imported from Asia, where they have been working with many of the same reliable growers for decades. There are plans in place to consider more domestic production, especially considering supply chain issues and shipping. There are amazing people doing small batch seed production in the United States that are doing incredible work, specifically with landrace varieties. Landrace seeds have evolved traits naturally over time in response to growing conditions like pests, climate, and diseases in a specific location.

Kitazawa not only considers a particular variety, but also a high standard of quality when bringing in seeds. They grow out new varieties first so they can ensure the health and vigor of the seeds they offer to customers. The process can take several years to not only source the seed, but to also ensure the integrity of the seed packet they sell.

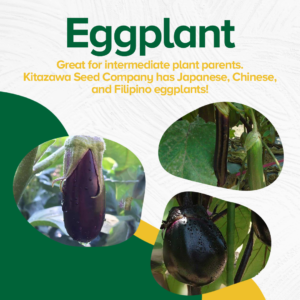
What Are the Differences Between Japanese, Chinese, and Filipino Eggplants?
One of Kitazawa’s new varieties is a Filipino eggplant. They have had customer requests for  years to carry a Filipino eggplant in their seed options. While they have lots of Japanese and Chinese eggplant varieties, none of them were quite right for their Filipino clientele. 

Traditionally, people think of a Japanese eggplant as being long, narrow, and purple. Generally the Japanese eggplants also have a purple calyx, which is the part of the eggplant that attaches to the stem. They are also quite firm with low moisture content, and often used for pickles. 

Chinese eggplants often have a green calyx and are lighter in color than the Japanese eggplants. Their texture is a bit creamier too.

The Filipino eggplant Kitazawa is sourcing is a greenish purple with a green and purple calyx. Generally, Filipino eggplants are more tender and a bit sweet. 

YC’s Recommended Kitazawa Varieties for Beginners

One of the great things about Asian vegetables is there’s such a huge diversity. There is something for everyone from the beginning gardener to the more experienced gardener and everyone in between.

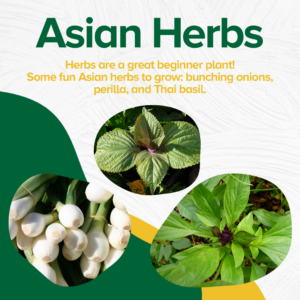
For people who are just starting out, some of the easiest plants to get started are Asian herbs. There is a huge variety of Asian herbs from bunching onions that you can use in pretty much everything to Thai basil and all of the different kinds of perilla. 

And then there are types that YC would consider big payoff varieties. With a crop like peas, you can eat the shoots and the peas once they form. They’re easy to grow and you get a lot of vegetables for your effort. Japanese cucumbers are another wonderful option and fairly easy to grow with a trellis.

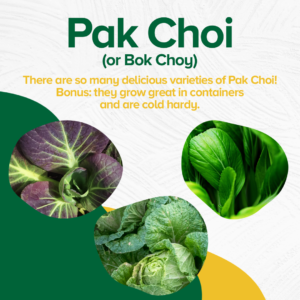
Kitazawa has a huge number of pak choi (or bok choy) available that can be easily grown in a container. They have a bunch of smaller varieties for small space growers. It’s a cold hardy vegetable you can grow in Spring and Fall. 

If that all sounds overwhelming, Kitazawa is always happy to give seed recommendations. You can give them a call and they’d be happy to help assist you. 

YC’s Favorite Recipe to Cook

Korean perilla is a Korean herb, and a very meaningful plant to YC personally, so it’s their go-to plant. She uses it in two ways: one, as a kind of lettuce wrap and two, she pickles it!

It’s really wonderful as a pickle or as a kimchi. Kitazawa carries many of the perilla varieties, including Japanese shiso, a Vietnamese variety, and a Korean variety. They’re also very easy to grow in containers! 

To learn more about different Asian recipes, check out the Kitazawa Recipe Blog. 

Visit  Kitazawa Seed Company

*****

About Bloom & Grow Radio Podcast 

Bloom & Grow Radio Podcast helps people care for plants successfully and cultivate more joy in their lives. Host Maria Failla, a former plant killer turned happy plant lady, interviews experts on various aspects of plant care, and encourages listeners to not only care for plants, but learn to care for themselves along the way.

About Our Interviewee

YC Miller works for Kitazawa Seed Company, which specializes in offering the highest quality Asian seeds to delight the diverse palates of their customers. They offer over 500 seed varieties that produce dento yasai or traditional heirloom vegetables of Japan, to the Asian vegetables popularly found in farmers’ markets, specialty grocery stores, and restaurants. Now you can grow them in your kitchen garden, sell them at your garden center and grow them commercially.

​​Follow Kitazawa Seed Company:

Website

Email

Featured Products:


Where to Buy

https://www.espoma.com/wp-content/uploads/2022/07/Copy-of-Asian-Heritage-1.png 1080 1080 espoma https://www.espoma.com/wp-content/uploads/2023/05/espoma-logo340w-1.png espoma2022-07-10 10:36:342022-07-10 10:44:08Preserving Asian Heritage Through Seeds and Stories

Bonsai Care 101

May 3, 2022/in Blog, Bloom and Grow Radio, Bonsai, Container Gardening, Indoor Gardening, Indoor Gardening

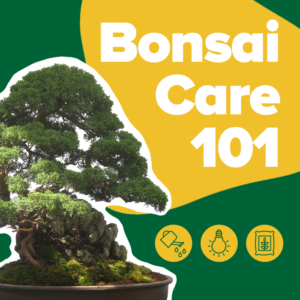
Picture of Bonsai tree

Bonsai Care 101

Bonsai trees–if you’re a millennial, you probably remember them from The Karate Kid movies. Did you know it’s actually pronounced “bone-sigh”? Bonsai means “to plant in a container or a potted plant.”

This blog all about bonsai care is inspired by Episode 119 of Bloom and Grow Radio–where host Maria Failla interviewed Bjorn from Eisei-En Bonsai.

Can Any Tree Be a Bonsai?

There are 3 characteristics to look for to help transform trees into the bonsai art we know and love:

  • Smaller leaves. You’re trying to create a large tree shrunk down into miniature form–so if you’re using a trunk with very large leaves, it looks quite out of proportion with the overall size of the plant.
  • Plants with bark on them. You should have to work with woody plants to achieve the true bonsai form. All of the conifers like juniper and pine are great for this!
  • Look for plants with apical dominance. Apical what?! Apical dominance means the bud at the tip of the stem stops the growth that occurs on the other buds along the stem. It does this to become the dominant stem and allow woody plants to grow taller–which is great for bonsai shaping!

Are Bonsai Grown Indoors or Outdoors?
You may be wondering, “can I grow a bonsai as a houseplant?” And the answer is yes–but with a few caveats.

You need to figure out if it’s a tropical or a temperate climate tree. Temperate climate trees have four seasons and need to go through their life cycles outdoors–think oaks and maples.

Tropical climate trees do not survive freezing temperatures and suffer in below 55 degrees F conditions, so these would be better options as indoor bonsai plants. Ficuses like the Weeping Fig (Ficus benjamina) and the Pot-Bellied Ficus (Ficus microcarpa) would both work great!

If you want an indoor bonsai, try sticking with the subtropical and tropical climate plants. And check out the Top 5 Bonsai Trees (Indoor and Outdoor Options) with Bjorn from Eisei-en Bonsai for more variety options!

How to Care for Bonsai Trees

Now that we know more about what to look for, let’s jump right into bonsai care. We’ll cover all the basics for soil, fertilizer, water, light, and pruning. Buckle up, ‘cause we’re on this road of planty learning for a while!

What Is the Right Soil for Bonsai?
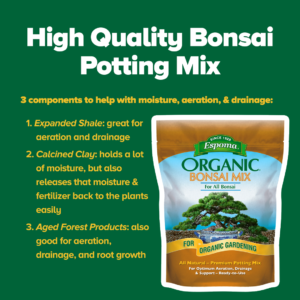
Since your goal is total control over the growth of the bonsai, you have to use almost entirely inorganic components when you mix your soil together. To make your own, try getting your hands on these 3 basic components:

  1. Expanded Shale: great for aeration and drainage
  2. Calcined Clay: holds a lot of moisture, but also releases that moisture & fertilizer back to the plants easily
  3. Aged Forest Products: also good for aeration, drainage, and root growth.

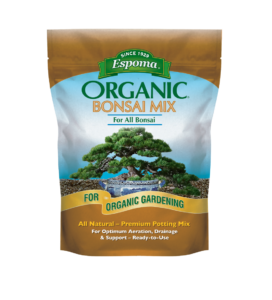
The particle size is quite large at 3/16 inch to ensure as much drainage and aeration to the root system as possible. Don’t want to make your own soil mix? Check out our Organic Bonsai Mix.

By keeping the plants in a mostly inert soil mix, you can then decide how much fertilizer to give the tree and the type of growth that you’re going to get out of the plant.

Bonsai Potting Mix

How Do I Fertilize Bonsai? 

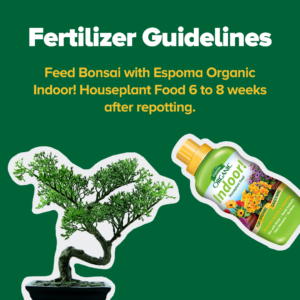
Fertilizer is the key to controlling your plant’s growth. To keep the soil from clogging up, Bjorn recommends distributing bonsai fertilizer by adding synthetic or organic fertilizer to a tea bag and slowly allowing the nutrients to leach into the soil. Every time you water your bonsai, water directly over your nutrient tea bag.

So how much fertilizer and what type of fertilizer should you apply? That all depends on the stage of tree development.

  • Young Trees: at this stage you want to thicken the trunk of the plant. Use a very high-nitrogen synthetic or inorganic fertilizer, which produces elongating, inner nodes and bigger leaves on your tree.
  • Older Trees: with older trees, you’re simply in maintenance mode. Here you’ll need fertilizer that has a much lower nitrogen value and well-rounded, equal amounts of nutrients.

Bonsai Fertilizers

How Do I Water Bonsai?

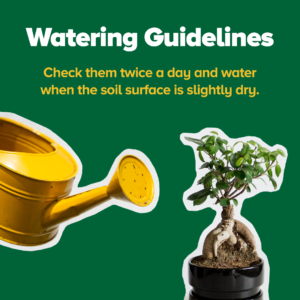
Since you’re using a rockier, more aerated soil, you’ll be watering more frequently than you would a regular potting mix.

A good general watering rule with bonsai plants: Bjorn suggests checking on them twice a day and water when the soil surface is slightly dry. Stick to the basic schedule of checking on your bonsai morning and evening, and all should be well in the bonsai world!

Bonsai Watering Guidelines

How Much Light Do Bonsai Need? 

In general, you want your bonsai plants to have as much light as possible. Bjorn says the more light you have, the smaller the leaf size and the softer the branch structure. In the long run it will be easier to maintain that tree’s shape.

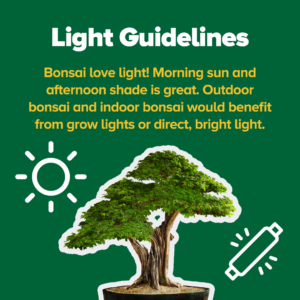
If you plan to keep an outdoor bonsai, morning sun and afternoon shade is best during summer. Indoor bonsai plants will need supplemental light, especially during the fall and winter months. Generally speaking, 12-14 hours of direct light is best for bonsai growth.

Bonsai Light Guidelines

How to Prune Bonsai? 

You might have guessed that pruning is one of the most important factors in creating a bonsai tree. There are two main parts to pruning: roots and shoots. Let’s go over both.

What is the difference between Root Pruning and Shoot Pruning?

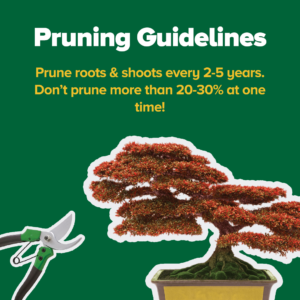
Root pruning should happen every 2-5 years in spring when you notice water is no longer penetrating the soil and simply pooling on the surface. Remove a lot of the old soil with a root rake or wooden chopstick. You will inevitably remove some roots through that process, but removing that old soil exposes the outer and underside of the root system. Make sure you don’t prune back more than 20-30% of the roots. Then simply replenish the space you’ve created with new potting mix. Since the mix is fresh, make sure to use your hands to pat the soil within the root system of the plant and give it a good watering to help settle the soil.

Shoot pruning is also done every 2-5 years in late spring or early summer after new growth has appeared. Your bonsai should have put out about 6-10 leaves–cut it back to two leaves with dormant buds. Essentially, you want to look for those little bitty nubs that are right at the base of the leaves. As long as you’re counting at least two, you can cut them back.

Think about pruning like you’re always trying to push the growth back and create desired directionality in one direction or another within the plant. Make sure to avoid pruning your roots and shoots in the same year–that would be far too much stress on your precious bonsai.

Bonsai Pruning Guidelines

Bonsai is a Wonderful Practice for Mindful Plant Parents!

Are you someone who likes to interact with your plants on a daily basis, control all the elements, and look towards the future? Then the bonsai is a perfect fit for you! Caring for a bonsai is one of the most engaging and interesting hobbies you can get into. It really shifts your perspective on instant gratification, which will definitely make you think differently about not only plants, but also life in general.

Ready, Set, Grow!

If you’re ready to grow your own bonsai, make sure to check out the Eisei-en Bonsai YouTube channel with Bjorn and find all the specific guidelines for each tree variety along with tons of other helpful information.

Where can one buy a bonsai tree? If you’re in Nashville, Tennessee, you absolutely have to get one of Bjorn’s bonsai plants at Eisei-En Bonsai Garden. Otherwise, check out Brussel’s Bonsai online for plants, tools, and pots!


About Bloom & Grow Radio Podcast

Bloom & Grow Radio Podcast helped people care for plants successfully and cultivate more joy in their lives. Host Maria Failla, a former plant killer turned happy plant lady, interviews experts on various aspects of plant care, and encourages listeners to not only care for plants, but learn to care for themselves along the way.

About Our Interviewee

Bjorn from Eisei-En Bonsai

Bjorn Bjorholm’s bonsai love started when he got a bonsai tree for his 13th birthday after watching all the Karate Kid movies. Even though his first bonsai croaked (hello plant parent initiation), Bjorn was hooked and founded the Knoxville Bonsai Society in high school with his father. After graduating from the University of Tennessee focusing on Japanese language and business, he moved to Japan and began a bonsai apprenticeship for 6 years under Master Keiichi Fujikawa at Kouka-en bonsai nursery in Osaka, Japan. His tenure as an apprentice at Kouka-en was followed by three years as artist-in-residence, making him the first foreign-born working bonsai professional in Japan. Bjorn now owns Eisei-en Bonsai in Nashville, TN, the premier bonsai garden, nursery and school of the Eastern US.

Follow Bjorn:

Website

Instagram

YouTube


References

  1. Episode 119 of Bloom and Grow Radio
  2. How Woody Plants Grow: https://extension.illinois.edu/blogs/garden-scoop/2020-12-12-how-woody-plants-grow
    1. Used to describe apical dominance
  3. Temperate Deciduous Forest: https://earthobservatory.nasa.gov/biome/biotemperate.php
    1. Used for temperate tree examples
  4. Ficus benjamina: https://plants.ces.ncsu.edu/plants/ficus-benjamina/
    1. Used for info on Ficus benjamina
  5. Ficus microcarpa: https://plants.ces.ncsu.edu/plants/ficus-microcarpa-ginseng/
    1. Used for info on Ficus microcarpa
  6. A Bonsai Close-Up on Indoor Tropical Bonsai: https://prairiestatebonsai.com/a-bonsai-close-up-on-indoor-tropical-bonsai/
    1. Used for indoor bonsai light requirements

Featured Products


Indoor Liquid Plant foodBonsai potting mix


Where to Buy

https://www.espoma.com/wp-content/uploads/2022/05/Bonsai-Care-1.png 700 700 espoma https://www.espoma.com/wp-content/uploads/2023/05/espoma-logo340w-1.png espoma2022-05-03 07:43:152024-10-01 17:32:39Bonsai Care 101

Rubber Plant Care and FAQs

April 19, 2022/in Blog, Bloom and Grow Radio, Indoor Gardening, Indoor Gardening

Rubber Plant Care Guide

Rubber Plant Care and FAQs

Rubber plants (Ficus elastica) don’t get enough credit in the tropical plant world. These humble plants are usually available at the garden center and always affordable, but they tend to get overlooked by some of the “sexier Instagram-worthy plants.” They can be hardy, growing into 6 foot trees from a small 4-inch pot, and come in beautiful variegated varieties. Rubber plants are fantastic for many more reasons that we’re going to dive into.

This blog is inspired by Episode 148 of Bloom and Grow Radio–where host Maria Failla interviewed Raffaele Di Lallo, founder of Ohio Tropics. 

Let’s first look at different types of rubber plants! 

Types of Rubber Plants

The two types of rubber plants are non-variegated and variegated.

Non-Variegated Rubber Plants: 

Ficus elastica ‘Decora’: typical shiny, green leaves

Ficus elastica ‘Robusta’: similar, but larger leaves 

Ficus elastica ‘Burgundy’: gorgeous, super dark, almost black leaves and stems

Variegated Rubber Plants: 

Ficus elastica ‘Tineke’: different shades of green, yellow, and cream 

Ficus elastica ‘Ruby’: beautiful pink variegation 

Ficus elastica ‘Doescheri’: leaves are a little bit narrower

PART 1: How to Take Care of Rubber Plants

No matter the variety of rubber plant you have, the care is almost identical. The only minor difference is that variegated plants need more volume of light than non-variegated plants. 

Rubber plants come from the Moraceae family, which also contains figs and mulberries. But don’t be fooled: rubber plants are actually toxic. If you break off a branch or leaf, you’ll notice a white substance dripping out that’s quite toxic to humans and animals. This white latex-like liquid was originally used to create rubber, hence the name rubber plant. Make sure to wear gloves when handling or pruning the plant. 

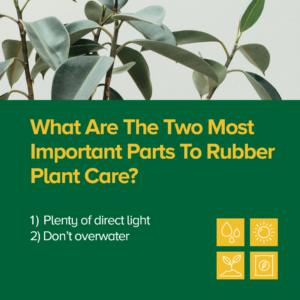
An easy-to-follow care plan for rubber plants is 1) make sure it gets plenty of direct light and 2) don’t overwater. Let’s get into more details below!

Rubber Plants Most Important Tips

How to Water Rubber Plants

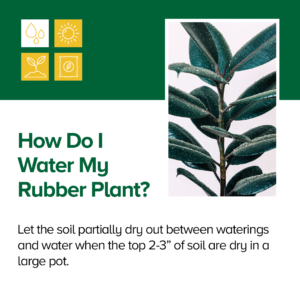
Rubber plants need to dry out sufficiently between waterings. Your finger is your best friend when it comes to determining moisture in your potting mix. Use your finger to determine how dry the potting mix has gotten. If you have a small four-inch pot, let the top 1/2 inch dry out before watering it again thoroughly. If you have a much bigger pot (around 15 inches), let at least the top quarter of the soil (2-3”) in your pot dry out before watering again. 

Always water your rubber plant thoroughly and always have a drainage hole in your pot. Don’t let your soil completely dry out, or you risk stressing out your plant’s roots. How to water rubber plant

How Much Light Do Rubber Plants Need? 

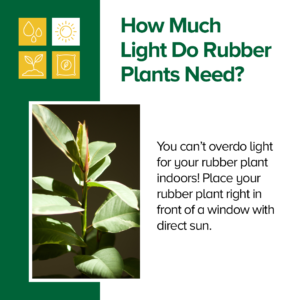
Oftentimes rubber plants are labeled as low light plants, but they really are low light tolerant. You can’t overdo light for your rubber plant indoors! As a general rule of thumb, put your rubber plant right in front of a window, preferably a window with some direct sun. 

An Eastern-facing window that gets morning sun is beautiful, or a Western-facing window that gets afternoon sun is great too. If you live in the Northern hemisphere and you have an unobstructed Southern window, those tend to get a ton of direct sun. Now, if you’re in the Southern hemisphere, North and South are reversed and you’ll have to adjust appropriately.

When it comes to water, the more light you have, the quicker your soil is going to dry out, because your plant will be growing more. So if you have plenty of sun, then you have to monitor your plant a lot more frequently, because it’s going to dry out quicker. How Much Light for Rubber Plant

What Type of Soil Do Rubber Plants Need? 

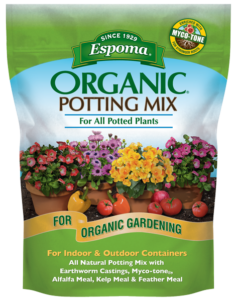
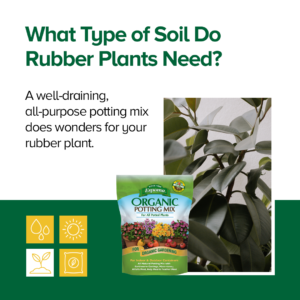
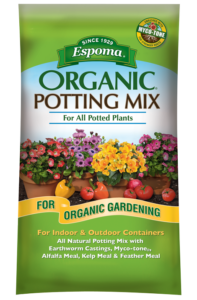
A well-draining, all-purpose potting mix will do wonders for your rubber plant. Check out Espoma’s Organic Potting Soil Mix to get you started; it’s often the best soil for indoor plants. Adding in perlite or orchid mix will provide that extra aeration to make sure your mix is well draining. To get a good balance between moisture retention and drainage, use three parts all-purpose potting mix and one part perlite. 

What Type of Soil for Rubber Plant

How to Fertilize Rubber Plants

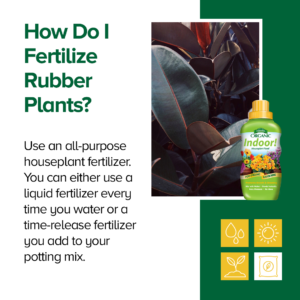
You can use any all-purpose houseplant fertilizer for rubber plants. There are two options: liquid fertilizer or a slow-release fertilizer you can add to your potting mix. 

If you don’t like liquid fertilizers, you can always use a slow-release plant food  that you add to your potting mix when you plant your rubber plant. Those fertilizers generally last up to 6 months. 

Now that you know all about rubber plant care, let’s get into some frequently asked questions! 

How to fertilize rubber plants

PART 2: Rubber Plant Frequently Asked Questions and Answers from Raffaele di Lallo

Why Is My Rubber Plant Not Growing? 

Your rubber plant needs more light! If your rubber plant is in a far corner from your window, it might be time to move it to brighter light. Remember, rubber plants thrive in bright, direct sunlight. 

How Do I Get My Rubber Plant to Branch and Be Bushier Instead of Taller? 

Don’t be afraid to prune! Just hack it off wherever you want (just not all the way down to the soil) and chop off a good portion of it. Pruning your rubber plant forces new branches to form, resulting in a bushier rubber plant. 

You can also try air layering, which is propagating from stems still attached to the plant. Take a sharp knife and make a diagonal cut about halfway into your rubber plant trunk. Then add some sphagnum moss in the cut and wrap the entire branch with moss. Put plastic wrap around it and tie it on both ends. Over the course of a few months, it’s going to send out roots from where you cut it, which you should be able to see through the plastic wrap. Then you simply cut the stem right under your air layering and replant it. 

What Are the Best Ways to Propagate a Rubber Plant?

The first way to propagate a rubber plant is air layering, described above. This works especially well if you have woody branches already formed. Air layering takes a few months to achieve new root growth. 

The second propagation method is making individual node cuttings. Find the spot where the leaf meets the branch and cut it off on each side, leaving half an inch on either side. You’re basically left with a leaf and then part of the stem, where the node is. At that point, you can either stick the stem in water or soil to grow roots. 

Be aware that if you try propagating your rubber plant in winter, you might have a lower success rate and it will be substantially slower compared to trying it in spring or summer when the plant is actively growing

Why Are New Leaves on My Rubber Plants Smaller Than the Older Ones?

Number one, our conditions at home are nothing like ideal conditions in the greenhouses that these plants were grown in. That in and of itself could be a cause. 

Poor, inconsistent conditions could be your second culprit. Poor lighting and letting your plant dry out too much as its developing new leaves can also affect the leaf size.

Why is My Rubber Plant Dropping Leaves? 

Rubber plants don’t like to be moved, first and foremost. And if you bring your plant home and shove it in a dark hole, you will get leaves dropping off. Your plant is not going to be able to support all the leaves it had when it was growing in good conditions.

If your plant is horribly root bound, it’s going to be very hard to keep up with the watering required to keep the roots hydrated. This could also be contributing to dropping leaves. At that point, you really need to re-pot it in a bigger pot. 

My Rubber Plant Looks Healthy, But the Branches Are All Over the Place. Why Is This Happening?

Indoors, we don’t have the benefit of wind that strengthens plants outside. Because of this, our indoor plants may need a little help compensating. It’s totally okay to tie up your plant. Rafaelle uses a bamboo stake that he inserted right through the root ball, gently tying the branches that were getting unruly. 

Why Are the Edges of My Variegated Rubber Plant Browning? 

You might not be watering your rubber plant properly. Avoid letting your soil dry out completely or letting your rubber plant soak in water for too long. Once you get the watering right, make sure your rubber plant is supplemented with enough light! 

What Are the Tiny White Spots on My Rubber Plant? 

Those tiny white spots are called lithocysts and pose no harm to your rubber plant. They are cells that contain calcium carbonate. 

Which Rubber Plant Should I Get?

Now that you know how to care for rubber plants and troubleshoot any issues, let’s figure out which rubber plant is right for you! 

If you’re getting your first rubber plant and have never grown one before, Raffaele recommends sticking with a non-variegated plant, since they’re going to be a little bit easier to care for. ‘Robusta’ is a great beginner rubber plant. And if you really love variegated plants, try the ‘Tineke’ or the ‘Ruby’ cultivars. 

Want to learn more about rubber plants and houseplants? Make sure to check out Raffaele’s blog and brand new book, Houseplant Warrior coming out soon! 


About Bloom & Grow Radio Podcast

Bloom & Grow Radio Podcast helped people care for plants successfully and cultivate more joy in their lives. Host Maria Failla, a former plant killer turned happy plant lady, interviews experts on various aspects of plant care, and encourages listeners to not only care for plants, but learn to care for themselves along the way.

About Our Interviewee

Engineer and plant parent for more than thirty years, Raffaele Di Lallo knows that the world of houseplants can be full of confusing myths and conflicting care advice. Raffaele started his blog Ohio Tropics focused on gardening with a tropical flare in cold weather climates. It quickly became a blog all about houseplant care. Five years later and he’s still writing about all things houseplants! 

His new book Houseplant Warrior: 7 Keys to Unlocking the Mysteries of Houseplant Care demystifies every aspect of plant parenting and is set to release on March 15, 2022. Houseplant Warrior is particularly relevant for the beginner or any houseplant aficionado struggling with their houseplants. Raffaele teaches a holistic approach to houseplant care and understanding how all of the conditions work together.

​​Follow Raffaele: 

Blog

Instagram

YouTube

Book


Featured Products

Where to Buy

https://www.espoma.com/wp-content/uploads/2022/04/Rubber-Plant-1.png 1080 1080 espoma https://www.espoma.com/wp-content/uploads/2023/05/espoma-logo340w-1.png espoma2022-04-19 14:09:282024-09-06 10:49:10Rubber Plant Care and FAQs

Seed Starting 101: How to Start Seeds Successfully

April 5, 2022/in Blog, Bloom and Grow Radio

Seed starting setup

Seed starting is upon us in the gardening world! There is no better way to connect with the food we eat than by growing it ourselves. Starting edible plants from seed can be intimidating, but we’re here to break it down and answer all your burning questions. 

This blog is inspired by Episode 114 of Bloom and Grow Radio–where host Maria Failla interviewed Joe Lamp’l–the Joe behind The joe gardener Show.

Before we dive into the how of seed starting, let’s understand the why. 

Why Start Your Garden from Seed? 

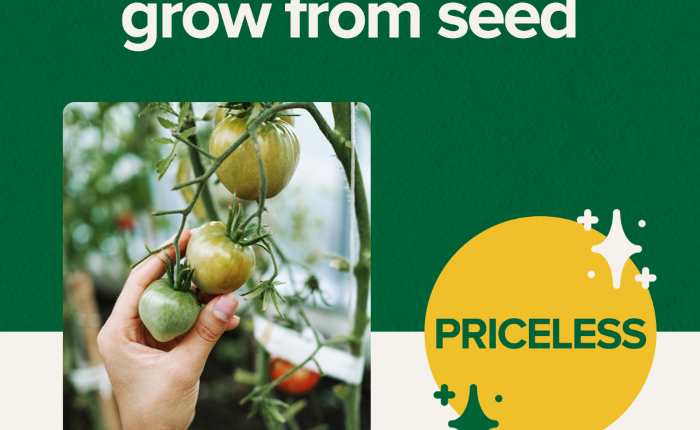
In our world of instant gratification, what’s better than starting your gardening season way sooner than most gardeners?! When you start seeds indoors, you get your hands in the dirt and get a jump on the growing season. And what a rewarding feeling it is to start your plants from seed, and enjoy the journey of bringing them from seed to plate. 

If you love your edibles, decide what you want to eat and which varieties you want. Don’t leave it up to what’s available at the garden center. Think about how much you can choose when you start from seed: flavor, varieties, and the stories behind different heirlooms. You can really expand your food choices when you get to pick exactly what you grow. 

Another great reason to start your own seeds is to make sure you’re growing the right kind of plant for your needs. Do you absolutely love tomatoes, but only have a small balcony to grow them? Look for microdwarf tomato varieties that only grow about 1-2 feet tall! If you have a short growing season, you’d also want to make sure you choose “early” or “short season” plant varieties. 

Starting from seed offers us the ability to be in control of the varieties we grow, plan in advance, and save lots of money in the long run. Speaking of starting seeds on a budget…

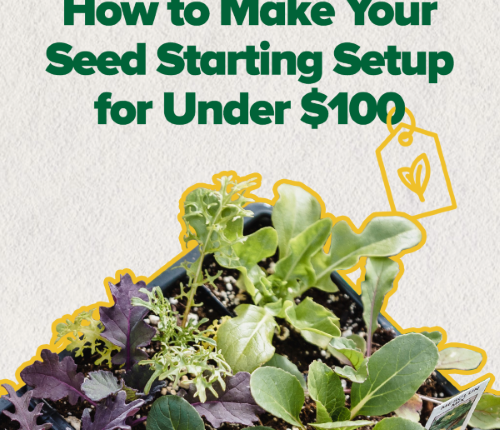
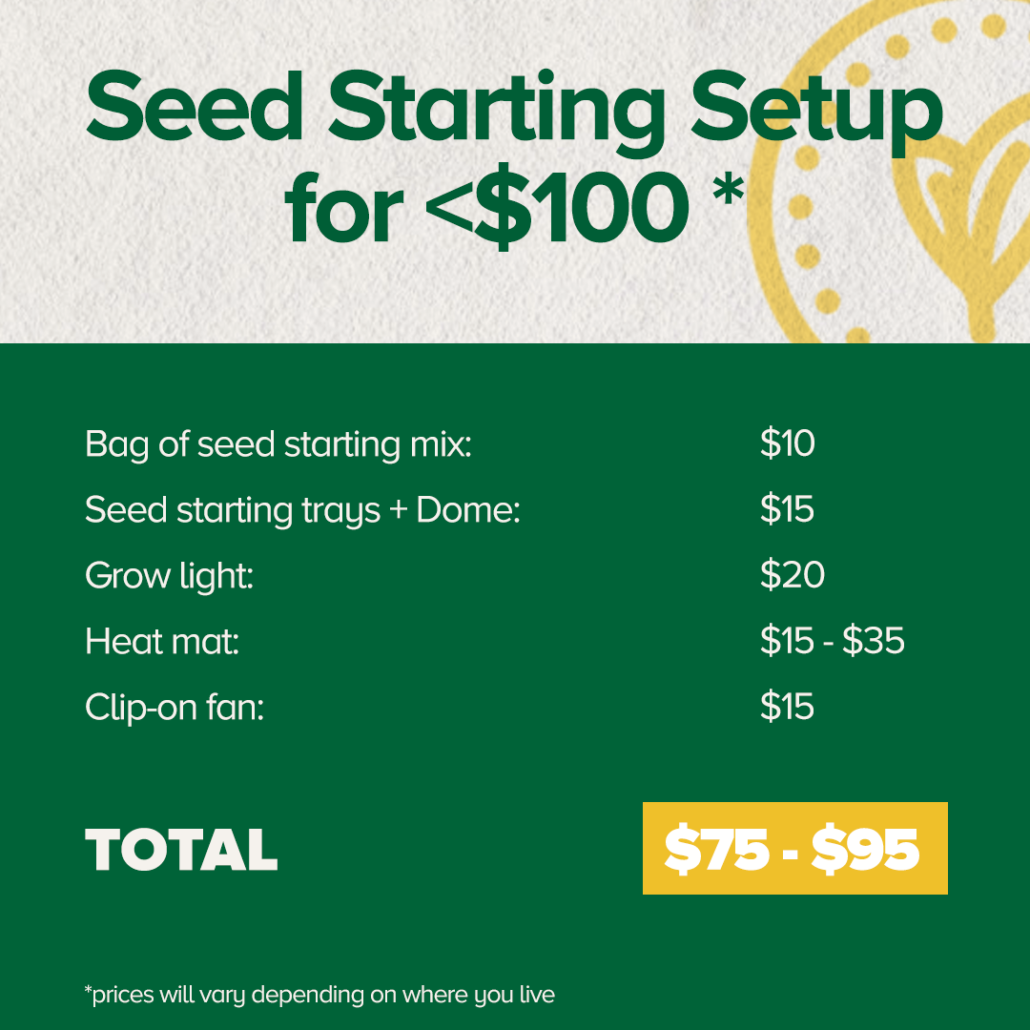
How to Get Your Seed Starting Setup for Under $100

Your seed starting setup can be super budget-friendly if you take the time to look at the components. For under a hundred dollars, you can put together everything you need! Let’s break down the materials, costs, alternatives, and conditions you need for seed starting. 

Seed Starting Mix

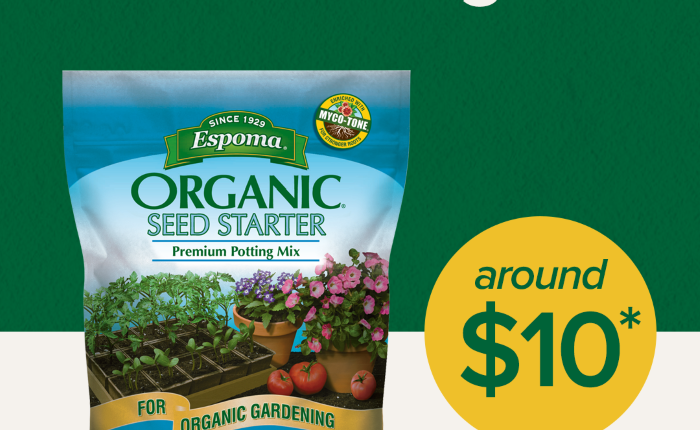
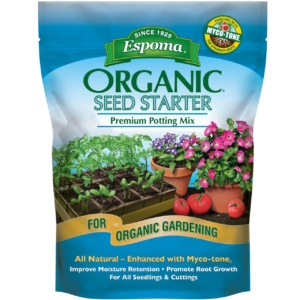
To start, you need a good seed starting mix. It’s called a “mix,” because there’s really no soil in it. It’s made of natural ingredients like peat moss, vermiculite, and perlite. A bag of seed starting mix is going to cost between $5-$10.

Espoma Organics takes the guesswork out of your selection by providing their high quality seed starting mix. 

Seed Starting Trays

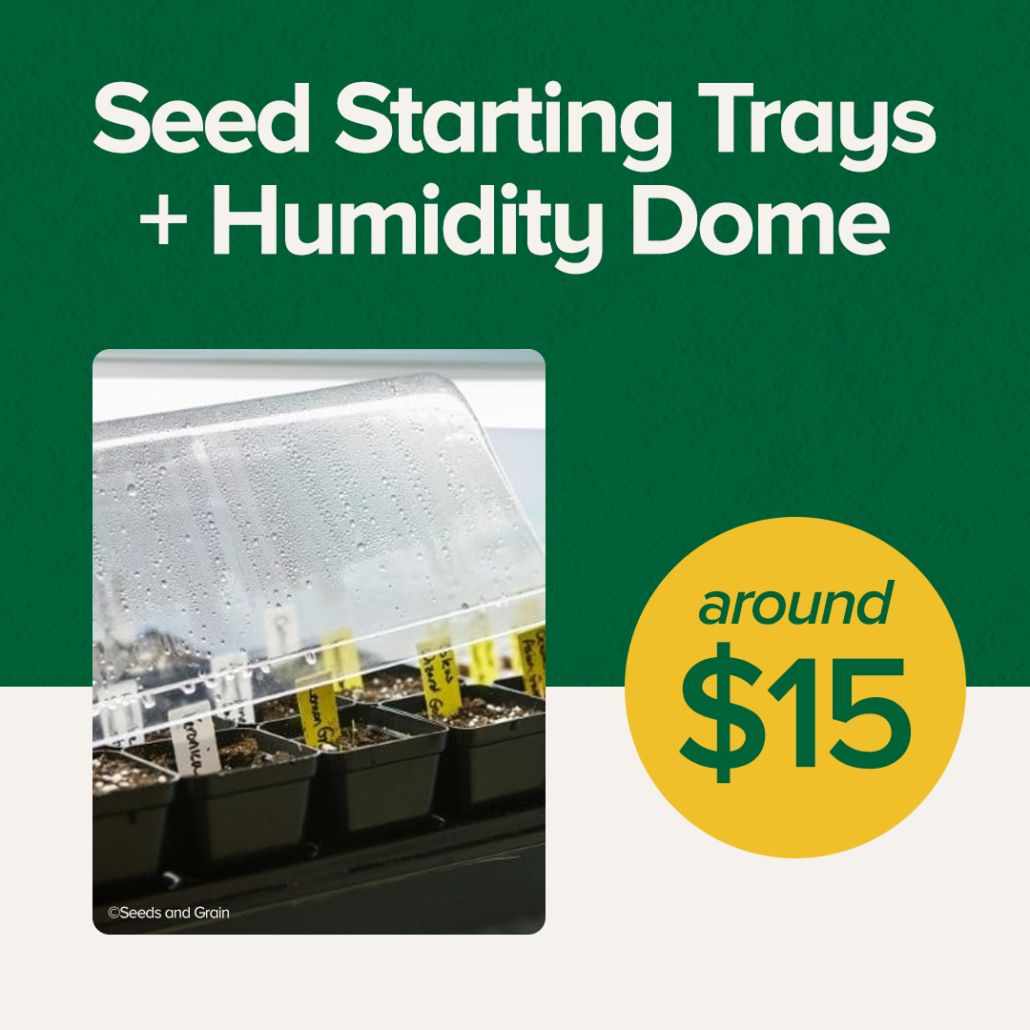
With one bag of seed starting mix, you can fill about two seed starting trays, which is your next material needed. Seed starting trays can give you anywhere between 18 to 72 cells to sow your seeds. You can get two trays for about $10. 

Look for seed starting trays with cells about 3.5 inches or smaller. In a traditional seed starting tray, cells are deep so seedling roots have more room to grow down. About 4 weeks from germination you’ll have to transplant your seedlings into a larger individual pot, AKA “potting up”.

Best Grow Lights for Seed Starting

Next is a grow light. Grow lights are where you could spend a lot of money in your seed starting setup, but if you’re on a budget, there is nothing wrong with buying an LED or fluorescent shop light for $20. You can get your seeds sprouted and ready for planting outside in good condition with a very inexpensive shop light. Will it be as good as a seedling that’s under a more expensive light? Maybe not, but all you’re really trying to do is rear those seedlings to the point that they are ready to go outside. Once they get outside, Mother Nature knows what to do and so does that seedling.

What are Heat Mats for Seed Starting important?

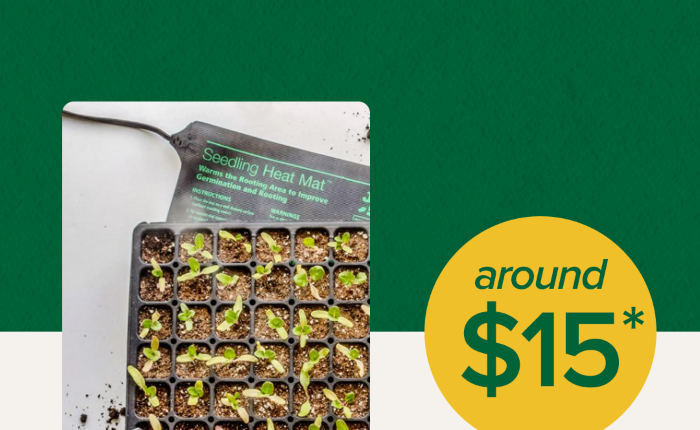
Heat mats are seed starting game changers. Heat mats raise the soil temperature, which helps your seeds sprout faster. Seeds have an ideal range of soil temperature in which they sprout the best, and can be anywhere from 65 to 85 degrees Fahrenheit. Seed mats will cost you between $15 and $35, depending on whether you get a thermostat attached.

Once most of your seeds have germinated, remove them from the heat mats. If you leave your seedlings on heat too long, they can start to become leggy. 

Humidity Dome for Germination

You’ll also want a humidity dome. It’s a clear plastic top that you put over the seed tray to hold the moisture in the soil until the seed germinates. If you don’t have a cover on your tray, the moisture won’t stay in the soil and the seed is not as likely to germinate. For two humidity domes, you’ll probably pay about $6. You can also use plastic wrap and lay it over the top to hold in moisture for your seedlings. 

A key point to remember with humidity domes: once your seeds germinate, remove the humidity dome so seedlings get enough oxygen. Airflow brings us to the next material needed. 

Small Fan for Seed Starting

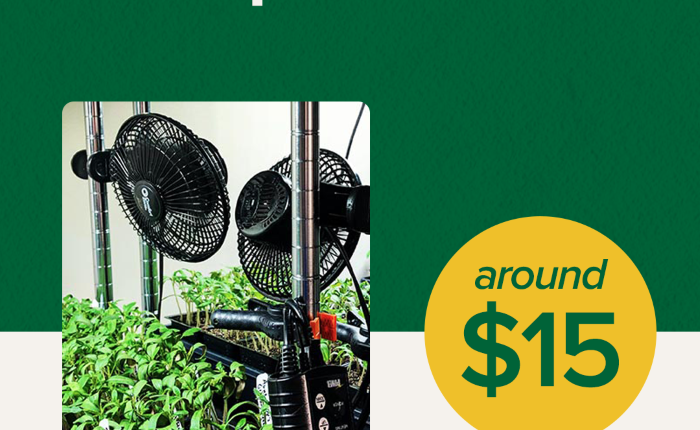
Last but not least, a fan. You can get a cheap clip-on fan for $15. Fans are important because once the seed germinates, you need air movement across that soil surface. Air movement reduces the chance of a fungal disease called damping off, which can kill your seedlings. Fans also simulate wind, making the stems sturdier and ready for outdoor conditions.

Total Seed Starting Materials Cost

Here’s the cost breakdown to get your seed starting setup for less than $100:

Bag of seed starting mix: $10

2 seed starting trays: $10

Shop light: $20

Heat mat: $15 – $35

Humidity dome: $6

Clip-on fan: $15

TOTAL: $81 – $96

All about Seeds: Where to Buy Them, Expiration Dates, & Non-GMOs

It’s important to find a good seed company. Here are some tips when you’re searching: 

  • Look for companies that have been around for a while with a good reputation. 
    • Do they have good customer service? 
    • Are their staff knowledgeable about their seeds? 
  • Find local or regional seed companies that grow their seeds close to home. Some seed companies can outsource their seeds from overseas from a huge commercial supplier. It’s important to know where your seeds are grown. 
  • When you grow seeds adapted to your area, plants have a much better success rate. The more you grow those seeds and save them, the more adapted they’ll become to your specific microclimate too! 

Seed Expiration Dates 

Seed packets will show the day that the seed was packed. Assuming you have leftover seeds and you keep them in a cool, dark, dry place, they will last anywhere from as little as one year to many years, depending on the seed. 

How do you know when a seed is still good or if it’s gone bad? Do a germination test! Before you plant your seeds, put about 10 seeds in a damp paper towel in a plastic bag. Check the moisture daily and after about 10-14 days, your seeds will either have sprouted or not. If 7 out of 10 sprouted, your viability is about 70%. Depending on your viability you can either plant extra or compost unusable seeds.

What are Non-GMO Seeds?

GMO stands for Genetically Modified Organism. Many seed companies have jumped on the bandwagon saying all of their seeds are “certified non-GMO.” There actually aren’t any GMO gardening seeds available for home gardeners. None of the seeds you purchase will ever be GMO seeds. GMO seeds are present in the commercial agriculture industry, but it’s expensive to produce a GMO seed and it’s not anything that we’re going to even be able to buy. So if a company is touting non-GMO seeds, that’s true, they are. But so are everyone else’s.

The Best Time to Start Your Seeds

The most important date you need to know is the last day that you are potentially going to have frost. This is called your frost-free date in Spring. You can find yours by Googling “last frost date” in your area. Once you have that date, then you work backward to about 6-8 weeks. That’s when you’ll be sowing most of your seeds.

You want to time your seed starting so you give your seeds about 6-8 weeks of growing time indoors. By the end of the 6-8 weeks, seedlings will have grown to a sturdy size and are then ready to grow outdoors. If you choose a good seed company, there should be lots of information about this on the back of the seed packet.

If you start your seeds too early, you risk your plants getting too big and outgrowing their space. They’re going to be looking for resources that you probably can’t provide indoors, like more light, nutrition in the soil, and space to grow. The longer your seedlings are confined indoors without the right environment, the more stressed they become. Timing when you plant your seeds is crucial to the seed starting process. 

Let’s Get Planting! 

Now that you’ve got your seed starting setup and timing down, how do you get your seeds in the soil? 

First, look at the information on your seed packet. It will typically have all that important seed starting information you need, including how many weeks to start indoors, days to maturity, and growth patterns. 

Make sure your seed starting mix is pre-moistened, like a damp sponge. Most seeds don’t need light to germinate, but they don’t need to be planted very deeply either. Once you have your seeds in, sprinkle a little bit of extra seed starting mix on top. Spray the tops of the soil gently with water so you don’t move the seeds around too much.

When your seeds are planted, place your humidity dome on top, put your tray on your heat mat, and turn your lights on. Your seedlings are going to sprout in a matter of days to a week, maybe two weeks at most. Once your seeds germinate, remove your humidity dome and turn on your fan. From there, you’re just ensuring that the soil stays moist.

The first leaves that come up are called seed leaves, or cotyledons. In a few weeks, your plants will grow new “true” leaves. Once those new true leaves emerge, you can start to add small amounts of supplemental fertilizer.

Your job over the next 4-5 weeks will be monitoring plant growth and making sure everything looks good. Keeping the lights at the proper distance above the tops of the seedlings is also key–not too close, not too far away.

The Final Step: How to Harden Off Your Plants

Hardening off is about 7 to 10 days of transitioning your seedlings slowly to outdoor conditions. You slowly increase the tender, new leaves’ exposure to sun and wind over about two weeks. Make sure outdoor temperatures are above 45 degrees Fahrenheit with no inclement weather during this period, and bring plants indoors every evening.

Here is a rough schedule to follow: 

  • Days 1-2: 1-3 hours outdoors in shade
  • Days 3-4: 3-5 hours outdoors in shade
  • Days 5-6: 3-5 hours outdoors in morning sun
  • Days 7-8: 7-12 hours outdoors in sun
  • Days 9-10: Leave plants outdoors overnight 

Once you’ve gotten your plants used to the outdoor elements, they’re all ready to be planted in their new homes outdoors! 

*****

Featured Products:


Where to Buy

https://www.espoma.com/wp-content/uploads/2022/04/Seed-starting.png 500 500 espoma https://www.espoma.com/wp-content/uploads/2023/05/espoma-logo340w-1.png espoma2022-04-05 08:25:302023-12-06 13:46:36Seed Starting 101: How to Start Seeds Successfully

Botanical Black History: 3 Brilliant Black Plant People You’ll Love

February 24, 2022/in Blog, Bloom and Grow Radio

3 Brilliant Black Plant People

For Black History Month, we want to highlight three amazing, historic Black plant people. Two you’ve almost certainly heard of before: Harriet Tubman and George Washington Carver. But did you know that Tubman was an herbalist and Carver spearheaded regenerative agriculture? Our third Black plant person was Wangari Maathai–the very first African woman to receive the Nobel Peace Prize for her environmental, women’s rights, and political work. 

This blog is inspired by Episodes 85 and 146 of Bloom and Grow Radio–where host Maria Failla interviewed Colah, host of Black in the Garden Podcast, about figures who inspire her.

Read on to learn more about how these brilliant Black plant leaders contributed to what we know in the plant world today! 

1. Harriet Tubman–The Herbalist You Never Knew

You’ve probably heard of Harriet Tubman as being a leader of the Underground Railroad, helping 300 enslaved people escape during the 1800s. On top of all that incredible work during the Civil War, she was also an herbalist, forager, and healer! 

One of the main conductor duties of the Underground Railroad was to find nourishment for the many enslaved seeking safe passage. Tubman’s extensive knowledge on foraging was absolutely essential as a conductor. She was taught how to forage for food and herbs in the surrounding forest, learning which plants were safe to eat, and how they could treat ailments. Knowing how to forage for foods like black cherry, paw-paw, and sassafras while avoiding toxic plants no doubt saved the many lives she encountered. 

Tubman also used herbal remedies passed down from her grandmother for so many treatments. She boiled cranesbill and lily roots to make medicine for wounded Civil War soldiers, treating things like smallpox, fevers, and other infectious diseases. To keep babies from crying and put them to sleep during treacherous journeys, she dosed their bread with laudanum, a tincture of opium. Tubman learned and practiced herbalism at great costs, as enslavers banned herbal practices from fears of being poisoned. 

Harriet Tubman had an understanding of the land–a deep intuitiveness and connection with nature. She was able to really use that to benefit the hundreds of enslaved people she freed. 

Harriet Tubman

2. George Washington Carver–Way More Than the Peanut Guy

Yep, you’ve probably heard of George Washington Carver as the Peanut Guy, inventing hundreds of ways to use the humble peanut. But his story is WAY more incredible than that. Let’s dive in. 

Regenerative agriculture is a phrase you may have heard thrown around in the plant community, but is nothing new. Regenerative agriculture practices building soil health to offset many environmental problems we face today for future generations of farmers. Carver played a crucial part in regenerating soil in the farming communities of the South. One big way he did that? Peanuts. 

Of course it wasn’t JUST peanuts. At that time Carver was working at the Tuskegee Institute as an agricultural research scientist. Soil was horribly depleted from years of cotton and tobacco monoculture farming, and Carver was on a mission to improve the soil and make farming more attainable for poor farmers of the South. Instead of the expensive fertilizers that were being pushed, Carver showed farmers they could use resources all around them to amend the soil. Surrounding woods had biodegradable materials like leaves, logs, and swamp muck–all perfect for in-ground composting that added rich organic nutrients and important microorganisms back into the soil. We truly owe American agriculture and organic farming to Carver, who pioneered much of the important soil and regenerative agriculture knowledge we practice now. 

So after teaching farmers how to use their surrounding resources, he wanted to continue building the soil with different nitrogen-fixing crops and crop rotation. In comes the peanut! Legumes, like the peanut and soy bean that Carver encouraged, are nitrogen-fixing plants that restore soil even more. But farmers had to be convinced that these crops could sell–so Carver set off to invent literally hundreds of ways to use peanuts, soy beans, and sweet potatoes in his laboratory. He made biofuel, amazing dyes, milk, butter, oils, cosmetics, and industrial products, just to name a few. He did this for multiple reasons: to make growing these plants profitable to farmers who were often farming on debts to white landowners; to regenerate the soil; and to make a protein-rich crop like peanuts readily accessible to many poor Southerners who couldn’t afford nutrient-dense foods. 

Despite being a research scientist, developing hundreds of new products in his lab, and tending to a farm research plot, he didn’t stop there. To make his research more accessible to farmers he was trying to reach, he created mobile agricultural schools called “Farmers Institutes.” These schools literally traveled from town to town via wagon, teaching farmers these regenerative agriculture techniques. It was so successful and popular that the USDA later adopted Carver’s outreach model. 

Carver’s work enabled Black farmers to turn their farms into productive, regenerative, and self-sufficient lands to alleviate poverty. What an amazing, trailblazing human! 

Check out Colah B. Tawkin’s Black in the Garden two-part podcast series on George Washington Carver, the botanical GOAT, to hear more about Carver. 

George Washington Carver

3. Dr. Wangari Maathai–A Trailblazing Woman Who Planted Millions of Trees

Wangari Maathai was the first African woman to receive the Nobel Peace Prize. But she was also the first woman from East and Central Africa to earn a PhD, moving on to be the first female professor in her home country of Kenya. And those weren’t her only firsts!

Dr. Maathai founded the Green Belt Movement in 1977. This grassroots organization encouraged women to plant trees in their local communities in Africa to fight environmental degradation and deforestation. These women were observing the very real effects of deforestation–receding streams, soil erosion, and habitat loss. Dr. Maathai’s solution not only encouraged trees to combat all these issues, but put women at the center of this incredibly important movement. She didn’t stop there. 

Dr. Maathai used her work on the Green Belt Movement to bring attention to the democratic struggle in Kenya. Due to governmental corruption, public lands were being privatized and illegally developed, wreaking havoc on the environment. Dr. Maathai realized she must approach the situation more systematically to address the problem. Her protests were met with harassment and beatings, landing her in jail–but she remained undaunted. She went on to serve on countless international commissions and committees, working tirelessly to fight for women’s rights, environmental issues, against land grabbing, and misogyny.

Her work led to over 50 million trees planted–can you imagine how HUGE that is? That totals to 1 million acres or 1,600 square miles. That’s bigger than Rhode Island! Not only did these trees help the local environments, but they also removed 2.5 million tons of CO2 from the atmosphere. Dr. Maathai’s legacy proves how a single human can be an incredible force for change.Wangari Muta Maathai

Botanical Black History in the Making

Out of her studies in broadcasting and her love for plants, Colah created the Black in the Garden podcast to highlight Black voices and Black people in horticulture. She is creating a space for Black people to connect with their history and culture through her media. 

As Black in the Garden has evolved, Colah’s mission has developed to explore the past, present, and future of Black people in horticulture. Colah herself has just announced an initiative to plant a tree in every state and make history as the first Black woman to do it, inspired by Dr. Wangari Maathai.

Follow her journey on the Black in the Garden podcast.

About Our Interviewee

Colah B. Tawkin is the juggernaut creator, producer, and voice behind the renowned Black in the Garden podcast, a podcast that exists specifically to highlight Black voices and Black people. Using her extensive horticultural knowledge, her endless love for Black people, and her keen ability to teach in a spirit of joy and kinship, she has built a village of Soil Cousins that have come to not only love, but trust her voice. Her aim is to grow and foster village-building, education, and healing through gardening. And she’ll make you laugh while she does it, too.

Her most recent work is the Black in the Garden Coloring Book, featuring podcast guests and 20 pages of illustrated botanical black excellence. 

Follow Colah & Black in the Garden: 

Website 

Instagram

Facebook 

Twitter

YouTube

References

Harriet Tubman: herbalism, food, foraging

  1. https://www.botanicgardens.org/blog/representation-botany-and-horticulture-part-2 
  2. https://www.npr.org/sections/thesalt/2016/04/27/475768129/nurse-spy-cook-how-harriet-tubman-found-freedom-through-food 
  3. https://www.nursing.virginia.edu/news/flashback-harriet-tubman-nurse/
  4. https://theherbalacademy.com/african-american-herbalism-history/ 

Underground Railroad

  1. https://www.history.com/topics/black-history/underground-railroad

George Washington Carver

  1. https://www.usda.gov/oascr/carver 
  2. https://agriculture.mo.gov/gwc.php
  3. https://www.cbf.org/blogs/save-the-bay/2021/02/what-we-owe-to-george-washington-carver.html
  4. https://www.nmhealthysoil.org/2021/01/28/soil-health-pioneer-george-washington-carver/ 
  5. https://www.csuchico.edu/regenerativeagriculture/blog/blm-reg-ag.shtml
  6. https://www.acs.org/content/acs/en/education/whatischemistry/landmarks/carver.html

Wangari Maathai

  1. https://www.nobelprize.org/prizes/peace/2004/maathai/biographical/ 
  2. https://www.un.org/africarenewal/web-features/wangari-maathai-woman-trees-dies
  3. https://en.unesco.org/womeninafrica/wangari-maathai/biography
  4. https://wangarimaathai.org/wangaris-story/
https://www.espoma.com/wp-content/uploads/2022/02/Brilliant-Black-Plant-People.png 1080 1080 espoma https://www.espoma.com/wp-content/uploads/2023/05/espoma-logo340w-1.png espoma2022-02-24 07:59:352022-02-24 08:38:52Botanical Black History: 3 Brilliant Black Plant People You’ll Love
Page 2 of 3123
Where to Buy

Get News & Updates

Recent Posts

  • VIDEO: How to Plant a Raised Bed Like a Pro with Farmer Nick
  • VIDEO: Transplanting Magnolias 🪴🌺 with Wyse Guide
  • VIDEO: How to Care for Roses 🌹 & Hydrangeas 🌸 with Garden Answer
  • VIDEO: How to Grow a Hummingbird Garden 🕊️🌿🌺 | Growing Joy with Maria
  • VIDEO: Boost Your Blooms: 🌸 Fertilizing Hydrangeas the Organic Way with Skye Hamilton

Tags

All-Purpose Potting Mix bio-tone Bio-tone Starter Bio-tone Starter Plus cactus and succulents Cactus Mix caring for houseplants Container Gardening DIY project Espoma espoma grown espoma organic Espoma Organics Espoma Video fall gardening flower garden flowers garden Garden Answer Gardening gardening tips gardens grow holly-tone houseplants Indoor! indoor gardening indoor plants Kaleb Wyse organic organic fertilizer Organic Gardening organic plant food Organic Potting Mix Outdoor Gardening Planting plants Potting Mix potting soil Spring Gardening succulents summer rayne oakes vegetable garden Vegetable Gardening Wyse Guide

Espoma. A Family Tradition Since 1929.

Espoma Organic logo
  • Espoma Dealer
  • Espoma Pro
  • Garden Club
  • Privacy Policy

Scroll to top